

The Critical Role of Grind Size in Espresso Extraction
When it comes to brewing exceptional espresso, no single factor has a more dramatic impact than grind size. The size of your coffee particles directly determines how water flows through your puck during extraction, creating either a balanced, flavorful shot or a disappointing result.
Think of grind size as the primary gatekeeper for water flow. Finer grinds create more resistance, slowing water’s path through the coffee and extending extraction time. Coarser grinds allow water to pass through more quickly, reducing extraction time. This relationship between grind size and extraction time directly affects what ends up in your cup.
Why does this matter so much? Because different flavor compounds extract at different rates:
– Fruity acids extract first (sour/bright flavors)
– Sugars and caramels extract next (sweet/balanced flavors)
– Bitter compounds extract last (harsh/astringent flavors)
The “sweet spot” for espresso extraction typically falls within a 25-30 second timeframe, where you’ve captured the desirable compounds while limiting the unpleasant ones. This is why precision grind settings are considered the foundational skill for anyone serious about espresso.
Professional baristas understand this relationship intuitively, making grind adjustment their primary tool for quality control when other variables (like dose weight and machine pressure) remain constant.
Diagnosing Grind Size Problems Through Taste and Flow
Before you can fix your espresso grind, you need to identify what’s wrong. The table below shows how extraction problems manifest in your cup:
| Too Coarse | Too Fine |
|---|---|
| Shot flows too quickly (under 20 seconds) | Shot flows too slowly or barely drips (over 35 seconds) |
| Sour, sharp, or acidic taste | Bitter, harsh, burnt, or ashy taste |
| Thin body, watery mouthfeel | Heavy, gritty, or muddy mouthfeel |
| Pale, thin crema that dissipates quickly | Dark, spotty crema with holes |
| Flavor lacks sweetness and complexity | Flavor lacks brightness and clarity |
These symptoms directly connect to extraction problems. When your grind is too coarse, water rushes through without proper contact time, creating under-extraction. That sharp, lemon-like acidity comes from acids that extracted early, while the sweeter compounds didn’t have time to dissolve.
Conversely, when your grind is too fine, water struggles to pass through the coffee bed. This excessive contact time leads to over-extraction, where bitter compounds dominate the flavor profile, creating that aspirin-like bitterness and lingering dry sensation.
While timing offers helpful guidance, your taste buds provide the ultimate feedback. The ultimate espresso grind size chart can give you visual references, but learning to recognize these flavor indicators is crucial for developing your brewing skills. If you’re experiencing persistent issues, our guide to troubleshooting espresso grind issues offers additional solutions.
Understanding Your Grinder: Types and Adjustment Mechanisms
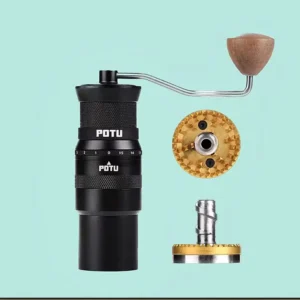
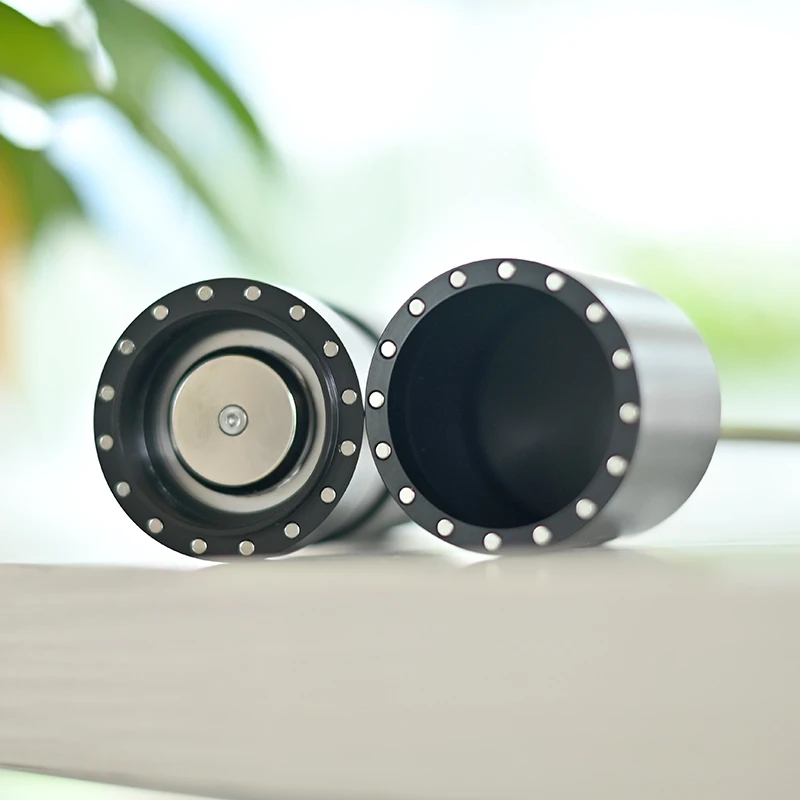
Before making adjustments, it’s important to understand your specific grinder type and how it operates. For espresso, burr grinders are essential because they produce consistent particle sizes, unlike blade grinders which create uneven fragments that extract at different rates.
Burr grinders typically fall into two main categories:
- Stepped Grinders: These have preset notches or “clicks” between adjustment positions, making them simpler to use but offering less precision.
- Stepless Grinders: These allow infinite adjustment within their range, offering maximum precision for dialing in espresso but requiring more skill to use effectively.
Common adjustment mechanisms include:
- Collar Adjustments: A rotating collar that moves the burrs closer or farther apart
- Worm Drive Systems: A small dial that makes micro-adjustments through gear reduction
- Direct Adjustment Dials: Knobs that directly control burr position
Most grinders follow a standard convention where clockwise rotation makes the grind finer and counter-clockwise makes it coarser, but always check your specific model. Some grinders also have a “zero point” where the burrs touch, which serves as a calibration reference.
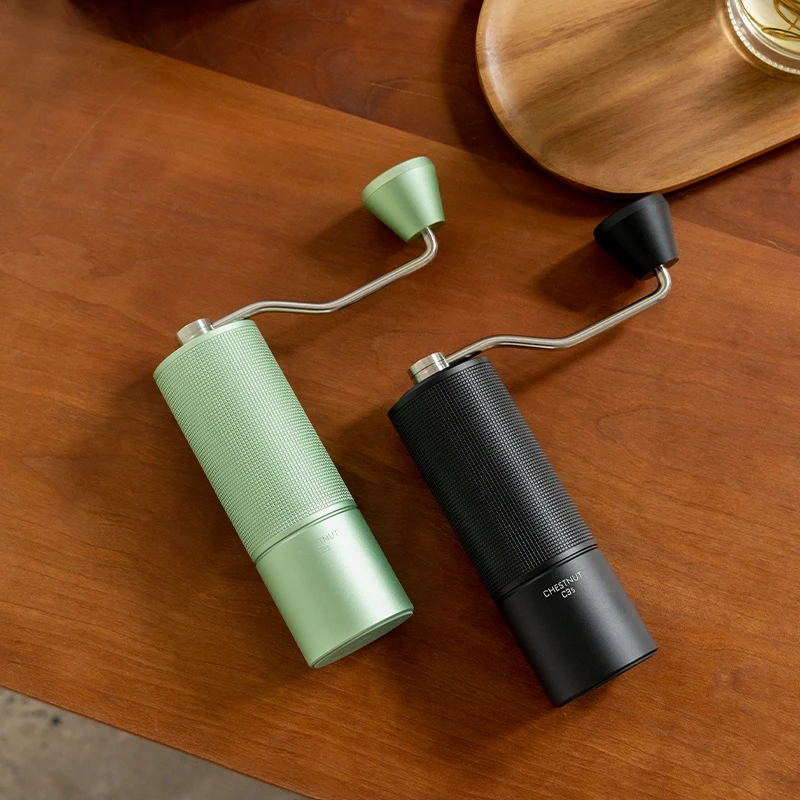
Our selection of precision manual grinders offers excellent control for home espresso enthusiasts who understand that grind consistency is non-negotiable for quality shots.
The Step-by-Step Grind Adjustment Process
Making proper grind adjustments requires a methodical approach to ensure you achieve optimal extraction without damaging your equipment. Follow these steps for safe and effective adjustments:
Consult your grinder manual for specific guidelines and limitations. Different models have unique mechanisms and safety considerations.
Determine if adjustment while running is needed. Some grinders must be running during adjustment to prevent burr binding, while others should only be adjusted when off.
Make small, incremental changes. For most home grinders, adjust by just 1-2 millimeters or one notch at a time. Even tiny adjustments can dramatically affect flow rate.
Always purge old grounds after adjustment. At least 5-10 grams of coffee should be ground and discarded after any adjustment to clear the previous setting.
Pay attention to resistance. If you encounter unexpected resistance while adjusting, stop immediately to avoid damaging the burrs.
Allow the grinder to “warm up” by grinding a small amount of coffee before your actual dose, especially if it’s been sitting unused.
Use a scale and timer to measure your results consistently rather than relying on visual estimates.
Safety warning: Never force an adjustment that feels stuck, as this can damage the burrs. If your grinder makes unusual noises after adjustment, stop immediately and check for potential issues.
For certain models, proper zero hand grinder calibration is essential before making fine adjustments for espresso.
Mastering the Dialing-In Process: A Systematic Approach
“Dialing in” is the methodical process professional baristas use to find the optimal grind size for a specific coffee. Rather than random adjustments, this systematic approach saves time and coffee while producing consistent results.
The key to effective dialing in is controlling all variables except the one you’re adjusting:
Start with a benchmark setting that’s close to espresso fineness (often described as similar to fine table salt).
Standardize your process:
– Use a consistent dose (typically 18g for a double shot)
– Maintain consistent tamping pressure
– Target a specific brew ratio (often 1:2, meaning 36g output from 18g input)Pull your first shot and observe:
– Time the extraction (from pump start to final volume)
– Weigh the output
– Evaluate the flow rate visually
– Taste the result criticallyMake a single adjustment based on results:
– If too fast/sour: Adjust finer
– If too slow/bitter: Adjust coarserRepeat the process, making smaller adjustments as you get closer to ideal extraction.
For example, if your first shot with 18g of coffee yields 36g in just 15 seconds and tastes sharply sour, you would make a significant adjustment finer. If the next shot runs for 22 seconds and tastes less sour but still bright, another finer adjustment (but smaller than the first) would be appropriate.
Remember that the commonly cited 25-30 second timeframe is only a guideline. The specific espresso grind settings for perfect shots may vary based on your machine, coffee bean, and personal taste preference. Many specialty coffee shops use slightly shorter times for light roasts and longer times for dark roasts.
For precise control over your adjustments, consider our collection of fine adjustment hand grinders designed specifically for espresso perfection.
Fine-Tuning by Taste: Decoding Flavor to Perfect Your Grind
While timing provides structure, taste is your ultimate guide for grind adjustment. Learning to decode flavor cues will help you make more precise adjustments:
Sour/Acidic Flavors – Under-extraction signs:
– Bright lemon-like sharpness that dominates
– Quick-fading flavor that doesn’t linger
– Lacks sweetness and body
– Solution: Grind finer to slow the flow and extract more compounds
Bitter/Harsh Flavors – Over-extraction signs:
– Aspirin-like bitterness that coats the tongue
– Burnt toast or ashy aftertaste
– Lingering unpleasant finish
– Solution: Grind coarser to quicken the flow and extract fewer bitter compounds
Weak/Watery Character – Under-extraction signs:
– Lacks intensity and body
– Flavors seem diluted and indistinct
– Crema is thin or disappears quickly
– Solution: Grind finer to increase resistance and concentration
Astringent/Dry Sensation – Over-extraction signs:
– Creates a drying feeling in the mouth
– Similar to the sensation of strong black tea
– Often accompanied by bitterness
– Solution: Grind coarser to reduce excessive compound extraction
Balanced but lacking sweetness:
– Shot is neither sour nor bitter but lacks complexity
– Requires very fine adjustment to find the sweet spot
– May indicate need for minor temperature adjustments
Understanding these flavor indicators helps you make more deliberate adjustments to find the correct grind setting for espresso that brings out the best in your beans.

All-Metal Hand Grinder, Flat Burr Hand Grinder, Manual Espresso Grinder, Precision Manual Grinder
Price range: $716.96 through $717.43 Select options This product has multiple variants. The options may be chosen on the product page
Fine Adjustment Hand Grinder, Precision Manual Grinder, Travel Coffee Grinder
Price range: $185.11 through $494.63 Select options This product has multiple variants. The options may be chosen on the product page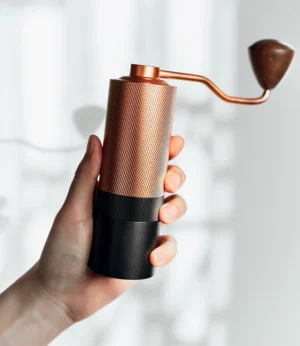

Hand Burr Grinder, Hand Crank Coffee Grinder, Manual Espresso Grinder, Portable Coffee Grinder
Price range: $262.72 through $300.22 Select options This product has multiple variants. The options may be chosen on the product page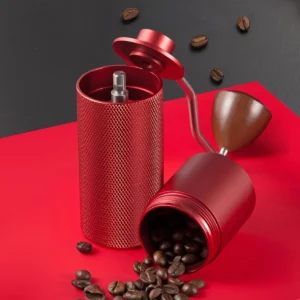
Hand Burr Grinder, Manual Coffee Grinder Stainless Steel, Precision Manual Grinder
Price range: $183.64 through $187.52 Select options This product has multiple variants. The options may be chosen on the product page
Manual Coffee Grinder Stainless Steel, Manual Espresso Grinder, Travel Coffee Grinder
Price range: $276.22 through $276.39 Select options This product has multiple variants. The options may be chosen on the product page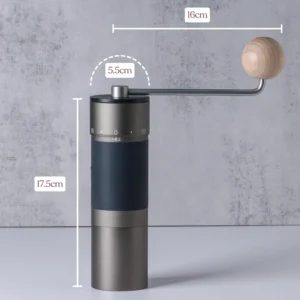
Hand Crank Coffee Grinder, Manual Coffee Grinder for Espresso, Manual Coffee Grinder Stainless Steel
$349.15 Select options This product has multiple variants. The options may be chosen on the product page
Recognizing Visual and Sensory Cues of Proper Grind
Beyond taste, visual and tactile cues can help confirm you’re on the right track with your grind size adjustments:
The ideal espresso grind should have a texture similar to fine table salt or powdered sugar. When you rub it between your fingers, it should feel like soft flour with slight clumping, but not so fine that it becomes completely smooth like powdered sugar.
During extraction, watch for these positive indicators:
– Flow begins as gentle drops after 5-8 seconds
– Drops form into thin streams resembling “mouse tails”
– Color progression from dark brown to caramel
– Even flow across the entire basket surface
– Steady, consistent rate without spurting or channeling
The resulting crema should be:
– Medium to dark golden color
– Consistent, fine texture without large bubbles
– Speckled with tiger-striping patterns
– Persistent for at least 1-2 minutes
Warning signs of improper grind include:
– Immediate gushing flow (too coarse)
– No flow or extremely slow dripping (too fine)
– Blonde spots or jets in the flow (channeling from uneven distribution)
– Crema that’s too dark and spotty (too fine) or too pale and quick to dissipate (too coarse)
Understanding these visual cues works alongside tasting to confirm you’re achieving the perfect espresso grind texture for optimal extraction.
Best Practices for Consistent Grind Adjustment
To maintain consistency in your espresso preparation, incorporate these key practices into your routine:
Change only one variable at a time when troubleshooting. If you adjust grind size, keep dose, tamping, and other factors constant to isolate the effect.
Use fresh beans ideally 5-15 days after roasting. Stale beans require increasingly finer grinds to compensate for degassing.
Clean your grinder regularly to prevent old coffee oils from affecting flavor and grind consistency. Focus especially on the burrs and chute.
Standardize your tamping technique by applying consistent pressure and ensuring even distribution in the basket before tamping.
Keep a brewing journal to track successful settings for different coffees. Note grind setting, dose, yield, time, and taste notes.
Warm up your grinder before critical shots by grinding a small amount of coffee first, especially if it’s been sitting idle.
Weigh your dose precisely using a scale accurate to 0.1g to ensure consistency between shots.
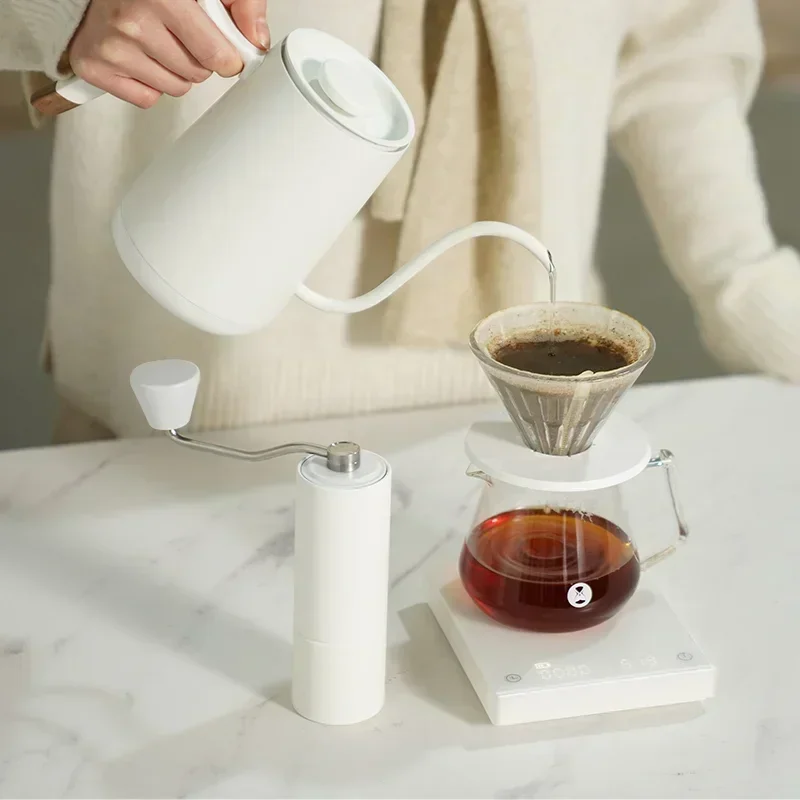
These practices complement the quality and precision of our manual espresso grinders, which are designed to deliver consistent particle size distribution crucial for even extraction.
External Factors Requiring Grind Readjustment
Even with perfect technique, several external factors will require you to readjust your grind settings regularly:
Bean Aging: As coffee ages, it releases carbon dioxide and dries out, requiring progressively finer grinding to maintain proper extraction. Typically, you’ll need to adjust 1-2 notches finer every 3-5 days after roasting.
New Coffee Origins: Different bean varieties, growing regions, and processing methods have unique density and hardness characteristics that affect grinding. Ethiopian coffees often require a different setting than Brazilian coffees, for example.
Roast Levels: Darker roasts are more brittle and grind more easily than lighter roasts. When switching between roast levels, expect to grind lighter roasts finer and darker roasts coarser.
Ambient Conditions: Humidity and temperature fluctuations affect bean moisture content and grinder performance. Many baristas find they need slightly coarser settings on humid days and finer settings in dry conditions.
Seasonal Changes: Coffee is an agricultural product that changes throughout the year. Even the same coffee from the same farm might require different settings from season to season.
Grinder Wear: Burrs gradually wear down over time, requiring finer settings to achieve the same result. Quality espresso coffee hand grinders with premium burr materials can minimize this effect.
When It’s Not the Grind: Other Variables Affecting Extraction
While grind size is crucial, sometimes extraction problems stem from other factors:
Water Temperature Issues: Most espresso machines need time to reach proper brewing temperature (195-205°F). Too cool water causes under-extraction regardless of grind size. Solution: Ensure proper warm-up time and temperature stability.
Inconsistent Pressure: Pump fluctuations or scale buildup can cause pressure variance. Solution: Regular machine maintenance and descaling.
Poor Distribution: Uneven coffee bed causes channeling where water finds the path of least resistance. Solution: Use distribution tools or techniques to ensure even coffee distribution before tamping.
Tamping Problems: Uneven or inconsistent tamping creates density variations. Solution: Develop a consistent tamping technique with level pressure.
Dose Inaccuracy: Too much coffee creates over-extraction; too little causes under-extraction. Solution: Always weigh your dose with a precise scale.
Water Quality: Mineral content affects extraction and flavor clarity. Solution: Use appropriate filtered water for espresso.
These variables interact with grind size, sometimes masking the true issue. Address these fundamentals before making dramatic grind adjustments.
Can You Use Pre-Ground Coffee for Espresso?
While fresh grinding is strongly recommended for quality espresso, the question of pre-ground coffee deserves a straightforward answer: it’s far from ideal but possible in emergency situations.
Pre-ground coffee presents several challenges for espresso preparation:
Rapid Staling: Ground coffee begins losing aromatic compounds and oxidizing within minutes. After 15-30 minutes, significant flavor degradation has already occurred.
Incorrect Grind Size: Commercial pre-ground coffee is rarely fine enough for proper espresso extraction unless specifically labeled for espresso machines.
Inability to Adjust: Without the ability to adjust grind size, you can’t optimize extraction for your specific machine and beans.
If you must use pre-ground coffee, try these compensating techniques:
- Use slightly more coffee than usual (increase dose by 1-2g)
- Tamp with slightly higher pressure
- Consider slightly cooler brewing temperature
- Adjust expectations accordingly
For consistent quality results, investing in a proper manual coffee grinder for espresso remains the best solution for espresso enthusiasts.
How Often Should You Adjust Your Espresso Grind?
The frequency of grind adjustments depends on your quality standards and several situational factors:
Daily Adjustments: Professional baristas typically dial in their espresso at the beginning of each day and make micro-adjustments throughout their shift. This accounts for humidity changes, bean aging, and equipment warming patterns.
Mid-Day Adjustments: Many specialty cafés perform a mid-day calibration check, especially if environmental conditions have changed significantly.
New Bag of Coffee: Every time you open a new bag of beans, expect to perform a complete dialing-in process, even if it’s the same coffee you’ve used before.
Signs Adjustment Is Needed: Rather than following a rigid schedule, learn to recognize when adjustment is necessary:
– Shot time drifts more than 3-5 seconds from target
– Visual flow pattern changes significantly
– Taste profile shifts toward sourness or bitterness
For home baristas, a good practice is checking your grind setting every morning for the first shot, then making adjustments as needed based on taste and flow.
Why Do Some Grinders Need to Run While Adjusting?
This important technical consideration can prevent damage to your grinder. Many espresso grinders, particularly flat burr designs, should be running during adjustment because:
When coffee particles are lodged between stationary burrs and you adjust to a finer setting, the burrs can bind against these particles, creating damaging pressure points. Running the grinder during adjustment allows particles to clear as the burrs move closer together.
Generally:
– Flat burr grinders more commonly require adjustment while running
– Conical burr grinders often (but not always) can be adjusted while stationary
– Stepless grinders typically need more care during adjustment than stepped models
If your manual doesn’t specify, the safest approach is:
1. Run the grinder empty
2. Make small adjustments while it’s running
3. Turn off and check the adjustment
4. Repeat as necessary
This precaution is particularly important when making finer adjustments, as the risk of burr binding increases as the gap narrows.
What If Your Shots Are Timed Perfectly But Taste Bad?
This common dilemma highlights why taste should always trump timing. The 25-30 second guideline is just that—a guideline, not an absolute rule.
If your shot runs for exactly 28 seconds but tastes bitter, trust your palate and adjust coarser regardless of timing. Several factors might explain this disconnect:
Coffee Roast Level: Darker roasts often extract more efficiently and may taste better with slightly shorter times.
Bean Density: Some beans are denser than others and extract differently at the same timing.
Fines Migration: Sometimes grinders produce too many “fines” (very small particles) that over-extract even when the overall timing looks correct.
Temperature Issues: Higher brewing temperatures accelerate extraction and can cause bitterness even with “correct” timing.
When facing this situation, consider alternative adjustments:
1. First, try a slightly coarser grind despite “perfect” timing
2. If still unsatisfied, consider adjusting dose (slightly less coffee)
3. Experiment with brew ratio (slightly more yield for less intensity)
Remember that the ultimate goal is a delicious espresso, not hitting a specific number on your timer. Let your taste buds guide your adjustments, even when they contradict conventional wisdom about timing.