
1. The Critical Connection Between Grind Size and Espresso Quality
The perfect espresso shot is a delicate balance of art and science. At its foundation lies one crucial element that can make or break your morning brew: grind size. Even the slightest adjustment to your grind can transform a sour, watery disappointment into a rich, complex espresso with perfect crema.
This precision is what professional baristas call “dialing in” – the process of finding the ideal grind setting for your specific coffee beans, equipment, and desired flavor profile. Mastering this skill is what separates casual coffee drinkers from true home baristas capable of creating café-quality espresso consistently.
Many home espresso enthusiasts face a common frustration: despite investing in quality equipment and beans, their shots remain inconsistent. One day brings perfection, the next delivers bitterness or sourness. The culprit is almost always improper grind adjustment.
Why does grind size matter so much?
– Too fine: Water struggles to flow through, resulting in over-extraction, bitterness, and slow shots
– Too coarse: Water rushes through too quickly, under-extracting and producing sour, weak espresso
– Just right: Water flows at the ideal rate, extracting the perfect balance of compounds for a sweet, complex shot
Understanding these fine-tuning espresso grind size techniques is essential for anyone serious about their home espresso game. A quarter-turn adjustment can literally transform a 15-second gusher into a perfectly extracted 30-second shot with dramatically improved taste.
Throughout this guide, we’ll take you through everything you need to know – from the tools required to the step-by-step process, troubleshooting common problems, and developing a system that works for your specific setup. The science behind definitive guide espresso grind size flavor relationships will help you understand not just how, but why certain adjustments affect your final cup.
2. Essential Tools for Precision Espresso Grinding
Before diving into the adjustment process, equipping yourself with the right tools is non-negotiable. Precision requires precision instruments – trying to dial in espresso without the proper tools is like trying to build a watch with a hammer.
Here’s what you’ll need in your espresso toolkit:
Digital Scale (0.1g precision): Essential for consistent dosing and yield measurement. Why 0.1g precision? Even a 0.5g difference in dose can noticeably alter extraction and flavor. Look for scales with fast response times and tare functionality for weighing both your ground coffee and the final espresso output.
Timer/Chronograph: Extraction time is a critical data point in dialing in. Options include standalone timers, smartphone apps, or using your espresso machine’s built-in timer if available. You’ll be aiming for consistency in the 25-35 second range for most traditional espressos.
Shot Glass or Server with Measurement Markings: Clear measurement markings help you visually confirm your yield matches your scale readings. The transparency also allows you to observe flow rate and color during extraction.
WDT Tool (Weiss Distribution Technique): This simple needle tool breaks up clumps in your ground coffee and ensures even distribution before tamping. Commercial options exist, but a homemade version with acupuncture needles or straightened paper clips works well.
Grinder Cleaning Tools: A small brush for sweeping away retained grounds and bellows (for some grinders) to blow out trapped particles. Clean grinders deliver more consistent results.
Consistent Tamper: Must fit your portafilter precisely. Avoid cheap, ill-fitting tampers that leave gaps around the edges of your coffee puck.
Notebook or App: Record-keeping is crucial for tracking your adjustments, outcomes, and refining your process over time.
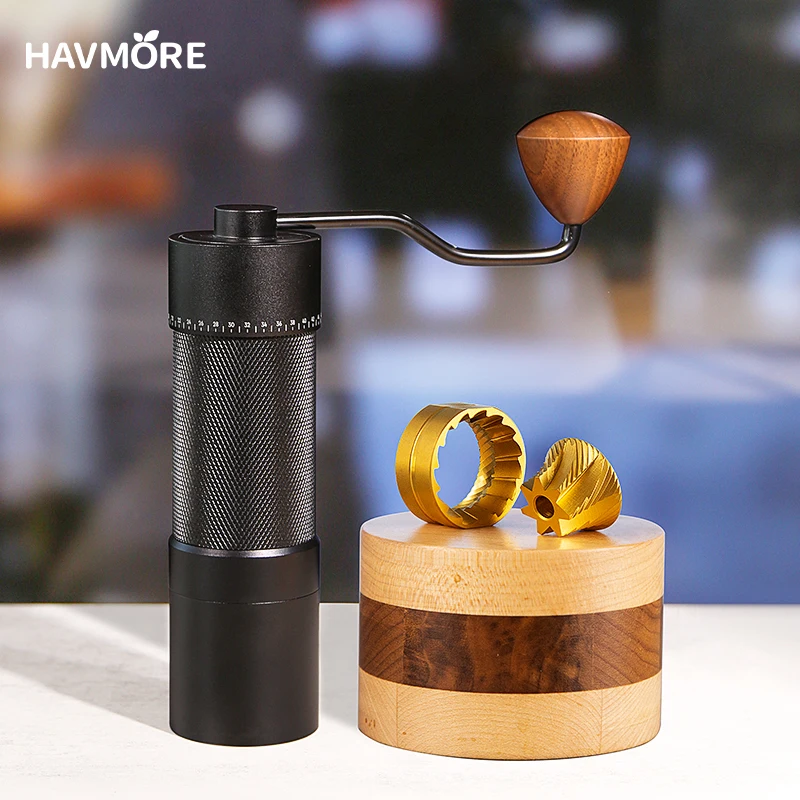
High-quality precision manual grinder options provide the fine adjustment capabilities crucial for espresso. Unlike cheaper grinders with limited settings, premium manual grinders offer the micro-adjustments necessary for proper dialing in.
These tools work together as an integrated system, each playing a vital role in helping you achieve and maintain precision in your espresso preparation.
3. Understanding Espresso Extraction Fundamentals
Before making grind adjustments, you need to understand the fundamental principles of espresso extraction and how they relate to each other.
Brew Ratios: The Foundation of Espresso
Brew ratio describes the relationship between coffee input (dose) and espresso output (yield). Common ratios include:
– Traditional espresso: 1:2 (e.g., 18g coffee → 36g espresso)
– Ristretto (concentrated): 1:1 to 1:1.5 (e.g., 18g coffee → 18-27g espresso)
– Lungo (extended): 1:2.5 to 1:3 (e.g., 18g coffee → 45-54g espresso)
The Extraction Time Window
While not an absolute rule, most well-extracted espressos fall within the 25-35 second range (measured from when you start your pump to when you stop the shot). This timeframe allows for proper extraction of desirable compounds while limiting bitter elements.
The Three Golden Variables
Espresso extraction revolves around three interconnected variables:
1. Grind size – controls flow rate and extraction speed
2. Dose – the amount of coffee used
3. Yield – the amount of espresso produced
Changing any one variable affects the others. For example, if you keep your dose and yield constant but make your grind finer, extraction time increases. Understanding how coffee grind affects pressure flow helps you predict these relationships.
The Balancing Act
Finding the sweet spot means balancing these variables for your specific coffee and equipment. Generally:
– If shot is too fast/sour → Grind finer
– If shot is too slow/bitter → Grind coarser
These guidelines create a framework for the practical adjustment process that follows. By understanding these fundamentals, you’ll make more informed decisions when adjusting your grind.
4. Finding Your Grinder’s “Zero Point”
Before making precise adjustments, you need to establish a reference point on your grinder called the “zero point” – the setting where the burrs just begin to touch.
What Is the Zero Point and Why It Matters
The zero point is where your grinder’s burrs make slight contact without damaging each other. This provides a consistent reference point from which to make precise adjustments. Without establishing this, you’re essentially guessing at settings.
Steps to Find the Zero Point Safely:
1. Make sure your grinder is empty of beans
2. If possible, unplug the grinder (for electric models)
3. Turn the adjustment mechanism toward the finer setting while gently rotating the burrs by hand
4. Listen and feel carefully for the first point of resistance or a light touch
5. When you detect the burrs just making contact, mark this position as your zero point
6. From zero, adjust coarser by a small amount to set your starting point
Stepped vs. Stepless Grinders
– Stepped grinders: Click between preset adjustment positions, making it easy to remember and repeat settings but limiting fine-tuning abilities
– Stepless grinders: Allow infinite adjustment precision but can be harder to reproduce exact settings
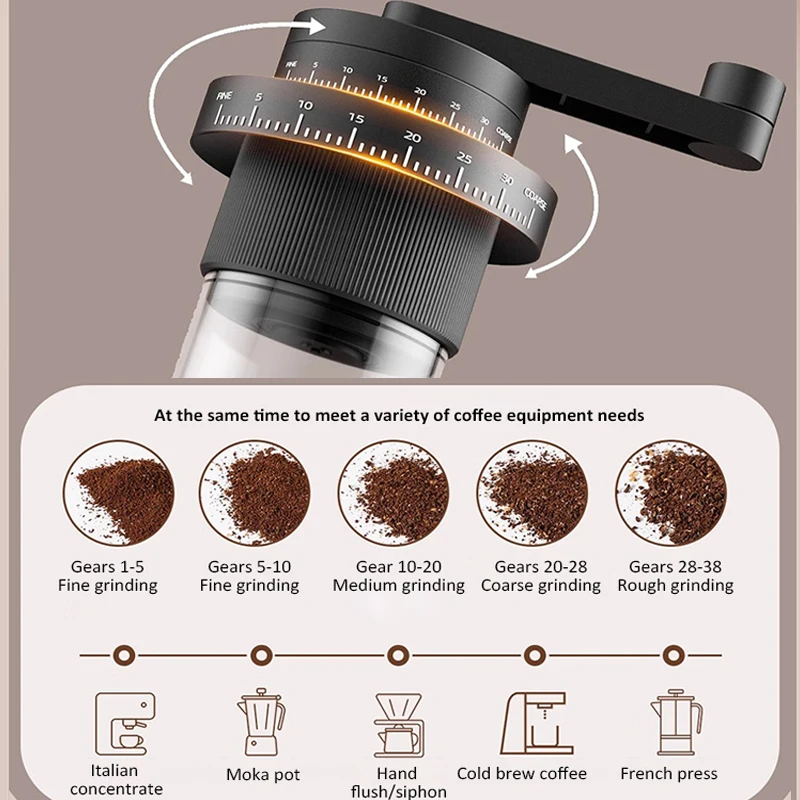
Many fine-adjustment hand grinder models provide the stepless precision needed for espresso while maintaining repeatability.
Safety First
Never run your grinder at or near the zero point with the motor on, as this can damage your burrs. Always adjust slightly coarser from zero before grinding actual coffee.
This zero point provides the fundamental reference for all subsequent adjustments. Starting your dialing-in process from a known position makes finding the ideal grind setting much more methodical.
5. The Step-by-Step Dialing In Process
Now that you understand the fundamentals and have established your zero point, it’s time to go through the actual dialing-in process:
1. Set your initial grind position
Start slightly coarser than you think you’ll need. For most espresso grinders, this means backing off from your zero point by:
– About 1.5-2 full rotations for typical conical burr grinders
– For stepped grinders, 4-5 clicks from where burrs touch
This gives you room to adjust finer as needed.
2. Prepare your precise dose
Weigh your beans before grinding (not after). For a standard double shot:
– Start with 18g of coffee for a standard 58mm portafilter
– For smaller portafilters, adjust accordingly (14-16g)
Consistency is crucial – use the same dose throughout your adjustment process.
3. Grind and prepare your puck
– Grind your coffee directly into the portafilter
– Use your WDT tool to evenly distribute grounds
– Tamp with consistent, moderate pressure (about 30 pounds)
– Ensure the puck is level
4. Pull your first test shot
– Place your portafilter in the machine
– Put your cup on a scale (tare to zero)
– Start your timer as you start the shot
– Watch the flow pattern, noting when the first drops appear
– Target your predetermined yield (typically 36g for an 18g dose at 1:2 ratio)
– Stop the shot when you reach the target yield
– Note the total extraction time
5. Analyze the results
– Record the extraction time
– Observe the flow characteristics
– After cooling slightly, taste the espresso
– Evaluate based on extraction time and taste (more on this in the next section)
6. Make precise adjustments
– If the shot was too fast (under 20 seconds) and tastes sour: Make a significant adjustment finer
– If the shot was slightly fast (20-24 seconds): Make a small adjustment finer
– If the shot was slightly slow (35-40 seconds): Make a small adjustment coarser
– If the shot was very slow (over 40 seconds): Make a larger adjustment coarser
The process of adjusting grind size espresso shot timing may require several iterations before reaching the ideal extraction.
7. Purge and repeat
After each adjustment:
– Grind and discard 2-4g of coffee to clear any old grounds
– Prepare another shot with the same dose
– Compare the new results with your previous shot
– Continue adjusting until you achieve the desired results
Remember, this is an iterative process that may take 3-4 attempts before hitting the sweet spot. Be methodical and change only one variable (the grind size) at a time.
6. Visual and Taste Analysis: Interpreting Your Results
Learning to analyze your shots both visually and by taste is crucial for making informed adjustments. These skills develop with practice but start with understanding these key indicators:
Visual Assessment of Flow Patterns
– Ideal flow: Appears like warm honey with even, steady flow starting around 5-8 seconds after pump activation
– Too fast flow: Watery, thin stream, appearing quickly (under 5 seconds), often blonde or light in color
– Too slow flow: Delayed appearance (over 12 seconds), dripping rather than flowing, very dark
Crema Characteristics
– Ideal crema: Medium brown with reddish-tiger striping, persists for at least 1-2 minutes
– Under-extracted crema: Thin, pale, dissipates quickly
– Over-extracted crema: Very dark, sometimes with a hole in the center, can be excessively thick
Taste Analysis Framework
The following table helps identify extraction issues through taste:
| Characteristic | Under-extraction | Balanced Extraction | Over-extraction |
|---|---|---|---|
| Dominant taste | Sour, sharp, tart | Sweet, balanced, complex | Bitter, astringent |
| Body/Mouthfeel | Thin, watery | Silky, full | Thick, muddy |
| Aftertaste | Short, disappears quickly | Pleasant, lingering | Long, unpleasant |
| Extraction time | Typically <25 seconds | 25-35 seconds | >35 seconds |
| Visual clues | Fast flow, pale crema | Steady flow, tiger-striped crema | Slow drips, dark crema |
When troubleshooting espresso grind issues, use both visual and taste cues in combination. An espresso might look right but taste wrong, or vice versa – both perspectives provide valuable data.
Distinguishing Grind Issues from Other Problems
Not all extraction problems relate to grind size. Consider these alternative causes:
– Channeling (water finding pathways through the puck) – often caused by distribution problems
– Temperature issues – can mimic extraction problems
– Coffee freshness – stale coffee can run fast regardless of grind size
– Puck preparation problems – uneven tamping can cause partial over/under-extraction
Developing your sensory analysis skills takes time. Keep notes on what you observe and taste to build your experience and pattern recognition abilities.
7. Troubleshooting Common Grind-Related Issues
Even with careful methodology, you’ll encounter challenges that require specific troubleshooting. Here are solutions to common grind-related problems:
Shots Pulling Too Fast (Under 20 seconds)
– Symptoms: Watery body, sour taste, thin crema that dissipates quickly
– Causes: Grind too coarse, channeling, coffee too fresh (needs to degas), insufficient dose
– Solutions:
* Make a significant adjustment finer (2-3 notches on stepped grinders)
* Ensure even distribution before tamping
* Check for appropriate dose for your basket size
* Let very fresh coffee rest an additional day
Shots Pulling Too Slow (Over 35 seconds)
– Symptoms: Bitter taste, burnt notes, dark crema, delayed first drops
– Causes: Grind too fine, excessive dose, tamping too hard, scale buildup in machine
– Solutions:
* Make a significant adjustment coarser
* Reduce dose by 0.5-1g
* Use more consistent, moderate tamping pressure
* Check machine for proper flow rate without portafilter
Channeling and Uneven Extraction
– Symptoms: Spluttering, uneven flow, fast shot despite fine grind
– Causes: Poor distribution, grinder clumping, tamping unevenly
– Solutions:
* Implement WDT technique for better distribution
* Ensure level tamping
* Check for clumping – may need to adjust grinder or use anti-static methods
Shot Starts Good But Turns Bitter
– Symptoms: Initial sweetness followed by harsh bitterness
– Causes: Likely grinding too fine for the last part of extraction
– Solutions:
* Adjust slightly coarser
* Consider stopping shot earlier (lower yield)
* Try a slightly lower brewing temperature if possible
Good Time But Poor Taste
– Symptoms: Shot runs 25-35 seconds but tastes off
– Causes: Could be coffee quality, water quality, or temperature issues
– Solutions:
* Verify water quality and temperature
* Try different beans
* Adjust brewing temperature if possible
Mastering manual espresso grind adjustment takes practice, but methodically working through these common issues will significantly improve your results. When one adjustment doesn’t solve the problem, consider whether multiple factors might be at play.
8. The Golden Rules of Espresso Grind Adjustment
Follow these essential principles to ensure consistent, safe, and effective grind adjustments:
1. Only Adjust Electric Grinders While Running
Always make adjustments to electric grinders while they’re running but empty of beans. This prevents burr damage and ensures the adjustment mechanism moves freely. For manual grinders, adjust when empty.
2. Make Small, Incremental Changes
Small adjustments have big effects. For most grinders:
– A 1/4 turn can change extraction time by 5+ seconds
– On stepped grinders, adjust 1-2 clicks at a time
– For very fine adjustments on quality grinders, even 1/8 turn matters
3. Always Purge After Adjustments
After any grind setting change, discard the first 2-4 grams of coffee that comes through. This clears the old grind setting and ensures your next shot reflects the new adjustment.
4. Keep Your Dose Consistent When Testing
When dialing in, change only one variable at a time. Keep your dose identical between test shots to isolate the effect of grind adjustments.
5. Be Methodical and Patient
Rushing the process leads to confusion and wasted coffee. Take your time, record your results, and make rational adjustments based on evidence.
6. Record Your Settings and Results
Maintain a log of your grind settings, resulting extraction times, and tasting notes. This builds a valuable reference for future dialing in sessions.
Our collection of espresso coffee hand grinders provides the precision adjustment capabilities needed to follow these golden rules effectively.
Following these principles might seem excessive at first, but they quickly become second nature and dramatically reduce the time and coffee needed to achieve excellent results.
9. Beyond Grind: Interacting Variables in Espresso Extraction
While grind size is foundational, several other factors interact with it to affect your espresso extraction:
Coffee Freshness Effects
– Coffee reaches optimal flavor for espresso typically 5-14 days after roasting
– Very fresh coffee (1-4 days) often requires a coarser grind due to excessive carbon dioxide causing resistance
– Older coffee (3+ weeks) typically requires progressively finer grinding as beans lose gases
– Adjust about one setting finer for every week of age beyond optimal freshness
Roast Level Considerations
Dark roasts generally require coarser grinding than light roasts due to:
– More brittleness in the bean structure
– Lower density
– More soluble compounds
Light roasts often need finer grinding and higher temperatures to properly extract their dense structure. Understanding espresso grind size light dark roasts differences can help you adjust appropriately.
Environmental Factors
– Higher humidity can cause grounds to absorb moisture and create more resistance – may need coarser grinding
– Temperature changes affect grind performance – many grinders perform differently when hot versus cold
– Seasonal adjustments are often necessary as ambient conditions change

All-Metal Hand Grinder, Flat Burr Hand Grinder, Manual Espresso Grinder, Precision Manual Grinder
Price range: $716.96 through $717.43 Select options This product has multiple variants. The options may be chosen on the product page
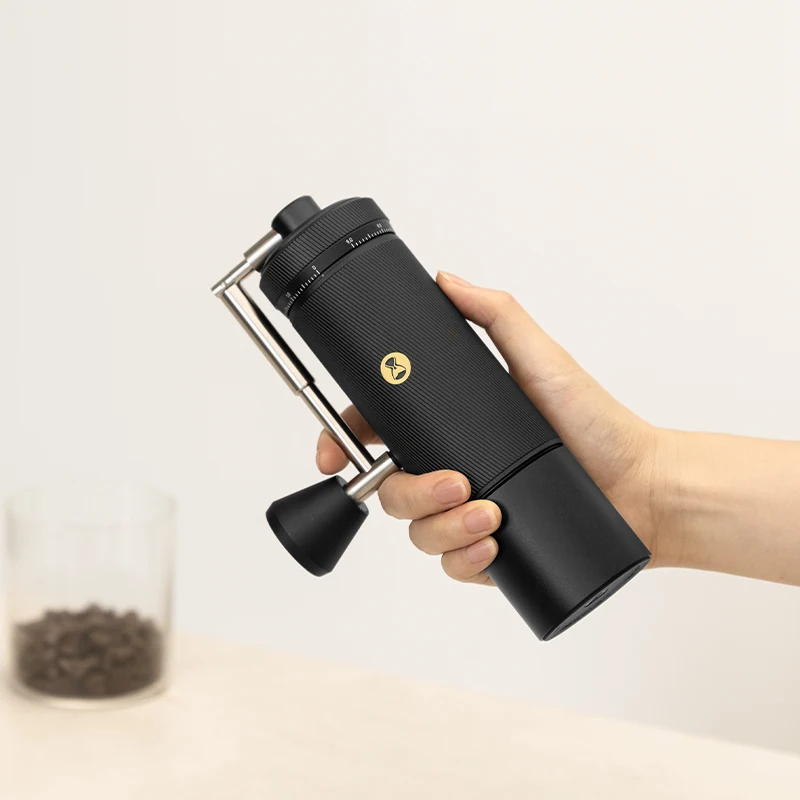
Fine Adjustment Hand Grinder, Precision Manual Grinder, Travel Coffee Grinder
Price range: $185.11 through $494.63 Select options This product has multiple variants. The options may be chosen on the product page

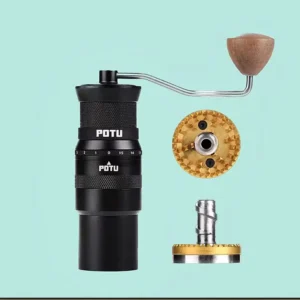
Hand Burr Grinder, Hand Crank Coffee Grinder, Manual Espresso Grinder, Portable Coffee Grinder
Price range: $262.72 through $300.22 Select options This product has multiple variants. The options may be chosen on the product page
Hand Burr Grinder, Manual Coffee Grinder Stainless Steel, Precision Manual Grinder
Price range: $183.64 through $187.52 Select options This product has multiple variants. The options may be chosen on the product page
Manual Coffee Grinder Stainless Steel, Manual Espresso Grinder, Travel Coffee Grinder
Price range: $276.22 through $276.39 Select options This product has multiple variants. The options may be chosen on the product page
Hand Crank Coffee Grinder, Manual Coffee Grinder for Espresso, Manual Coffee Grinder Stainless Steel
$349.15 Select options This product has multiple variants. The options may be chosen on the product page
Water Quality and Temperature
– Harder water creates more resistance in the puck, potentially requiring grind adjustments
– Higher brewing temperatures extract more quickly and may require coarser grinding
– Lower temperatures extract more slowly, often needing finer grinding
Machine Pressure Considerations
– Standard machines operate at 9 bars, but many modern machines offer pressure profiling
– Lower pressure generally requires finer grinding
– Declining pressure profiles often allow for finer grinding without channeling
Being aware of these interacting variables helps explain why your “perfect setting” from yesterday might not work today. Espresso making is dynamic, requiring ongoing small adjustments rather than finding a permanent setting.
10. Creating Your Dialing-In System
Developing your own systematic approach to dialing in will save you time, coffee, and frustration in the long run:
Record-Keeping Essentials
Create a simple logging system (digital or analog) that tracks:
– Coffee details (origin, roast date, roast level)
– Grinder setting
– Dose weight
– Yield weight
– Extraction time
– Tasting notes (both positive and negative characteristics)
– Any unusual factors (humidity, temperature, etc.)
Sample Entry Template:
Date: [Date]
Coffee: [Brand, Origin, Roast Date]
Grind Setting: [Your grinder's specific measurement]
Dose: 18.0g
Yield: 36.2g
Time: 29 seconds
Notes: Medium body, chocolate notes, slight citrus acidity. Slight channeling on right side of basket.
Next adjustment: Try 0.2g less coffee, same grind setting.
Using Past Data Effectively
After logging several coffees, you’ll start to recognize patterns:
– Similar coffees often require similar settings
– Beans from the same roaster at similar roast levels often behave consistently
– You’ll develop starting points for different coffee types
Our manual coffee grinder for espresso collection offers the precision and consistency needed to maintain reproducible settings in your system.
Digital vs. Analog Tracking
– Paper journals work well for immediate notes and are always accessible
– Digital apps allow better searching and pattern recognition
– Some coffee apps specifically designed for shot logging offer additional analysis
– Choose what fits your workflow and you’ll actually use consistently
With practice, you’ll develop intuition about where to start with new coffees and how to quickly adjust based on visual and taste feedback. This systematic approach transforms dialing in from frustrating guesswork to efficient problem-solving.
11. Is Your Grinder Capable of Precision Adjustment?
Not all grinders are created equal when it comes to espresso. Understanding your equipment’s capabilities and limitations is crucial:
Grinder Types and Espresso Capability
| Grinder Type | Adjustment Precision | Consistency | Espresso Suitability |
|---|---|---|---|
| Blade grinders | None | Very poor | Not suitable |
| Entry burr (sub-$100) | Low (few settings) | Fair | Marginal |
| Mid-range burr | Moderate (stepped) | Good | Workable with practice |
| Premium burr | High (small steps/stepless) | Excellent | Ideal |
| Commercial | Very high | Outstanding | Professional standard |
Signs Your Grinder May Be Limiting Your Results
– Unable to make small enough adjustments (jumps from too fast to too slow)
– Inconsistent particle size (some powder, some chunks)
– High static and clumping
– Significant grind retention between doses
– Unable to grind fine enough for proper extraction
– Burrs heat up significantly during grinding
Minimum Requirements for Consistent Espresso
For truly consistent results, your grinder should have:
– Burr design (not blade)
– Ability to make very fine adjustments
– Low retention between doses
– Consistent particle size distribution
– Sufficient power to grind fine enough without stalling
Upgrade Considerations
If you’re serious about espresso, your grinder should be the first upgrade consideration, even before your espresso machine. A great grinder with a modest machine will produce better results than a poor grinder with an expensive machine.
Many espresso enthusiasts find that manual grinders offer excellent value in the entry-to-mid-range market, providing the precision necessary for good espresso without the cost of equivalent electric models.
12. Maintaining Your Grinder for Consistent Performance
Regular maintenance ensures your grinder continues to deliver consistent results and extends its lifespan:
Regular Cleaning Schedule
– Basic cleaning: Every 1-2 weeks or 1-2 pounds of coffee
– Deep cleaning: Every 1-2 months or 5-10 pounds of coffee
– More frequent cleaning for darker roasts which leave more oils
Proper Cleaning Procedure
– Always unplug electric grinders before cleaning
– Follow manufacturer’s instructions for disassembly
– Use grinder-specific cleaning products (avoid rice or uncooked beans)
– Pay special attention to the burr edges and threading
– Fully dry all components before reassembly
Dealing with Static and Retention
– RDT (Ross Droplet Technique): Adding a tiny drop of water to beans before grinding
– Brushing out retention chambers after grinding
– Using anti-static grids if available for your model
– Allowing grounds to rest briefly before removing from catch cup
Signs of Burr Wear
– Inconsistent grind size despite proper adjustment
– Inability to grind fine enough for espresso
– Excessive fines production
– Unusual noises during grinding
– Typically occurs after 500-1000 pounds of coffee for consumer grinders
Seasoning New Burrs
New burrs often perform better after “seasoning”:
– Run 1-2 pounds of inexpensive coffee through at medium-fine setting
– This smooths microscopic burr edges and improves consistency
– Only then dial in for espresso
Maintaining your grinder isn’t just about longevity—it directly affects your espresso quality. A well-maintained grinder with sharp burrs provides more consistent particle size, which leads to more even extraction and better flavor.
13. Why Do Perfect Settings Change? Adapting to Fluctuating Conditions
Even with a perfect setup and process, you’ll notice your ideal settings drift over time. Understanding these natural variations helps prevent frustration:
Daily Micro-Adjustments
Many baristas find they need slight adjustments throughout the day due to:
– Warming of equipment (both grinder and espresso machine)
– Ambient temperature changes from morning to afternoon
– Subtle changes in bean moisture content as containers are opened and closed
Bean Aging Effects
As coffee ages, chemical changes occur:
– Degassing: Fresh beans release carbon dioxide for 1-2 weeks after roasting
– Oxidation: Exposure to air changes bean structure over time
– Both processes require progressively finer grinding as beans age
Seasonal Humidity and Temperature Effects
Seasonal changes significantly impact grind requirements:
– Summer humidity may require coarser grinding as beans absorb moisture
– Winter’s dry air may necessitate finer grinding
– Consistency is more challenging during seasonal transitions
Barometric Pressure Considerations
Though subtle, changes in atmospheric pressure can affect extraction:
– Low-pressure systems may require slightly finer grinding
– High-pressure systems might need slightly coarser adjustments
– Most noticeable in areas with dramatic weather changes
The Dynamic Nature of Coffee
Coffee is an agricultural product with inherent variability. Even beans from the same bag might have subtle differences day-to-day as you work through it.
Accepting this variability as normal – rather than a problem to be “solved” – is part of the espresso journey. The most successful home baristas embrace the need for ongoing adjustment rather than seeking a permanent “perfect” setting.
14. Advanced Grinding Techniques for Espresso Enthusiasts
Once you’ve mastered the fundamentals, consider these advanced techniques to further refine your espresso:
Grind Distribution Manipulation
– WDT (Weiss Distribution Technique): Using fine needles to break up clumps and ensure even distribution
– Tap distribution: Gentle tapping of portafilter sides to settle grounds before tamping
– Grooming tools: Various devices that help level the coffee bed before tamping
Temperature-Controlled Grinding
– Some premium grinders offer temperature stability features
– For others, grinding beans directly from freezer can improve consistency and reduce static
– Consider grinding in a cooler environment for more consistent results
Single-Dosing vs. Hopper Grinding
– Single-dosing: Grinding only what you need for each shot
* Advantages: Fresh grounds, ability to switch coffees easily
* Challenges: Potential consistency issues, retention problems
– Hopper grinding: Keeping beans in the hopper
* Advantages: More consistent grinding, especially with cheaper grinders
* Challenges: Beans becoming stale, difficult to switch coffees
RDT (Ross Droplet Technique)
– Adding a tiny drop of water (via spray bottle or damp spoon) to beans before grinding
– Dramatically reduces static electricity
– Improves dose consistency and reduces mess
– Particularly effective with very dry beans or low humidity environments
Finding your perfect espresso grind size often requires experimenting with these advanced techniques to address specific challenges with your equipment and beans.
Specialty Tools for Advanced Users
– Laser particle size analyzers (expensive but available in some coffee labs)
– Distribution tools with adjustable depth settings
– Calibrated tampers that provide consistent pressure
– Precision dosing funnels to eliminate mess and improve distribution
These advanced techniques become more relevant as you refine your process and seek to eliminate variables that cause inconsistency.
15. Your Journey to Espresso Mastery Through Grind Precision
The path to consistently excellent espresso is an ongoing journey rather than a destination. Embracing this perspective transforms frustration into enjoyment of the process.
As you develop your grinding precision skills, you’ll notice a remarkable improvement in your espresso quality. Shots that were once sour or bitter become balanced and complex. Coffees reveal flavor notes you never knew existed. The ritual of adjustment becomes second nature – a few seconds of thoughtful tinkering rather than minutes of frustrated guessing.
This precision grinding knowledge connects to broader coffee understanding. The same principles of extraction apply across brewing methods, making you more adept at pour-over, French press, or any other method you explore.
Beyond grinding, you’ll naturally begin exploring other variables – water chemistry, temperature surfing, pressure profiling – but the fundamental skill of grind adjustment remains the foundation upon which all other espresso knowledge is built.
Take comfort in knowing that even professional baristas make daily adjustments. The difference is their confidence in knowing exactly what adjustment to make based on what they observe. This same confidence will develop through your systematic approach and careful observation.
Your espresso journey never truly ends – there are always new coffees to explore, techniques to refine, and subtle improvements to make. But mastering grind precision transforms this journey from a frustrating series of failures to a rewarding exploration of coffee’s incredible complexity.