
Introduction: Why Manual Coffee Grinder Maintenance Matters
That beautiful manual coffee grinder sitting on your kitchen counter isn’t just a tool—it’s the gateway to exceptional coffee experiences. Like any precision instrument, your grinder requires regular care to deliver consistently excellent results cup after cup.
Proper maintenance directly impacts your daily brew in several crucial ways:
- Better flavor extraction – Clean burrs produce uniform grounds that extract evenly, maximizing flavor
- Consistent grind size – Well-maintained grinders deliver predictable results for your preferred brewing method
- Smooth operation – Regular cleaning prevents the stiffness and resistance that can make grinding frustrating
- Extended lifespan – Routine care protects your investment, often doubling the functional life of your grinder
Many coffee enthusiasts discover too late that neglected grinders develop problems. Coffee oils become rancid over time, creating off-flavors that compromise even the finest beans. Without proper maintenance, burrs can wear prematurely or become clogged, leading to inconsistent grinding that ruins extraction.
Understanding coffee grinder maintenance needs lays the foundation for preserving your grinder’s performance. Throughout this guide, we’ll explore maintenance approaches tailored to different grinder designs, materials, and usage patterns to help you keep your manual grinder in peak condition.
Understanding Your Manual Coffee Grinder Anatomy
Before diving into maintenance procedures, it’s essential to understand what makes up your manual coffee burr grinder. This knowledge helps you clean more effectively and handle each component with appropriate care.
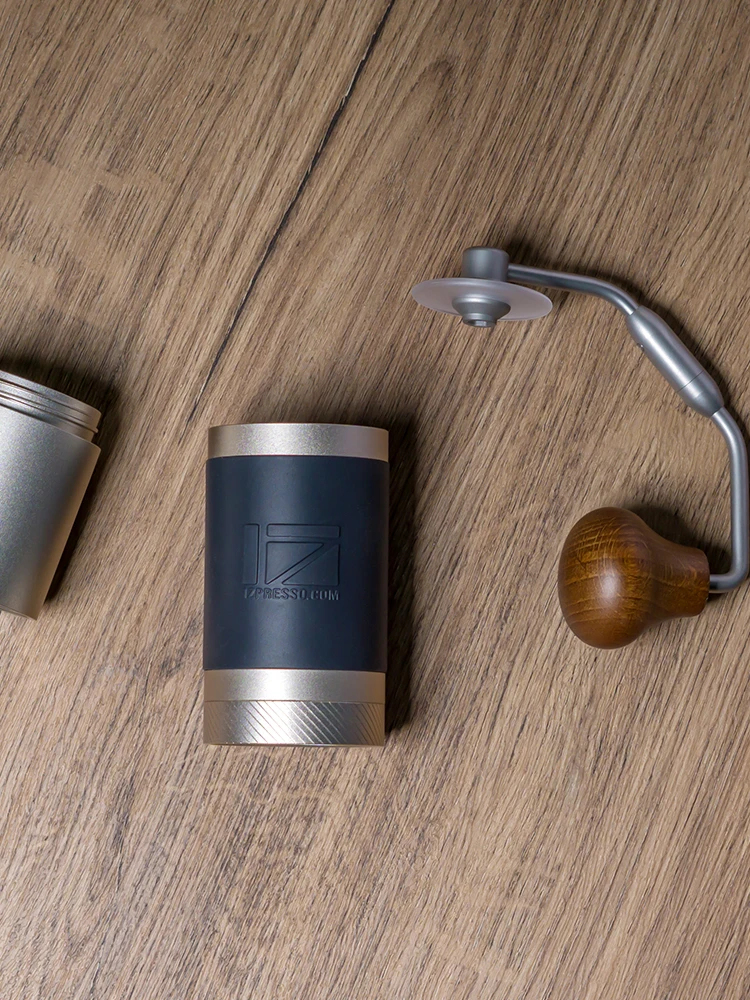
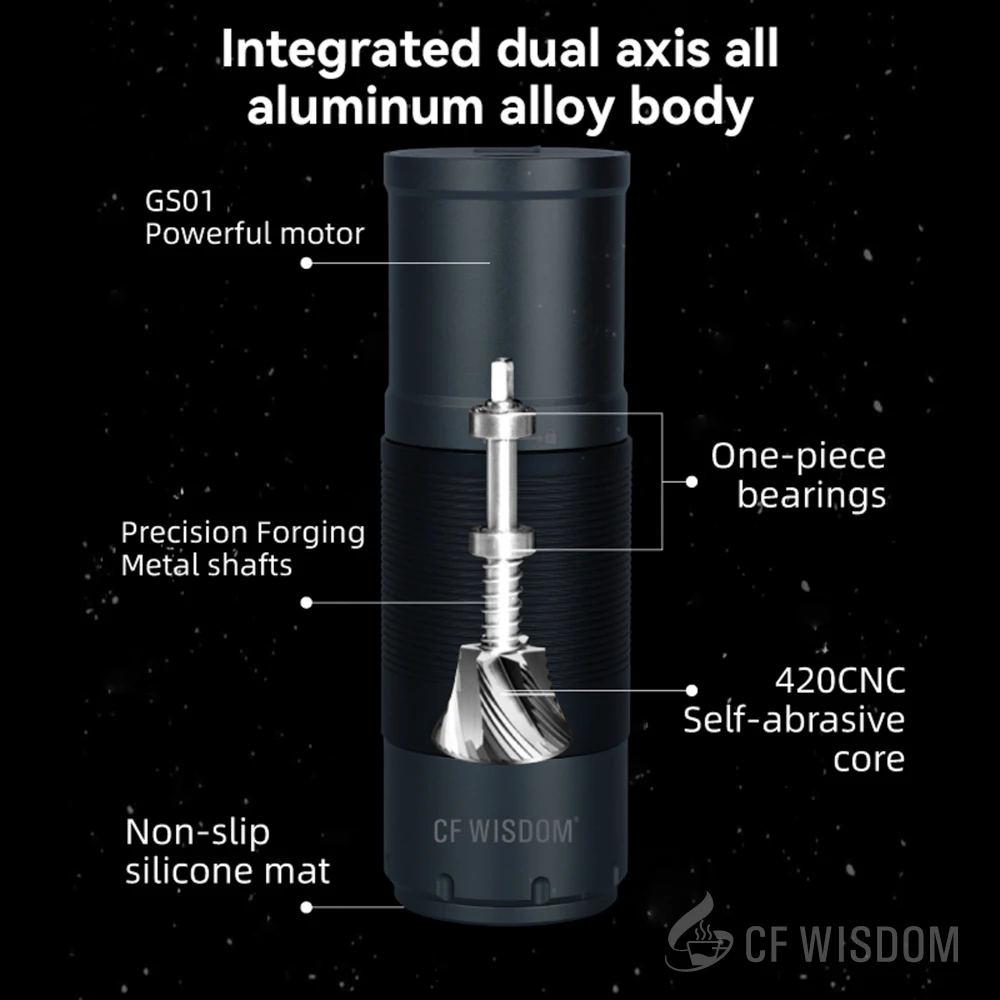
Most manual coffee grinders share these key components:
- Hopper – The top chamber where whole coffee beans are loaded
- Burrs – The grinding mechanism (usually conical) that crushes beans to your desired size
- Adjustment mechanism – The dial, step, or click system controlling grind size
- Handle/crank – The external arm that powers the grinding motion
- Grind chamber/catch cup – The bottom container collecting the ground coffee
- Central shaft/axle – The metal rod connecting the handle to the burrs
- Bearings – Components that enable smooth rotation of moving parts
The heart of your grinder—the burrs—typically come in either ceramic or steel varieties, each with specific care requirements:
| Burr Material | Advantages | Maintenance Considerations |
|---|---|---|
| Ceramic | Heat-resistant, doesn’t transfer heat to beans | More brittle, can chip if foreign objects enter grinder |
| Steel | More durable, potentially sharper edges | May require more frequent cleaning to prevent rust (especially in humid environments) |
Understanding your specific grinder design influences how you’ll approach maintenance. Premium grinders from different manufacturers use varying construction methods—some with easily removable burrs, others with more complex disassembly procedures. The ceramic versus steel burr debate extends to maintenance considerations as well as performance characteristics.
Essential Maintenance Tools and Supplies
Assembling the right toolkit makes manual grinder maintenance significantly easier. Here are the essential items you’ll need:
- Small brushes
- Soft paintbrush (1/2 inch) for general cleaning
- Old toothbrush for burr detailing
Espresso machine brush (if available)
Microfiber cloths
- Lint-free for cleaning external surfaces
Separate cloths for wet and dry applications
Air blower or can of compressed air
- For reaching tight spaces and removing loose particles
Especially useful for cleaning adjustment mechanisms
Safe cleaning agents
- Food-grade mineral oil (for wooden components)
- White vinegar solution (for mineral buildup)
Unscented dish soap (minimal amount for deep cleaning)
Specialized tools
- Small screwdriver set for disassembly
- Grinder cleaning tablets like Grindz (optional but effective)
- Wooden skewer or chopstick for dislodging stuck grounds
DIY alternatives can work effectively when specialized tools aren’t available. A pipe cleaner can substitute for a burr brush, and a small makeup brush can work well for general cleaning. For those interested in a more comprehensive approach, our guide on essential equipment for coffee grinder cleaning provides detailed recommendations.
Creating Your Cleaning Schedule: Daily, Weekly, and Monthly Routines
Establishing a regular maintenance schedule prevents both performance issues and the need for more intensive cleaning later. Your ideal schedule depends on how frequently you use your grinder.
Daily (After Each Use – 30 seconds):
- Empty grounds completely
- Brush visible coffee particles from burrs and chamber
- Wipe external surfaces with dry cloth
- Leave hopper empty when not in use
Weekly (5 minutes):
- Brush out hoppers and chambers more thoroughly
- Clean external surfaces with slightly damp cloth
- Remove any visible coffee oil buildup
- Check for unusual resistance during operation
- Inspect adjustment mechanism for smooth function
Monthly (15-20 minutes):
- Complete disassembly (following manufacturer guidelines)
- Deep clean all components
- Inspect burrs for wear
- Address any developing issues
- Recalibrate if necessary
Signs that indicate your grinder needs immediate cleaning, regardless of schedule:
- Visible coffee residue buildup
- Inconsistent grind size
- Unusual resistance when grinding
- Strange sounds during operation
- Off-flavors in your coffee
Regular cleaning ensures optimal performance from your manual burr coffee grinder. Even casual users benefit from monthly deep cleaning, while daily grinders require more frequent attention.
Quick Daily Maintenance: After-Use Care (30 Seconds)
These simple 30-second habits after each use prevent buildup that can affect flavor and performance:
- Empty all remaining grounds by turning the grinder upside down and tapping gently
- Remove the grounds chamber and shake out any stubborn particles
- Brush visible coffee dust from the lower burr and collection chamber using a small brush
- Invert the grinder and give it a gentle tap to dislodge particles trapped between burrs
- Wipe down external surfaces with a dry microfiber cloth to prevent oil buildup
Pro tip: After grinding especially oily beans or darker roasts, spend an extra 15 seconds brushing the burrs to prevent accelerated residue buildup.
This quick routine is particularly important for portable coffee grinders that might be stored between uses. When grounds sit in your grinder for extended periods, they become stale, introduce moisture, and can affect the flavor of your next batch.
Daily cleaning also gives you an opportunity to notice any developing issues before they become problems. Changes in grinding feel, sound, or output quality often appear gradually, and this quick check helps you catch them early.
Weekly Maintenance: Keeping Performance Consistent (5 Minutes)
Once weekly, a slightly more thorough cleaning maintains consistent performance without the need for disassembly:
- Remove the handle and hopper lid
- Turn the grinder upside down and adjust to coarsest setting
- Use a soft brush to clean around the upper burr, removing coffee dust and oils
- Hold the grinder at various angles while brushing to reach different areas
- Use a wooden chopstick or skewer to gently dislodge any packed grounds from the chute
- Clean the grounds chamber thoroughly with a slightly dampened cloth
- Inspect the handle connection point for debris and clean if necessary
- Wipe all external surfaces with a slightly damp cloth, then dry immediately
Careful with moisture! Avoid getting water inside the burr chamber—use minimal dampness and always dry thoroughly.
For grinders with exposed adjustment mechanisms, pay special attention to these areas as fine coffee dust tends to accumulate and affect grind consistency. Stainless steel manual coffee grinders particularly benefit from regular cleaning of the adjustment threads to maintain precise settings.
This weekly routine removes coffee oils before they become sticky residue, ensuring your grinder continues to operate smoothly and deliver consistent results.
Monthly Deep Clean: Disassembly and Thorough Maintenance (15-20 Minutes)
A monthly deep clean with full disassembly keeps your grinder performing like new. This process varies by model, but follows these general steps:
Preparation
– Find a clean, well-lit workspace with a soft towel to prevent parts from rolling away
– Take photos of your assembled grinder from multiple angles before starting (helpful for reassembly)
– Have your cleaning supplies readyDisassembly
– Remove the handle/crank
– Separate the hopper from the main body
– Remove the adjustment dial/ring (note the setting for reassembly)
– Carefully extract the inner burr and central shaft
– Remove the outer burr if possible (consult manufacturer instructions)Cleaning Each Component
– Brush all burr surfaces thoroughly with a stiff brush
– Clean threads and adjustment mechanisms with a small brush
– Use compressed air to blow out hard-to-reach areas
– Wipe non-burr components with a lightly dampened cloth
– For stubborn residue, use a tiny amount of mild dish soap, then rinse and dry completelyInspection
– Check burrs for chips or unusual wear patterns
– Inspect the central shaft for straightness
– Examine bearings for smooth operation
– Look for damaged threads or stripped screwsReassembly
– Ensure all components are completely dry
– Replace the outer burr first, aligning any markers
– Install the inner burr and central shaft
– Reattach the adjustment mechanism at your noted setting
– Reconnect the hopper and handle
– Test the movement before use
Warning: Never soak metal components, especially burrs. Excessive moisture can cause rust or damage precision parts.
This thorough approach to cleaning manual burr grinders removes all accumulated coffee oils and particles that affect flavor and performance. After completion, run a small amount of coffee through the grinder to “season” the clean burrs before brewing your next cup.
Material-Specific Cleaning Methods: What Works for Each Component
Different grinder materials require specific cleaning approaches to prevent damage while ensuring thorough maintenance:
Stainless Steel Components
- Best cleaning method: Dry brushing, followed by wiping with barely damp cloth
- Avoid: Soaking, abrasive cleaners, bleach-based products
- Special considerations: Dry immediately and thoroughly to prevent water spots
Ceramic Burrs
- Best cleaning method: Dry brushing with stiff brush, compressed air for crevices
- Avoid: Dropping, metal tools, soaking in water
- Special considerations: More brittle than steel; handle gently during cleaning
Steel Burrs
- Best cleaning method: Stiff brush cleaning, minimal moisture exposure
- Avoid: Soaking, abrasive cleaners, storing while damp
- Special considerations: Completely dry before reassembly to prevent rust
Wooden Elements
- Best cleaning method: Wipe with dry or barely damp cloth
- Avoid: Soaking, excessive moisture, harsh detergents
- Special considerations: Occasional food-grade mineral oil treatment for unfinished wood
Plastic/Acrylic Parts
- Best cleaning method: Warm water with mild soap, thorough rinse and dry
- Avoid: Hot water, abrasive scrubbers, alcohol-based cleaners
- Special considerations: Check for cracks where coffee oils might accumulate
For grinders with specialized materials, consult manufacturer guidelines. Many ceramic burr coffee grinders have specific recommendations regarding cleaning frequency and methods to maintain performance while protecting the more delicate ceramic surfaces.
Caring for Your Burrs: The Heart of Your Grinder
The burrs are your grinder’s most important component, directly responsible for grind quality and consistency. Their proper care deserves special attention:
Ceramic Burr Care
- Clean with dry methods only (brushes, compressed air)
- Inspect regularly for chips or cracks that might affect grind quality
- Handle with care during cleaning—ceramic can chip if dropped
- Avoid grinding extremely hard objects (unpopped popcorn kernels, etc.)
Steel Burr Care
- Remove coffee oils regularly to prevent rancidity
- Ensure complete drying after any cleaning
- Check edges for signs of dulling (decreased cutting efficiency)
- Clean more frequently in humid environments
Signs of Burr Wear
- Increasingly inconsistent grind size
- More “fines” (powder) in your ground coffee
- Difficulty achieving fine grind settings
- Unusual sounds during grinding
- Visible damage to cutting edges
Burr Myths Debunked
Myth: Burrs need to be “seasoned” with coffee before use
Fact: While some minor metal burrs might smooth out initially, intentional seasoning isn’t necessaryMyth: Coffee beans clean burrs during grinding
Fact: Beans actually deposit oils that need regular removal
For grinders with replaceable burrs, knowing when replacement is needed saves you from frustrating brewing experiences. Most quality burrs should last 3-5 years with proper maintenance before replacement becomes necessary.

Troubleshooting Common Manual Coffee Grinder Issues
Even with regular maintenance, you might encounter performance issues. Here’s how to identify maintenance-related problems and resolve them:
Inconsistent Grind Size
Potential causes:
– Burrs need cleaning (coffee oil buildup)
– Loose burr mounting
– Burr misalignment after cleaning
– Worn burrs requiring replacement
Solution: Deep clean burrs, ensure proper reassembly with burrs securely mounted, check alignment, and inspect for wear.
Difficulty Turning the Handle
Potential causes:
– Coffee grounds packed between burrs
– Bearing needs cleaning
– Central shaft needs lubrication (rarely)
– Foreign object trapped in grinding mechanism
Solution: Disassemble and clean thoroughly, paying special attention to the central shaft and bearing areas. Adjust to coarsest setting and try again.
Strange Noises During Grinding
Potential causes:
– Foreign object in beans (small stone, etc.)
– Burr misalignment
– Loose component
– Bearing issue
Solution: Stop grinding immediately, disassemble and inspect for foreign objects or damage. Check that all components are properly tightened during reassembly.
Excessive Coffee Retention
Potential causes:
– Buildup in ground exit chute
– Static buildup (common in dry environments)
– Design limitation
Solution: Clean exit pathway thoroughly, add 1-2 drops of water to beans before grinding (Ross Droplet Technique) to reduce static, tap grinder firmly after use.
Misaligned Burrs After Cleaning
Potential causes:
– Incorrect reassembly sequence
– Components not fully seated
– Missing calibration step
Solution: Reference manufacturer instructions or your pre-disassembly photos. Ensure components are fully seated and aligned with any guidemarkers.
For precision-focused users, precision manual grinders require extra attention to burr alignment after cleaning. The small calibration adjustments that make these grinders exceptional can also make them more sensitive to reassembly errors.
Testing Grind Consistency: Ensuring Your Maintenance Works
After maintenance, verify your grinder is performing correctly with these simple tests:
Visual Inspection Test
– Grind a small amount of coffee at your usual setting
– Spread grounds on dark paper or plate
– Look for consistency in particle size and minimal “fines” (powder)
– Compare to a previous sample if possibleTouch Test
– Rub grounds between fingers
– Feel for uniform texture without gritty inconsistencies
– Check for unusual amount of powder clinging to fingersExtraction Test
– Brew coffee using your regular method
– Time the extraction (especially for espresso or pour-over)
– Compare to your typical extraction time
– Note any changes in flavor clarity or balanceCalibration Check
– Return to a familiar grind setting
– Compare results to your pre-maintenance expectations
– Make minor adjustments if needed
If your grind consistency seems off after cleaning, first check that all components were reassembled correctly. Pay particular attention to burr alignment and ensure the adjustment mechanism is functioning properly. For more specialized approaches to evaluating your grinder’s performance, explore our guide on mastering grind consistency with hand burrs.
Storage Best Practices: Protecting Your Grinder Between Uses
Proper storage complements your maintenance routine and prevents unnecessary wear:
- Store empty – Never leave beans in the hopper during storage
- Keep dry – Store in a low-humidity environment to prevent moisture damage
- Temperature stability – Avoid locations with extreme temperature fluctuations
- Upright position – Store standing upright to prevent stress on the handle shaft
- Avoid sunlight – Direct sunlight can degrade wooden or plastic components
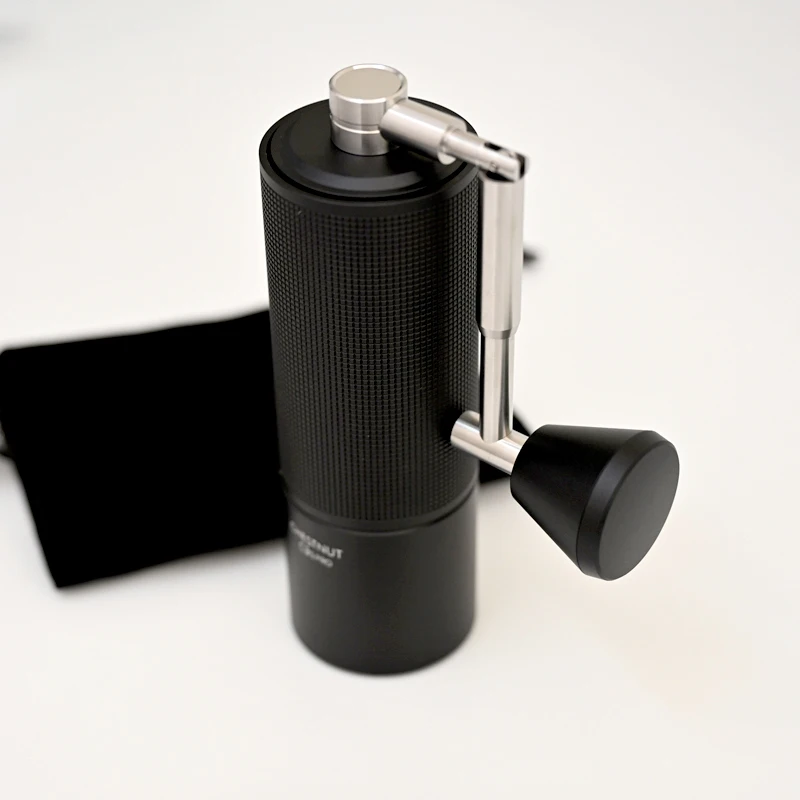
- Protective case – For travel or infrequent use, consider a protective case or bag
- Loose adjustment – Store with the burrs at a medium-to-loose setting to reduce pressure
For travel situations, travel coffee grinders often include specialized storage considerations. These compact units benefit from protective cases that prevent damage to adjustment mechanisms and handles during transport.
Seasonal Maintenance: Adjusting Care for Environmental Changes
Environmental conditions affect your grinder’s performance and maintenance needs throughout the year:
Summer/Humid Conditions
- Increase cleaning frequency to prevent mold growth
- Pay extra attention to drying all components thoroughly
- Consider using desiccant packets for storage if humidity exceeds 60%
- Watch for increased resistance in adjustment mechanisms
- Clean more frequently if grinder feels “sticky”
Winter/Dry Conditions
- Address increased static electricity issues
- Use the Ross Droplet Technique (adding tiny water droplets to beans before grinding)
- Clean grounds chamber more frequently as static causes grounds to cling
- Monitor wooden components for drying or cracking
- Apply food-grade mineral oil to unfinished wood if needed
Vacation Homes/Seasonal Use
- Perform deep cleaning before extended storage
- Store with burrs in relaxed position (medium-coarse setting)
- Use airtight container or bag with desiccant for long-term storage
- Remove handle if storing for months
- Re-clean thoroughly before returning to use
For grinders with specific features designed to reduce maintenance requirements, check out our guide on key features of low-maintenance hand grinders to see if your next purchase could simplify your seasonal care routine.
Extending Burr Life: Preventive Maintenance Techniques
Maximize the lifespan of your burrs—the most critical and expensive component—with these preventive approaches:
- Inspect beans before grinding – Remove any stones or foreign objects
- Avoid extremely light roasts for ceramic burrs – These harder beans can increase wear
- Clean after specialty beans – Flavored or exceptionally oily beans leave more residue
- Maintain consistent cleaning schedule – Prevents buildup that increases friction and wear
- Use appropriate grind settings – Unnecessarily fine settings accelerate wear
- Monitor grinding resistance – Increasing difficulty may indicate cleaning needs
- Keep adjustment mechanism clean – Prevents uneven pressure on burrs
- Avoid empty grinding – Never run the grinder without beans
Many coffee enthusiasts find their grinders last significantly longer with these preventive practices. The minimal effort required for proper maintenance pays dividends in extended burr life and consistent performance. For a comprehensive approach to maximizing your manual coffee grinder’s lifespan, consistent application of these techniques makes a substantial difference.
When to Replace Parts: Recognizing the Signs
Even well-maintained grinders eventually need part replacements. Here’s how to identify when components have reached the end of their useful life:
Burr Replacement Indicators
- Visibly damaged cutting edges
- Significantly slower grinding despite cleaning
- Inability to achieve fine grinds
- Consistently uneven particle size
- Increasing amounts of fine powder regardless of setting
Handle/Crank Issues
- Wobbling during operation
- Stripped connection point
- Cracks in handle material
- Excessive play in rotating mechanism
Bearing Problems
- Grinding feels rough even after cleaning
- Unusual sounds during operation
- Visible damage or corrosion
- Excessive shaft movement
Adjustment Mechanism Failure
- Unable to maintain selected setting
- Skipping between adjustment points
- Stripped threads
- Inconsistent grind size at same setting
For most quality manual grinders, burrs should last 3-5+ years with proper maintenance. Other components typically last even longer. When considering whether repair is worthwhile, compare the replacement part cost against the typical lifespan of manual coffee grinders to make an informed decision.
Should You Oil Your Manual Grinder? Myths vs. Facts
The question of lubricating manual grinders creates considerable confusion among coffee enthusiasts:
Myth: All manual grinders need regular oiling to maintain smooth operation.
Fact: Most modern grinders are designed to operate without additional lubrication. Manufacturer instructions rarely recommend oiling.
Myth: Food-grade oils improve burr performance.
Fact: Oil attracts coffee particles and can create gummy residue that harms grind consistency.
Myth: Bearings require regular lubrication.
Fact: Many quality grinders use sealed bearings or bushings that are pre-lubricated for life.
When lubrication might be appropriate:
– If specifically recommended by manufacturer
– For non-coffee-contacting moving parts showing excessive wear
– For wooden components (exterior only) using food-grade mineral oil
– For rusted parts during restoration (followed by thorough cleaning)
If you do need to address a specific issue with lubrication, our detailed guide on lubricating hand coffee grinder burrs provides safe approaches that won’t compromise your coffee quality.

How Do Professional Baristas Maintain Their Manual Grinders?
Professional coffee experts approach grinder maintenance with ritualistic precision:
- Consistency is key – Professionals clean their grinders on a strict schedule, not just when problems arise
- Documentation – Many keep logs tracking cleaning dates and grinder performance
- Preventive approach – They address developing issues before they affect taste
- Bean selection awareness – They adjust cleaning frequency based on bean oiliness and roast level
- Testing protocols – After maintenance, many use standardized tests to verify performance
- Zero tolerance for flavor drift – Even slight changes in taste trigger investigation
One technique many professionals use is the “purge grind” after cleaning—grinding a small amount of beans that are discarded before brewing—which removes any remaining cleaning residue and re-seasons the burrs. This is especially important for manual espresso grinders where precision is critical for proper extraction.
Maintaining Your Grinder While Traveling: Portable Care Tips
Keep your travel grinder performing well with these on-the-go maintenance strategies:
- Assemble a mini cleaning kit:
- Foldable brush
- Small microfiber cloth
- Interdental brushes for tight spaces
Ziplock bags for containing coffee dust during cleaning
Quick field cleaning techniques:
- Use bread to absorb oils when brushes aren’t available
- Carry uncooked rice for emergency deep cleaning (discard the rice after)
- Keep pre-measured beans in containers to avoid spills inside your grinder
Tap grinder firmly on solid surface (padded with cloth) to dislodge retained grounds
Environmental considerations:
- Clean more frequently in humid environments
- Dry thoroughly in beach locations (salt air accelerates corrosion)
- Keep grinder in sealed container during transit
- Allow grinder to acclimate before opening in different climate conditions
For those frequently on the move, exploring purpose-built travel-friendly coffee grinding options can simplify maintenance while ensuring great coffee away from home.
Frequently Asked Questions: Manual Grinder Maintenance
Q: Can I use rice to clean my coffee grinder?
A: While rice has historically been recommended, many manufacturers advise against it as it can damage burrs, especially ceramic ones. Purpose-made grinder cleaning products are safer and more effective.
Q: Is it safe to wash any grinder parts in a dishwasher?
A: Generally no. The high heat and harsh detergents can damage components. Most parts should be hand-cleaned using the methods outlined in this guide.
Q: How do I remove coffee stains from exterior surfaces?
A: For stainless steel, a paste of baking soda and water works well. For wood, very light sanding followed by food-grade mineral oil can refresh the appearance. Always test in an inconspicuous area first.
Q: Is compressed air safe for cleaning burrs?
A: Yes, in moderation. Use short bursts and maintain some distance to avoid forcing dust deeper into the mechanism. Always hold the grinder so dust blows away from other components.
Q: How do I salvage a grinder that was accidentally soaked?
A: Disassemble completely, dry each part thoroughly with cloths, then allow to air dry for 24-48 hours. Pay special attention to burrs and bearings. For wooden parts, dry slowly to prevent cracking.
Q: Do flavored coffees require special cleaning consideration?
A: Yes, clean immediately after grinding flavored beans as their oils are typically more persistent and can linger, affecting the taste of future batches.
For those seeking to minimize maintenance requirements altogether, our comparison of low-maintenance manual coffee grinders highlights models specifically designed for cleaning convenience.
Conclusion: A Well-Maintained Grinder is the Foundation of Great Coffee
The humble manual coffee grinder stands as the unsung hero in the pursuit of exceptional coffee. Through consistent maintenance—from quick daily brushing to monthly deep cleans—you preserve not just a tool, but the quality of every cup you brew.
The small investment of time in proper cleaning pays remarkable dividends: more vibrant flavors, smoother operation, and a grinder that remains a reliable companion for years rather than months. The difference between a well-maintained grinder and a neglected one becomes obvious in both the cup and the grinding experience.
By following the maintenance routines outlined in this guide, you transform simple care tasks into a ritual that enhances your relationship with coffee. Whether you’re using an entry-level model or a premium precision instrument from the collection of general hand coffee grinders, these practices ensure your equipment works as intended—consistently delivering the foundation for exceptional coffee.
Remember that consistency in maintenance leads to consistency in coffee quality. Your diligence in caring for your grinder today directly influences the excellence of tomorrow’s brew.