Why Regular Cleaning of Your Manual Burr Coffee Grinder Matters
When it comes to brewing exceptional coffee, your manual burr grinder plays a crucial role in determining the quality of your cup. Yet many coffee enthusiasts overlook the importance of keeping this essential tool clean. Regular maintenance of your burr grinder isn’t just about aesthetics—it directly impacts the flavor of every coffee you brew.
Over time, coffee oils and fine particles accumulate inside your grinder. These residues eventually turn rancid, transferring bitter, unpleasant flavors to fresh beans. Even small amounts of stale coffee can noticeably taint your brew, masking the delicate flavor notes you’ve carefully selected in your beans.
Beyond flavor preservation, regular cleaning offers several important benefits:
- Consistent grind quality: Residue buildup affects the precision of your burrs, leading to uneven particle sizes that cause both under-extraction (sour, weak coffee) and over-extraction (bitter, harsh coffee)
- Smoother operation: Clean grinders require less force to operate, making your morning ritual more enjoyable
- Extended equipment life: Removing coffee oils prevents premature wear on moving parts
- Better extraction: Clean burrs create more uniform grounds, allowing for optimal water contact and flavor extraction
Comprehensive maintaining manual coffee grinders practices ensure that every component functions as designed. The difference becomes particularly noticeable when brewing light roasts or specialty coffees, where clarity and distinct flavor notes are prized.
Understanding whether coffee grinders need maintenance is fundamental to preserving both equipment performance and coffee quality. Just as you wouldn’t cook with dirty pans, brewing with a neglected grinder compromises the care you’ve taken in selecting quality beans.
When to Clean Your Manual Burr Grinder: Finding Your Ideal Schedule
Establishing a cleaning routine for your manual burr grinder helps maintain optimal performance and flavor quality. The frequency largely depends on your usage patterns and the type of coffee you grind.
For most coffee enthusiasts, a two-tiered approach works best:
Quick cleaning (daily or after each use):
– Brush out loose grounds from the catch cup and grinding chamber
– Wipe down the exterior to prevent oil buildup
– Tap the grinder gently to dislodge trapped particles
Deep cleaning (periodic):
– Daily users: Every 1-2 weeks
– Weekly users: Every 1-2 months
– Occasional users: Every 2-3 months
Your cleaning schedule should also account for your bean preferences. Darker, oilier roasts leave more residue behind and generally require more frequent cleaning than lighter roasts. Similarly, flavored coffees can leave persistent oils that affect future brews if not properly removed.
How do you know when it’s time for a deep clean? Watch for these indicators:
– Visible coffee oil buildup (looks dark and sticky)
– Inconsistent grind results despite unchanged settings
– Increased resistance when grinding
– Coffee flavors becoming muted or “off”
Understanding the ideal manual coffee grinder cleaning frequency based on your individual use patterns helps strike the right balance between maintenance effort and coffee quality. When followed consistently, this preventive approach ensures your grinder delivers peak performance with every brew.
Essential Tools and Materials for Effective Grinder Cleaning
Gathering the right tools before you begin cleaning your manual burr grinder makes the process more efficient and effective. Most of what you need can be found around your home, with a few specialized items worth considering for optimal results.
Must-Have Tools:
– Soft bristle brushes (a dedicated coffee brush or clean paintbrush)
– Microfiber cloths for removing coffee oils
– Cotton swabs for reaching tight areas
– Small, soft toothbrush for burr cleaning
– Dry, clean towel as a work surface
Helpful Additional Items:
– Compressed air canister for blowing out particles
– Wooden toothpicks for clearing compacted grinds
– Flashlight for inspecting hard-to-see areas
– Small cleaning tray to catch loose grounds
When it comes to cleaning agents, less is more. For most cleaning tasks, a dry approach is safest. If you need additional cleaning power, opt for:
– Food-safe, odorless grinder cleaner tablets
– Uncooked rice or bread (for some grinders—check manufacturer recommendations)
– Mild dish soap diluted in water (only for non-burr components)
Having proper essential equipment for coffee grinder cleaning readily available makes maintenance less of a chore and more of a simple routine. For particularly stubborn residue, understanding which non-toxic cleaners for burr grinders are appropriate ensures you don’t compromise your equipment or coffee quality.
Remember that harsh chemicals, abrasive tools, and excessive moisture are the enemies of precision grinding equipment. Simple, gentle tools used consistently are your best strategy for maintaining your grinder’s performance.
Preparation: Setting Up for a Successful Cleaning Session
Before diving into the disassembly process, proper preparation ensures a smooth cleaning experience and prevents potential mishaps with small parts or delicate components.
- Choose a clean, well-lit workspace with plenty of room to spread out
- Place a light-colored towel or cloth on your work surface to prevent small parts from rolling away and to provide contrast for better visibility
- Completely empty all beans from the hopper and run the grinder briefly to clear remaining grounds
- Have your cleaning tools within easy reach and organized
- Take reference photos of your assembled grinder from multiple angles before beginning disassembly
- Locate any manufacturer instructions or online diagrams for your specific model
Careful preparation is especially important if this is your first time cleaning your particular grinder model. Each manual burr grinder in our manual coffee burr grinders collection has slight variations in design that may affect the disassembly process.
If possible, arrange your workspace away from sinks or water sources to minimize the risk of accidental water exposure to sensitive components. Also consider creating a sequential layout for parts as you remove them—this mimics the disassembly order and makes reassembly more intuitive.
Taking these preliminary steps might seem unnecessary, but they save significant time and frustration, particularly when dealing with the small screws and precision components common in quality manual grinders.
Step 1: Careful Disassembly of Your Manual Burr Grinder
Proper disassembly is crucial for thorough cleaning while preventing damage to your grinder’s components. Though designs vary, most manual burr grinders follow similar construction principles.
Begin by removing the handle, which typically attaches to the central shaft via:
– A screw or nut at the center of the handle
– A hex-key fastener on the side of the handle
– A push-button release mechanism
Once the handle is detached, separate the hopper from the collection chamber. Depending on your model, this may involve:
– Unscrewing the two sections (often requiring several rotations)
– Releasing a locking mechanism that joins the pieces
– Removing a fastening ring that secures the components
Next, carefully extract the inner burr assembly:
1. Note the current grind setting before making any adjustments
2. Unscrew any visible fasteners holding the burr assembly in place
3. Gently pull the center shaft while supporting both burrs
4. Pay close attention to the orientation of any washers, springs, or bearings

For models with adjustable settings, document exactly how the adjustment mechanism was positioned before disassembly. Many hand burr grinder designs include small components that maintain the alignment and stability of the burrs—be especially careful with these precision parts.
As you remove each component:
– Place parts in a logical sequence on your work surface
– Group related fasteners together
– Note any unique orientation requirements for reassembly
If you encounter resistance during disassembly, never force components apart. Consult your manufacturer’s guide or look for additional fastening points you may have missed. Some high-precision grinders use intricate mechanisms that require specific disassembly techniques.
Step 2: Cleaning the Burrs – Techniques for Different Materials
The burrs are the heart of your manual grinder and require special attention during cleaning. Different burr materials demand slightly different approaches for optimal care and longevity.
For Steel Burrs:
– Use a dry, soft brush to remove coffee particles from the grinding surfaces
– Clean between the teeth with a wooden toothpick or soft brush tip
– Wipe with a dry microfiber cloth to remove coffee oils
– Avoid water contact whenever possible to prevent rust formation
– For stubborn residue, use a very lightly dampened cloth and dry immediately
For Ceramic Burrs:
– Brush away loose grounds with a soft bristle brush
– Clean grinding surfaces thoroughly with a dry cloth
– Use cotton swabs to reach between cutting edges
– Ceramic can tolerate slight moisture better than steel, but still minimize water exposure
– Never soak ceramic burrs as water can penetrate mounting points
When cleaning any burr type, maintain the proper angle of approach to avoid damaging the cutting edges. Work parallel to the edge rather than directly against it. Check for cleanliness by running your finger gently along the flat surfaces—they should feel smooth without any sticky residue.
For extensive oil buildup, specialized ceramic burr coffee grinder cleaning pellets can help absorb oils without damaging the precision surfaces. These food-safe pellets are ground through the machine like coffee beans but absorb oils in the process.
Remember that the burrs’ alignment is crucial for consistent grinding performance. Handle these components with care and avoid placing them on hard surfaces that might cause nicks or chips in the cutting edges. A properly cleaned burr will have a uniform appearance without dark, oily residue in the grooves.
Step 3: Cleaning the Supporting Components and Housing
While the burrs receive the most attention, properly cleaning the supporting components ensures complete maintenance and prevents old coffee residue from contaminating fresh grounds.
Hopper (Bean Chamber):
– Brush out all loose beans and grounds
– Wipe interior with a dry microfiber cloth to remove oils
– Pay special attention to corners where oils collect
– For wooden hoppers, use minimal moisture to prevent warping
Grounds Chamber/Catch Cup:
– Remove all remaining coffee grounds
– Wipe interior thoroughly to remove fine dust
– Clean threads carefully if it screws onto the main body
– If made of glass or metal (without electronics), can be washed with mild soap and water
Central Shaft and Bearings:
– Wipe the shaft with a dry cloth to remove oils
– Clean any accessible bearings with a dry cotton swab
– Avoid introducing any liquid to bearing assemblies
– Inspect for coffee particles in bearing housing
Adjustment Mechanism:
– Brush out grounds from threads or click settings
– Clean grind adjustment ring with a dry cloth
– Remove coffee dust from adjustment teeth or notches
– Be gentle with delicate adjustment components
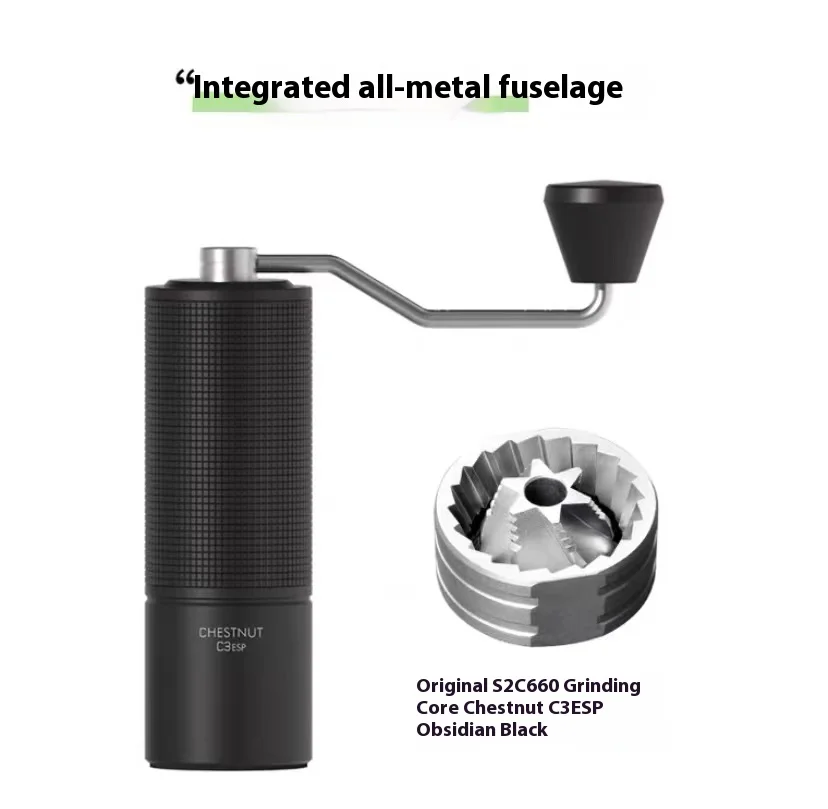
For grinders with metal exteriors, like our stainless steel manual coffee grinders, you can use a slightly damp cloth for exterior cleaning, followed by immediate drying to maintain the finish. The exterior can benefit from occasional polishing with a clean, dry cloth to maintain its appearance.
During this phase, inspect all components for damage or excessive wear. Look for cracks, chips, or worn areas that might affect performance. This is also an excellent time to check rubber or silicone gaskets for signs of deterioration that might require replacement.
Step 4: The Critical Drying Phase – Ensuring Complete Moisture Removal
Thorough drying is perhaps the most underappreciated yet crucial step in the cleaning process. Even minimal moisture left on components can lead to quality issues or potential damage.
For any components that came in contact with moisture:
– Immediately wipe with a clean, dry cloth to remove surface water
– Allow to air dry completely on an absorbent towel
– Position components to allow maximum airflow around all surfaces
– Plan for extended drying time in humid environments
Steel components require particular attention, as even invisible moisture can cause oxidation or rust spots. After wiping dry, consider letting steel parts rest for 1-2 hours before reassembly to ensure complete evaporation of any remaining moisture.
Ceramic parts may appear dry on the surface but can retain moisture in microscopic pores. Allow these components to air dry thoroughly, away from direct sunlight which could cause uneven drying or potential cracking.
WARNING: Never reassemble your grinder until you’re absolutely certain all parts are completely dry. Trapped moisture can:
– Cause rust or corrosion on metal parts
– Create an environment for mold growth
– Lead to clumping of future coffee grounds
– Potentially damage wooden components through swelling
For grinders with wooden elements, provide extra drying time as wood can absorb and hold moisture longer than other materials. Using a fan to circulate air around components can speed the drying process safely without introducing heat that might damage precision parts.
Following these comprehensive essential steps to deep clean hand coffee grinder techniques ensures your equipment remains in optimal condition. This attention to drying may seem excessive, but it significantly extends the useful life of your grinder.
Step 5: Precise Reassembly for Optimal Performance
Careful reassembly is just as important as thorough cleaning. A properly assembled grinder ensures consistent performance and prevents damage to precision components.
- Begin with the burr assembly, ensuring correct orientation of both the inner and outer burrs
- Replace any washers and springs in the exact sequence they were removed
- Verify that the central shaft moves freely without wobbling
- Secure the burr assembly according to your grinder’s design (typically with a screw or nut)
- Reconnect the hopper to the grinding chamber, aligning threading carefully
- Reattach the handle, ensuring it’s securely fastened to the shaft
- Reset your grind adjustment to your documented original setting
Common reassembly challenges include:
Misaligned threading: If components won’t screw together easily, stop and realign rather than forcing the connection. Cross-threading can permanently damage your grinder.
Incorrect burr orientation: Most burrs only fit correctly in one position. If you meet resistance, check the alignment rather than applying force.
Binding or stiffness: After reassembly, the handle should turn smoothly. If you encounter resistance, disassemble and check for misalignment or improperly seated components.
Once reassembled, test your grinder with a small amount of beans to ensure it operates smoothly and produces consistent grounds. Properly executing zero hand grinder calibration after cleaning helps maintain precise grind settings for optimal brewing results.
If your grinder makes unusual sounds or the grinding feels uneven, carefully disassemble and inspect the components again. Often, a small misalignment or an incorrectly positioned washer is responsible for post-cleaning performance issues.
Quick Cleaning Methods for Daily Maintenance
Between deep cleanings, implementing simple daily maintenance habits can significantly extend the intervals between major cleanings while maintaining optimal performance.
After Each Use:
– Tap the sides of your grinder gently to dislodge grounds trapped in the burrs
– Use a small brush to sweep away visible coffee particles from the catch cup
– Wipe the exterior with a dry cloth to remove fingerprints and coffee dust
– Leave the hopper empty until your next use to prevent oil transfer
Quick Burr Cleaning (Weekly):
– Remove the handle and collection cup
– Use a soft brush to clean accessible parts of the burrs without disassembly
– Gently blow air (using a bulb blower, not compressed air) to remove particles
– Reassemble and adjust your grind setting if necessary
Time-Saving Tips:
– Keep a dedicated small brush stored with your coffee equipment
– Use a cloth dedicated exclusively to coffee equipment to prevent cross-contamination
– Store your grinder with components slightly loosened to prevent oils from cementing parts together
– Incorporate quick cleaning into your coffee routine while waiting for water to boil
These simple practices take just a few extra seconds but pay dividends in grinder longevity and coffee quality. Most mechanical coffee grinder designs benefit tremendously from these basic maintenance habits, even without frequent deep cleaning.
Remember that lighter roasts tend to produce less oil residue than darker roasts. If you primarily use light or medium roasts, you might extend your quick cleaning schedule slightly, while dark roast enthusiasts should be more vigilant about regular maintenance.
What to Avoid: Common Mistakes That Can Damage Your Grinder
Protecting your investment means knowing not just what to do, but what to avoid when cleaning your manual burr grinder. These common mistakes can compromise performance or cause permanent damage.
Never use rice to clean burr grinders. While this is a popular internet recommendation, rice is actually too hard for most burrs and can:
– Dull the cutting edges
– Cause microfractures in ceramic burrs
– Damage alignment mechanisms
– Void manufacturer warranties
Avoid excess water exposure, particularly on:
– Steel components (can rust even after drying)
– Wooden parts (can swell, warp, or crack)
– Bearing assemblies (can flush out lubricant)
– Areas with calibration mechanisms
Never use these cleaning agents:
– Bleach or harsh chemical cleaners
– Abrasive powders or scrubbing pads
– Strongly scented cleaners that can impart odors
– Alcohol-based products on plastic components
Additional practices to avoid:
– Placing any components in the dishwasher
– Using metal tools to scrape burrs clean
– Forcing parts together during reassembly
– Using compressed air at high pressure (can force debris deeper into mechanisms)
Understanding proper lubricating hand coffee grinder burrs techniques is important, but equally important is knowing when not to lubricate. Most quality manual grinders require minimal or no lubrication, and using the wrong products can contaminate your coffee with unpleasant flavors or odors.
When in doubt about a cleaning method, consult the manufacturer’s guidelines. Most premium grinder makers provide specific recommendations for their products, and following these ensures both optimal performance and warranty protection.
Troubleshooting: Solving Common Post-Cleaning Issues
Even with careful cleaning and reassembly, you may occasionally encounter performance issues. Here’s how to diagnose and address common problems.
Problem: Grinder feels unusually stiff or difficult to turn
– Solution: Check for proper burr alignment and ensure no grounds are trapped between burrs
– Solution: Verify that washers and spacers are correctly positioned
– Solution: Confirm grind setting isn’t too fine for casual testing
Problem: Inconsistent grind size after reassembly
– Solution: Ensure the burr is seated properly and fully secured
– Solution: Check that the adjustment mechanism is properly calibrated
– Solution: Verify the central shaft is straight and properly aligned
Problem: Parts won’t fit back together correctly
– Solution: Double-check orientation of all components against reference photos
– Solution: Inspect for small pieces that may have been overlooked during reassembly
– Solution: Ensure no coffee particles are interfering with connecting surfaces
Problem: Metal-on-metal sound during grinding
– Solution: Immediately stop and check burr alignment
– Solution: Look for missing washers or spacers
– Solution: Inspect for foreign objects caught between components
Fine Adjustment Hand Grinder, Precision Manual Grinder, Travel Coffee Grinder
Price range: $185.11 through $494.63 Select options This product has multiple variants. The options may be chosen on the product pageHand Burr Grinder, Hand Crank Coffee Grinder, Manual Espresso Grinder, Portable Coffee Grinder
Price range: $262.72 through $300.22 Select options This product has multiple variants. The options may be chosen on the product pageManual Burr Mill, Manual Coffee Grinder Stainless Steel, Manual Coffee Mill Grinder, Mechanical Coffee Grinder
Price range: $127.26 through $130.32 Select options This product has multiple variants. The options may be chosen on the product pageHand Burr Grinder, Manual Coffee Grinder Stainless Steel, Precision Manual Grinder
Price range: $183.64 through $187.52 Select options This product has multiple variants. The options may be chosen on the product page
For persistent issues after attempted troubleshooting, consult the manufacturer’s support resources. Most quality grinder companies offer detailed guides or customer service to help resolve maintenance-related problems.
Understanding how to properly maximize the lifespan of manual coffee grinders through effective troubleshooting and maintenance ensures your investment continues delivering exceptional coffee for years to come. Regular maintenance combined with prompt attention to any emerging issues will keep your grinder performing at its best.
Can You Use Cleaning Pellets in a Manual Burr Grinder?
Cleaning pellets (sometimes called grinder tablets) are specialized products designed to absorb coffee oils and remove residue from grinder burrs. While widely used for electric grinders, their suitability for manual grinders deserves special consideration.
These pellets work by being ground just like coffee beans. As they pass through the grinder, they absorb oils and carry away residue. They typically consist of food-safe materials like wheat, barley, and other starches—essentially functioning as edible sponges for coffee oils.
For manual grinder owners, cleaning pellets offer a few advantages:
– They can reach areas difficult to access during manual cleaning
– They’re effective at absorbing oils without disassembly
– They provide a chemical-free cleaning option
However, consider these important limitations:
– Cleaning pellets don’t replace the need for periodic deep cleaning
– They primarily address oils, not compacted grounds or dust
– Some manual grinders with ceramic burrs may not be suitable for pellet use
– The resistance when grinding pellets may be higher than with coffee beans
If you choose to use cleaning pellets, follow these guidelines:
1. Verify compatibility with your specific grinder model
2. Use only as directed on the package (typically grinding them as you would coffee)
3. Follow with a small amount of sacrificial coffee to remove any residual pellet material
4. Still perform regular brush cleaning and periodic deep cleaning
Understanding how long manual coffee grinders last often relates directly to proper maintenance practices, including appropriate use of cleaning aids like pellets when suitable for your specific model.
Does a Clean Grinder Really Make Better Coffee?
The difference between coffee ground in a well-maintained grinder versus a neglected one isn’t merely theoretical—it’s noticeable in your cup. But what exactly changes when you brew with a clean grinder?
First, flavor clarity improves dramatically. Coffee oils turn rancid relatively quickly, and even small amounts of old oil can impart stale, bitter notes that mask the desirable characteristics of your beans. This is particularly noticeable with light and medium roasts, where subtle fruit and floral notes can be easily overwhelmed by off-flavors from built-up residue.
Clean burrs also provide more consistent particle size distribution. Even minor buildup on burr edges can create more “fines” (very small particles) that over-extract and introduce bitterness. Simultaneously, residue can prevent proper cutting of some beans, leading to larger particles that under-extract and add sourness.
In practical terms, users typically notice:
– Brighter, more distinct flavor notes
– Better separation of flavor characteristics
– Improved sweetness and reduced bitterness
– More consistent results between brews
– Enhanced aroma during both grinding and brewing
The difference becomes most apparent when switching between different coffee varieties. A clean grinder allows each new bean to express its unique characteristics without carrying flavors from previous coffees. This is especially important when alternating between distinctly different beans, such as moving from a dark, chocolatey roast to a bright, fruity Ethiopian variety.
Precision manual grinder users often report the most noticeable improvements from regular cleaning, as these high-end tools are specifically designed to deliver exceptional grind consistency that can be compromised by even minimal buildup.
Premium Maintenance: Going Beyond Basic Cleaning
For coffee enthusiasts who have invested in high-quality manual grinders, implementing advanced maintenance practices can further enhance performance and extend equipment life beyond the basics of routine cleaning.
Burr Seasoning and Care:
Newly cleaned burrs benefit from proper “seasoning”—running a small amount of coffee beans through before brewing your next cup. This applies a minimal protective oil layer that helps the burrs perform optimally without affecting flavor. Choose a moderate-priced bean for this process rather than your premium single-origin coffees.
Optimal Storage Practices:
Between uses, store your manual grinder:
– In a dry environment with stable temperature
– Away from direct sunlight that can affect plastic components
– With the adjustment slightly loosened to reduce pressure on burrs
– Without coffee beans in the hopper to prevent oil transfer
Seasonal Maintenance Adjustments:
In humid seasons, consider more frequent cleaning and thorough drying to prevent moisture-related issues. Conversely, in very dry environments, metal components may benefit from minimal food-safe lubrication on moving (non-grinding) parts.
Calibration Maintenance:
High-precision grinders benefit from occasional recalibration to ensure the zero point (where burrs touch) remains accurate. This typically involves a simple adjustment procedure specific to your grinder model but maintains the accuracy of your grind settings over time.
Aesthetic Preservation:
For display-worthy manual grinders, particularly those with wood, brass, or copper components, specialized care extends beyond functional maintenance. Food-safe wood oils for handles and appropriate metal polishes for decorative elements keep your grinder looking as good as it performs.
By combining these advanced practices with regular cleaning, your manual burr grinder will remain a reliable tool for excellent coffee for many years. At Savor Suite, we believe exceptional coffee starts with properly maintained equipment, which is why we emphasize these care practices for all our premium grinders.

