
Introduction to Espresso Grind Adjustment
Achieving the perfect espresso shot begins with one crucial element: the grind. The size of your coffee grounds directly determines how water flows through your puck, affecting extraction time, flavor balance, and that beautiful crema on top. Even a tiny adjustment of just 0.1mm can dramatically transform your espresso from sour and watery to rich and complex.
When it comes to manual grinding, understanding how to make precise adjustments is what separates disappointing shots from cafe-quality results. This skill involves:
- Learning your grinder’s unique mechanics
- Making controlled, intentional adjustments
- Troubleshooting common issues that affect consistency
- Developing a systematic approach to finding the ideal setting
The process of “dialing in” your grind isn’t a one-time task but rather an ongoing conversation between you, your beans, and your equipment. As you develop this skill, you’ll gain an intuitive understanding of precision grind settings that will elevate every espresso you create. Let’s begin this journey toward espresso perfection.
Manual Grinder Fundamentals: Know Your Equipment
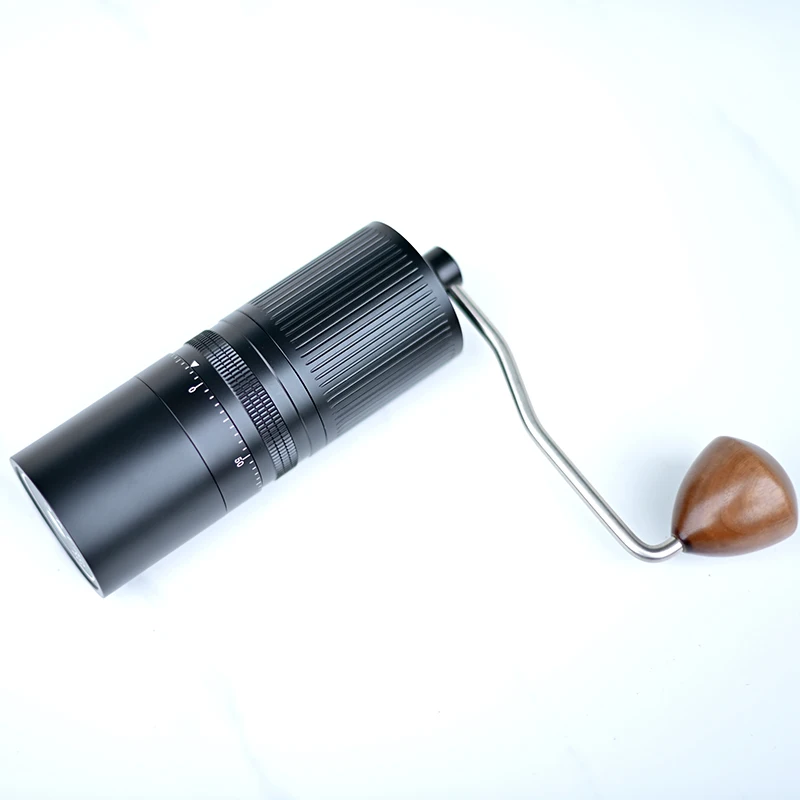
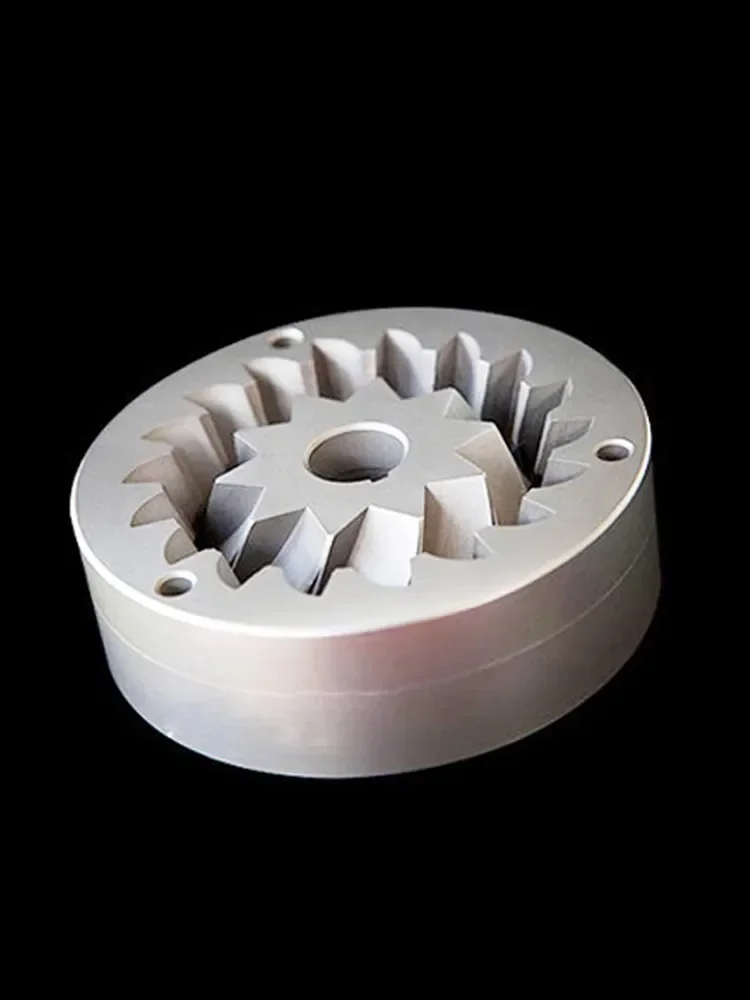
Before making any adjustments, you must understand the heart of your manual grinder: the burrs and adjustment mechanism. Most quality manual grinders feature either conical or flat burrs. Conical burrs have a cone-shaped center that fits into a ring, while flat burrs consist of two parallel rings with grinding surfaces facing each other. Each design offers different grinding characteristics, with flat burr hand grinders often providing exceptional consistency for espresso.
Your grinder’s adjustment system will fall into one of two categories:
Stepped adjustment systems click into preset positions, offering clear, repeatable settings. These are excellent for beginners as they provide definitive reference points but may limit fine-tuning between steps.
Stepless adjustment systems allow for infinite adjustment positions without predetermined clicks. While they offer ultimate precision for espresso, they can be challenging to return to previous settings exactly.
Most manual grinders use one of three common adjustment methods:
1. Collar adjustments – where you twist the top or bottom collar to change settings
2. Dial systems – featuring a dedicated adjustment wheel
3. Click settings – with numbered or marked positions
To interpret your grinder’s indicators, check if it uses numbers, dots, or other markings to denote settings. Remember that on most grinders, clockwise movement creates a finer grind while counter-clockwise produces a coarser result—though always verify this with your specific model.
Essential Preparation: Setting Up for Success
Before adjusting your grind, proper preparation ensures accurate, repeatable results:
Clean your grinder thoroughly. Old grounds and oil buildup affect consistency and flavor. Remove all grounds from the burrs, chambers, and adjustment mechanism using a small brush. Deep cleaning your manual grinder regularly prevents flavor contamination and ensures smooth operation.
Gather the necessary tools. You’ll need a digital scale with 0.1g precision, a timer, a notebook for tracking settings, and fresh beans roasted within 2-4 weeks.
Find your reference point. The “zero point” is where the burrs just touch—a crucial reference for all adjustments. To locate it safely:
– Start with your grinder empty
– Slowly adjust toward finer settings while gently turning the handle
– Stop when you hear the first light contact between burrs
– Mark this as your zero pointCreate a baseline. From zero, back off by a set amount (typically 3-4 clicks or 1/4 turn for stepped grinders) to create a starting point for espresso. Record this position in your notebook as “espresso baseline.”
This methodical approach provides the foundation for your adjustment journey. Think of it as calibrating a precision instrument—which is exactly what your manual grinder is.
Step-by-Step Guide to Grind Adjustment
Now that you understand your equipment and have established a baseline, let’s walk through the adjustment process:
Select your starting point based on your baseline. For most espresso brewing, begin at your established espresso baseline setting. If you haven’t created one yet, start with burrs approximately the distance of a sheet of paper apart (roughly 0.1mm).
Identify the correct espresso texture. Properly ground espresso should resemble fine table salt or granulated sugar. Rub a small amount between your fingers—it should feel slightly gritty but not powdery or chunky.
Make directional adjustments. For most manual grinders:
– Turning clockwise = finer grind (numbers increasing)
– Turning counterclockwise = coarser grind (numbers decreasing)
Remember that finer means slower extraction, while coarser means faster extraction.
Use small increments. Make tiny adjustments—just 1/4 to 1/2 of a stepped click or about 5-10 degrees on a stepless system. Small changes have significant impacts on espresso flow.
Purge after adjustments. Always discard 2-3 grams of coffee after making an adjustment to clear any grounds retained at the previous setting.

Professional baristas know that consistency is key to reliable results. When adjusting your espresso grind, maintain the same pressure when turning the adjustment mechanism and try to make changes when the grinder is empty to avoid damaging the burrs.
The Dialing-In Process: Fine-Tuning Your Grind
Dialing in is where science meets art in espresso preparation. This methodical process helps you zero in on the perfect grind setting:
Start with consistent dosing. Use 18-20g of coffee for a standard double shot. Precise measurement ensures your adjustments affect only the variable you’re testing—the grind size.
Distribute and tamp evenly. Uneven distribution causes channeling, where water finds the path of least resistance through your puck, resulting in inconsistent extraction regardless of grind quality.
Pull your test shot. The standard benchmark is a 1:2 ratio (e.g., 18g coffee yielding 36g espresso) in 25-30 seconds. This timing isn’t arbitrary—it represents an extraction sweet spot for most coffees, as explained in our guide on the 30-second espresso rule.
Analyze your results:
– Shot too fast (under 20 seconds): Grind is too coarse
– Shot too slow (over 35 seconds): Grind is too fine
– Within range but tastes off: Fine-tune based on taste (see next section)Make incremental adjustments. Based on your analysis:
– For shots 5+ seconds too fast: Adjust 2 steps finer
– For shots 1-5 seconds too fast: Adjust 1 step finer
– For shots 1-5 seconds too slow: Adjust 1 step coarser
– For shots 5+ seconds too slow: Adjust 2 steps coarserRepeat the process. Pull another shot, analyze, and adjust again if needed. Record each setting and result in your notebook.
This iterative approach systematically narrows down your options until you find the sweet spot where time, ratio, and—most importantly—taste align perfectly.
Taste Assessment: Using Your Palate to Guide Adjustments
While timing provides useful benchmarks, ultimately your taste buds should guide your grind adjustments. Here’s how to interpret what you’re tasting:
| Extraction | Visual Cues | Taste Characteristics | Mouthfeel | Adjustment Needed |
|---|---|---|---|---|
| Under-extracted | Blonde, fast flow, thin crema | Sour, sharp, lemony, lacks sweetness | Thin, watery | Grind finer |
| Properly extracted | Medium brown, steady flow, thick crema | Sweet, balanced, complex, with pleasant acidity | Rich, silky, full | No adjustment needed |
| Over-extracted | Dark, slow drips, mottled crema | Bitter, astringent, burnt, hollow | Dry, harsh, powdery | Grind coarser |
Learning to identify these characteristics takes practice but becomes intuitive over time. Focus on sweetness as your north star—properly extracted espresso has natural sweetness that balances any acidity.
When tasting, ask yourself:
– Does the espresso taste bright but harsh? That’s under-extraction.
– Does it taste flat and bitter? That’s over-extraction.
– Does it have pleasant complexity with balanced sweetness? You’ve found your target.
The precision manual grinder options available today allow for incredibly subtle adjustments that can transform your espresso experience. By learning to correlate taste with grind settings, you’ll develop an intuitive understanding of how to adjust based on what you taste rather than just following numbers.
Common Challenges and Troubleshooting
Even with proper technique, you may encounter these common grind adjustment challenges:
Problem: Inconsistent shot times despite unchanged settings
– Solution: Check for bean freshness and consistency; different beans may require different settings
– Solution: Ensure consistent dosing and tamping pressure
– Solution: Clean your grinder thoroughly as residual grounds affect consistency
Problem: Stiff or slipping adjustment mechanism
– Solution: Clean thoroughly and remove any coffee residue from threads
– Solution: Apply minimal food-safe lubricant to external threads if recommended by manufacturer
– Solution: If persisting, disassemble according to manufacturer instructions for cleaning
Problem: Inconsistent grind particle sizes
– Solution: Check for worn or misaligned burrs
– Solution: Ensure the grinder is assembled correctly after cleaning
– Solution: Consider upgrading burrs if they’re damaged
Problem: Lost ideal setting
– Solution: Return to your zero point and count clicks/turns to your recorded baseline
– Solution: Pull a test shot and adjust incrementally
– Solution: Use visual comparisons with photos of previous successful grinds
If you continue experiencing issues, our detailed guide for troubleshooting espresso grind issues can help identify and resolve specific problems that might be affecting your results.
Maintaining Your Manual Grinder for Optimal Performance
Proper maintenance ensures consistent grind quality and extends your grinder’s lifespan:
Cleaning frequency should correlate with usage—weekly for daily users, monthly for occasional users. Coffee oils and fine particles build up on burrs and in adjustment mechanisms, gradually altering your grind consistency and making adjustments less predictable.
Essential cleaning checklist:
* Remove all beans and grind empty to clear retention
* Disassemble according to manufacturer instructions
* Brush burrs with a dedicated coffee grinder brush
* Clean threads on adjustment mechanisms
* Wipe down all chambers with a dry cloth
* For deeper cleaning, use grinder-specific cleaning tablets quarterly
Pay attention to warning signs that maintenance is needed: irregular grinding sounds, visible inconsistency in particle size, or increasing difficulty in making adjustments. These indicate it’s time for a thorough cleaning.
For complete details on keeping your grinder in peak condition, follow our manual burr grinder maintenance guide that covers model-specific techniques and recommended cleaning products.

All-Metal Hand Grinder, Flat Burr Hand Grinder, Manual Espresso Grinder, Precision Manual Grinder
Price range: $716.96 through $717.43 Select options This product has multiple variants. The options may be chosen on the product page
Fine Adjustment Hand Grinder, Precision Manual Grinder, Travel Coffee Grinder
Price range: $185.11 through $494.63 Select options This product has multiple variants. The options may be chosen on the product page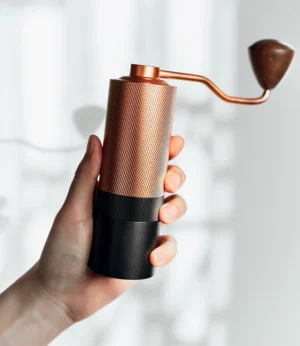

Hand Burr Grinder, Hand Crank Coffee Grinder, Manual Espresso Grinder, Portable Coffee Grinder
Price range: $262.72 through $300.22 Select options This product has multiple variants. The options may be chosen on the product page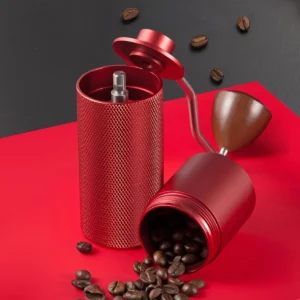
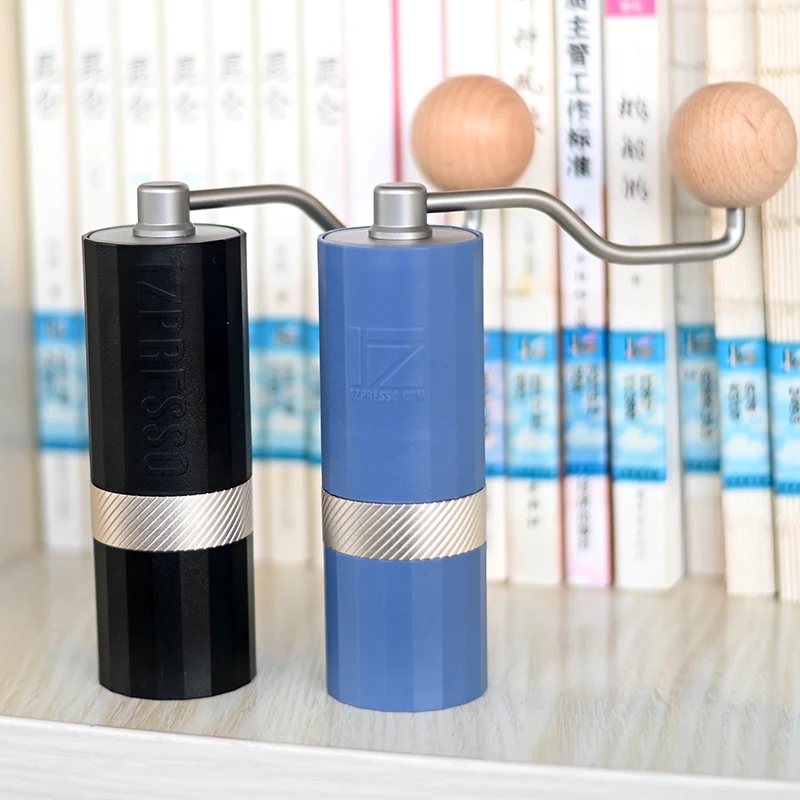
Hand Burr Grinder, Manual Coffee Grinder Stainless Steel, Precision Manual Grinder
Price range: $183.64 through $187.52 Select options This product has multiple variants. The options may be chosen on the product page
Manual Coffee Grinder Stainless Steel, Manual Espresso Grinder, Travel Coffee Grinder
Price range: $276.22 through $276.39 Select options This product has multiple variants. The options may be chosen on the product page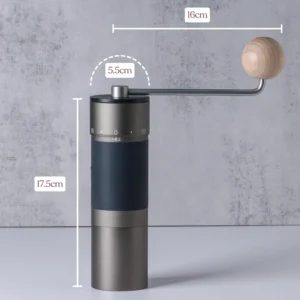
Hand Crank Coffee Grinder, Manual Coffee Grinder for Espresso, Manual Coffee Grinder Stainless Steel
$349.15 Select options This product has multiple variants. The options may be chosen on the product page
Advanced Considerations: Beyond the Basics
Once you’ve mastered basic adjustments, several additional factors can help you achieve even greater precision:
Bean variables significantly impact grind settings. Darker roasts typically require coarser settings than lighter roasts. Bean density varies by origin and altitude—denser beans often need finer grinding. Always be prepared to adjust when switching beans.
Environmental factors affect grinding more than most realize. Higher humidity causes beans to absorb moisture, often requiring a finer grind. Temperature fluctuations can change how oils distribute during grinding. Seasonal adjustments are normal and necessary.
Grinder seasoning occurs naturally over time. New burrs become more consistent after grinding 5-10 pounds of coffee as microscopic edges smooth out. This is why your grinder may perform differently when brand new versus after several weeks of use.
Revisit your settings regularly. Create a habit of checking and potentially adjusting your grind when:
– Opening a new bag of beans
– After significant weather changes
– When you notice changes in shot quality
Advanced users with fine adjustment hand grinders often experiment with slightly finer settings to highlight sweetness or slightly coarser settings to emphasize brightness. These subtle tweaks allow you to customize extraction to highlight specific bean characteristics.
Supplemental Content: Espresso Dialing-In FAQ
Do I need to adjust my grind for each new bag of coffee?
Yes, almost always. Different beans, roast levels, and freshness all affect how water flows through the grounds. Starting with your previous successful setting is fine, but expect to make at least minor adjustments.
What’s the difference between burr types for espresso grinding?
Conical burrs typically produce slightly more particle size variation, which some prefer for traditional espresso blends. Flat burrs generally create more uniform particles, often preferred for lighter roasts and single origins. Both can produce excellent espresso when properly adjusted.
How can I categorize different coffees based on grind requirements?
Generally, lighter roasts need finer grinds than darker roasts. Robusta beans typically need coarser grinds than arabica. Fresh beans usually require coarser grinds than older beans. Keep notes on these patterns to predict starting points for similar coffees.
How does a manual grinder compare to an electric grinder for espresso?
Quality manual espresso grinders often match or exceed mid-range electric grinders in consistency but require physical effort. They typically generate less heat (preserving flavors) and offer exceptional value for their performance level. High-quality manual grinders provide the precision necessary for excellent espresso.
Creating Your Personal Grind Setting Library
Documenting your successful grind settings creates a valuable resource that saves time and coffee. A simple but effective tracking system helps you quickly dial in new coffees and replicate your best results.
Create a notebook or digital document with entries that include:
– Bean name, roaster, and roast date
– Grinder setting (with reference to your zero point)
– Dose weight and yield weight
– Extraction time
– Taste notes and satisfaction rating
– Date of brewing
Here’s a simple example entry:
“Ethiopian Yirgacheffe, ABC Roasters, roasted 10/15. Setting: 3.5 from zero. 18g in, 36g out, 28 seconds. Bright, floral, honey sweetness. Rating: 9/10.”
This documentation becomes increasingly valuable as you collect more data. You’ll start noticing patterns—perhaps all washed Ethiopian coffees work well around the same setting, or that you prefer certain beans extracted slightly faster than the standard time.
For those seeking even more precision, specialized manual coffee grinders for espresso provide the fine adjustment capabilities needed to capture these subtle differences in your records.
By maintaining this personal library, you’ll develop a deeper understanding of how different variables interact, turning the sometimes frustrating process of dialing in into an enjoyable, predictable craft.