

The Importance of Fresh Ground Coffee for AeroPress Adventures
There’s simply no comparison between coffee brewed with pre-ground beans and the rich, aromatic experience of freshly ground coffee. When coffee beans are ground, they immediately begin releasing the volatile compounds, essential oils, and aromatics that give coffee its distinctive flavor and character. Within just 15-30 minutes after grinding, these compounds start to oxidize and deteriorate significantly.
This freshness factor becomes even more crucial when brewing with an AeroPress. The unique pressure brewing method of the AeroPress excels at extracting these delicate flavor compounds efficiently – but only if they’re present in the first place. Pre-ground coffee, having lost much of its aromatic oils, simply can’t deliver the same depth of flavor that the AeroPress is capable of producing.
While traveling, maintaining this freshness becomes particularly challenging. Hotel rooms, campsites, and borrowed kitchens rarely come equipped with quality grinding equipment. Yet those on-the-go moments – watching sunrise from a mountain overlook or enjoying a quiet moment in a foreign city – often call for the best coffee experiences.
The difference is something you can test yourself. Try brewing two AeroPress coffees side by side – one with beans ground a week ago and another with beans ground minutes before brewing. The freshly ground cup will demonstrate noticeably more aroma, flavor complexity, and that distinctive brightness that precision grind settings help achieve in great coffee.
Understanding the Perfect Grind Size for AeroPress
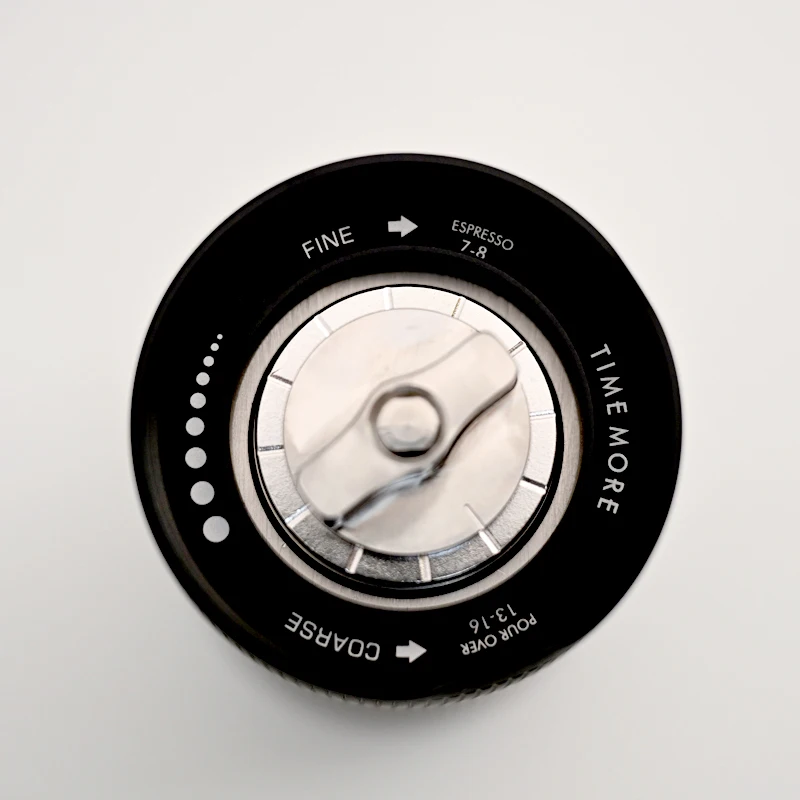
Getting your grind size right is perhaps the most critical factor in brewing excellent AeroPress coffee, especially when you’re away from home. The ideal AeroPress grind falls between medium-fine and fine – somewhat finer than typical drip coffee but coarser than espresso.
This specific grind size strikes the perfect balance for the AeroPress brewing method:
– Too coarse: Water flows through too quickly, resulting in weak, under-extracted coffee
– Too fine: Creates excessive resistance, making pressing difficult and potentially resulting in bitter over-extraction
– Just right: Similar to table salt consistency, allowing 20-30 seconds of gentle pressure during the plunging process
The way you brew with your AeroPress also affects your ideal grind size. Standard method brewing (filter cap down) generally works best with a medium-fine grind. If you prefer the inverted method, you might go slightly finer since the longer steep time benefits from a more controlled extraction rate.
Water temperature further influences your grind size decision. Using water that’s right off the boil (about 200°F/93°C) works well with a medium-fine grind, while slightly cooler water (175-185°F/80-85°C) may require a slightly finer grind to ensure proper extraction within the typical 1-2 minute brew time.
Understanding the ultimate espresso grind size chart gives you valuable reference points, as AeroPress grind should be slightly coarser than espresso but finer than pour-over. The visual and tactile aspects of your ground coffee tell you much about its suitability – it should feel slightly gritty between your fingers but not powdery, and should clump slightly but break apart easily.
The relationship between extraction, grind size, and brew time shows why mastering espresso grind size concepts applies to AeroPress brewing as well – both methods rely on pressure and require careful attention to particle consistency for optimal results.
Why Manual Burr Grinders Are Ideal for Travel
For the coffee enthusiast on the move, manual burr grinders represent the perfect intersection of quality, portability, and convenience. Their travel advantages over electric alternatives are substantial:
- No electricity required – perfect for camping, remote locations, or international travel with different voltage systems
- Compact size and lightweight design – many quality manual grinders weigh under 12 ounces and can fit inside the AeroPress plunger for efficient packing
- Exceptional durability – fewer moving parts and solid construction withstand the rigors of travel
- Silent operation – grind early morning coffee without disturbing travel companions or hotel neighbors
Beyond these practical benefits, manual burr grinders deliver superior coffee quality through consistent particle size. Unlike blade grinders that chop beans unevenly (producing both fine powder and large chunks), burr grinders crush beans between two textured surfaces, creating uniform particles that extract at the same rate.
This consistency is particularly important for AeroPress brewing, where the pressure extraction method amplifies both the positive and negative aspects of your grind quality. The adjustability of good manual burr grinders also allows you to dial in that perfect medium-fine consistency that AeroPress requires.
When comparing manual versus electric grinder options for AeroPress travel, the manual burr grinder emerges as the clear winner for the serious travel coffee enthusiast who refuses to compromise on quality while away from home.
Essential Features to Look for in a Travel Coffee Grinder
When selecting the perfect travel companion for your AeroPress coffee kit, certain features separate merely adequate grinders from those that will deliver excellent results cup after cup, no matter where your adventures take you.
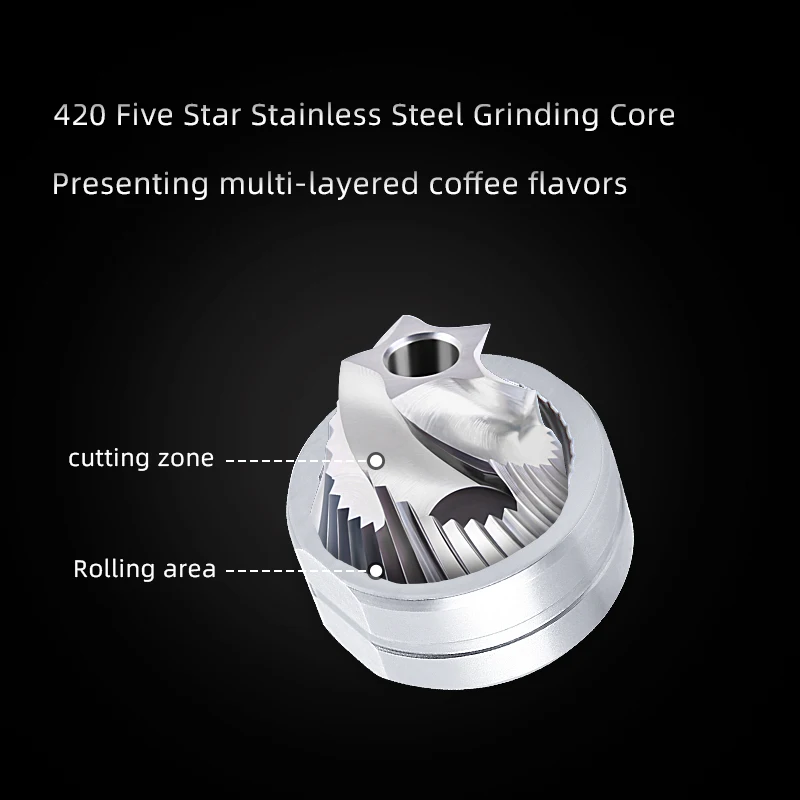
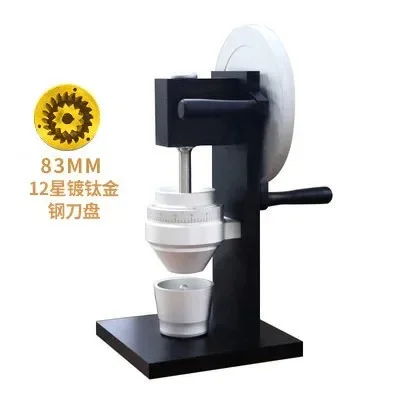
Burr Material and Quality
- Ceramic burrs: Lightweight, don’t transfer heat, but more brittle
- Stainless steel burrs: More durable for travel, slightly heavier, excellent cutting performance
- Burr design: Look for precision-cut burrs with sharp edges that produce consistent particle size
Grind Adjustment Mechanism
- Click settings: Provide repeatable precision and prevent unwanted adjustment during travel
- Stepless adjustment: Offers infinite settings but may shift during transport
- Adjustment range: Ensure the grinder can achieve the medium-fine consistency AeroPress requires
- Adjustment retention: Grinder should maintain settings when disassembled for cleaning
Size and Weight Considerations
- Optimal dimensions: Under 6 inches tall and 2-3 inches in diameter for packability
- Weight range: Ideal travel grinders weigh 8-14 ounces, balancing portability with stability
- Compact design: Some grinders are specifically sized to nest inside the AeroPress plunger
Capacity and Efficiency
- Bean capacity: 20-30 grams is ideal (enough for 1-2 AeroPress brews)
- Grinding speed: Efficient models require 60-90 seconds for an AeroPress-sized portion
- Handle design: Longer handles provide better leverage for faster grinding with less effort
Durability Features
- Body material: Aircraft-grade aluminum or stainless steel withstands travel conditions
- Connection points: Robust threading or connections that won’t wear out or cross-thread
- Bearing quality: Smooth operation with minimal wobble indicates quality construction
Understanding these essential features of compact coffee grinders helps you make an informed decision that aligns with your specific travel needs, whether you’re a business traveler with limited suitcase space or a backpacker counting every ounce.
Top 5 Portable Coffee Grinders for AeroPress Travelers
Finding the perfect travel grinding companion for your AeroPress involves balancing size, weight, grind quality, and durability. Here are our top recommendations across different price points and traveler profiles:
1. Ultra-Compact Premium Option
Key Features:
– Precision-machined stainless steel burrs for consistent medium-fine grinds
– Weighs just 9.5 ounces
– Fits perfectly inside AeroPress plunger for space-saving packing
– 20g capacity (perfect for single AeroPress brew)
– Fold-away handle with excellent leverage
– Premium price range, but built to last decades
Ideal For: Minimalist travelers, backpackers, and those who value top-tier grind quality despite the higher investment.
2. Mid-Range Workhorse
Key Features:
– Ceramic conical burrs with impressive consistency
– Weighs 11 ounces with durable aluminum body
– 15 click settings for precise grind adjustment
– 25g capacity for slightly larger brews
– Comfortable silicone grip for stable grinding
– Mid-range price point with excellent value
Ideal For: Regular travelers seeking reliability and good grind quality without the premium price tag.
3. Budget-Friendly Option
Key Features:
– Stainless steel burrs with good consistency for the price
– Lightweight plastic and steel construction at 10 ounces
– 12 grind settings covering AeroPress range well
– 20g capacity with clear grounds container
– Tool-free disassembly for easy cleaning
– Budget-friendly price point
Ideal For: Occasional travelers or those new to hand grinding who want to test the waters without major investment.
4. Ultra-Durable Adventure Grinder
Key Features:
– All-metal construction designed for rugged outdoor use
– Steel burrs resist damage from impacts
– Sealed bearing assembly prevents dust and moisture issues
– 30g capacity for sharing coffee
– Slightly heavier at 14 ounces but virtually indestructible
– Upper-mid price range
Ideal For: Outdoor enthusiasts, campers, and adventure travelers who need equipment that can withstand rough conditions.
5. Compact Electric Option
Key Features:
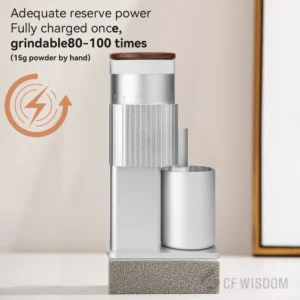
– Rechargeable battery provides 15-20 grinds per charge
– Ceramic burrs with good consistency
– More weight at 1 pound but eliminates manual effort
– 20g capacity with one-button operation
– USB charging for universal power access
– Premium price point
Ideal For: Business travelers or those with hand strength limitations who still want fresh ground coffee on the go.
Our portable coffee grinder collection includes these and other models specifically selected for travel compatibility. For those focusing specifically on hand operation, our handheld coffee grinder selection offers additional options to consider.

Fine Adjustment Hand Grinder, Precision Manual Grinder, Travel Coffee Grinder
Price range: $185.11 through $494.63 Select options This product has multiple variants. The options may be chosen on the product page

Hand Burr Grinder, Hand Crank Coffee Grinder, Manual Espresso Grinder, Portable Coffee Grinder
Price range: $262.72 through $300.22 Select options This product has multiple variants. The options may be chosen on the product page
All-Metal Hand Grinder, Compact Coffee Mill, Hand Burr Grinder, Travel Coffee Grinder
$212.33 Select options This product has multiple variants. The options may be chosen on the product page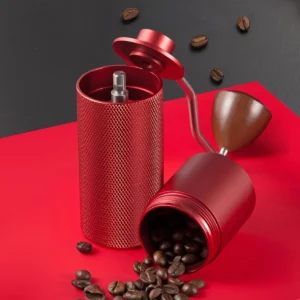
Hand Burr Grinder, Manual Coffee Grinder Stainless Steel, Precision Manual Grinder
Price range: $183.64 through $187.52 Select options This product has multiple variants. The options may be chosen on the product page
Ceramic Burr Coffee Grinder, Hand Burr Grinder, Hand Crank Coffee Grinder, Manual Coffee Bean Grinder
Price range: $59.17 through $59.96 Select options This product has multiple variants. The options may be chosen on the product page
Handheld Burr Grinder, Manual Coffee Mill Grinder, Travel Coffee Grinder
$191.45 Select options This product has multiple variants. The options may be chosen on the product page
Perfecting Your Grinding Technique for Travel
Grinding coffee effectively while traveling requires slightly different techniques than you might use at home. These approaches help you maintain consistency without your usual amenities:
Measuring without scales: Use the AeroPress scoop as your measurement tool – one level scoop equals approximately 14 grams of whole beans, perfect for a single strong cup. Alternatively, fill the grinder’s chamber to a consistent level each time.
Stabilize your setup: The key to efficient grinding is stability. Sit down and hold the grinder between your knees, or brace it against a firm surface like a countertop edge or table.
Proper hand positioning: Hold the grinder body with your non-dominant hand while turning the handle with your dominant hand. Keep your grip on the body firm but not tight, which helps maintain stability without causing fatigue.
Consistent cranking motion: Maintain a steady, moderate pace rather than fast, irregular bursts. This produces more consistent results and is actually more efficient overall.
Track your settings: Many travel grinders lose their setting when disassembled. Take a photo of the setting position or count the clicks/turns from zero to maintain consistency across multiple brewing sessions.
Quiet grinding technique: When sharing accommodations, wrap the grinder in a towel or clothing item to dampen noise, and grind in the bathroom with the door closed to minimize disturbance.
Understanding the ideal grind settings for AeroPress hand grinders helps you adjust your technique based on your specific equipment. Most quality grinders require about 45-60 seconds of steady cranking for an AeroPress-sized portion at medium-fine setting.
Packing and Protecting Your Coffee Gear
Smart packing makes traveling with coffee equipment much more practical and protects your investment in quality gear. Here’s how to maximize space efficiency and minimize risk:
Nesting configuration: Most manual grinders are designed to fit perfectly inside the AeroPress plunger. Place the grinder in first, then add a small bag of beans, and cap with the AeroPress plunger lid for a compact, self-contained unit.
Protection strategy: Use clean socks to wrap individual components, which both protects them and maximizes suitcase space. For particularly fragile grinders, consider using a small hard case or repurposing a sturdy sunglasses case.
Bean storage solutions: Carry beans in valve-sealed bags that release CO₂ but prevent oxygen entry. For trips under a week, consider pre-measuring daily portions into small silicone bags to simplify your morning routine.
Minimalist kit components:
- AeroPress and grinder (nested configuration)
- Collapsible kettle or heat-resistant container
- Small digital scale (optional)
- 2-4 paper filters in protective case
Coffee beans in valve bag
Dual-purpose items: Use your travel mug as both brewing water container and drinking vessel. A bandana can serve as both a coffee filter in emergencies and for wiping equipment clean.
For those seeking ultra-portability, consider investing in specialized compact coffee mills that are specifically designed with travel considerations in mind, often featuring removable handles and protective cases.
Troubleshooting Common Grinding Issues While Traveling
Even the best travel coffee setups occasionally present challenges. Here’s how to address common grinding issues on the go:
Inconsistent Grind Size
Problem: Your coffee grounds contain both fine powder and larger chunks.
Solution: Check that the burr is properly centered and all components are fully tightened. Many grinders have a stabilizing mechanism that may have loosened during travel. Also ensure you’re maintaining consistent pressure while grinding.
Slipping Burrs or Jammed Beans
Problem: The mechanism slips or suddenly stops turning.
Solution: Remove the handle and clear any jammed beans. With some darker roasts or oily beans, pre-breaking larger beans before adding them to the grinder can prevent jamming. Ensure all connection points are clean and free of old coffee residue.
Adjusting for Different Water Types
Problem: Your usual grind setting produces under-extracted or over-extracted coffee with unfamiliar water.
Solution: Mineral content in water significantly affects extraction. With mineral-rich hard water, use a slightly coarser grind to prevent over-extraction. With soft or filtered water, you might need a slightly finer grind.
Sudden Change in Required Effort
Problem: Grinding suddenly becomes much harder without changing settings.
Solution: Immediately clean the burr set as coffee oils and fine particles have likely built up. In humid environments, this happens more quickly. Use a small brush or toothpick to clean between burr teeth.
Quality hand burr grinders generally experience fewer issues than cheaper alternatives, particularly in maintaining consistent settings during travel. Their precision-manufactured components tend to stay aligned even when subjected to the inevitable bumps and jostling of travel.
Alternative Grinding Solutions When You’re in a Pinch
Sometimes even the best-laid plans go awry. When you find yourself without your grinder or face unexpected issues, these alternatives can save your coffee experience:
Pre-grinding strategy: If you know you’ll have limited grinding options, pre-grind coffee just before your trip and store it in small, airtight containers (ideally with one-way valves). While not optimal, coffee pre-ground 3-5 days earlier still outperforms most commercially pre-ground options. Vacuum-sealed individual portions can extend acceptable quality to about a week.
Local café solutions: Many specialty coffee shops are happy to grind beans for an AeroPress if you purchase from them and specify the brewing method. Bring your AeroPress with you to show the barista if there’s any confusion about grind size.
Emergency improvisation: In true emergencies, placing beans in a sturdy zip-top bag and crushing them with a rolling pin or flat bottle bottom can produce a workable coarse grind. This method works better for French press brewing than AeroPress but can produce passable results.
Maximizing pre-ground quality: If using pre-ground coffee, slightly shorter brew times (60-75 seconds instead of the typical 90-120) and slightly cooler water help mitigate the over-extraction that often occurs with the excessive fines in pre-ground coffee.
For more comprehensive approaches to grinding coffee on the go, consider whether alternative brewing methods might better accommodate your situation when ideal grinding isn’t possible.
How Different Coffees Respond to Portable Grinding
Not all coffee beans behave the same way in manual grinders, especially compact travel models. Understanding these differences helps you select suitable coffees for your journey:
Roast level impacts: Darker roasted beans are more brittle and generally easier to grind manually, requiring less force. However, their oils can build up on burrs more quickly, necessitating more frequent cleaning. Light roasts are denser and harder, demanding more effort but producing less residue on your equipment.
Origin characteristics: Different growing regions produce beans with varying density and hardness. As a general rule, higher-grown coffees (often from regions like Ethiopia, Kenya, and Colombia) tend to be denser and slightly more challenging to grind by hand.
Age considerations: Very fresh beans (1-7 days off roast) release significant CO₂ and can create inconsistent grinding resistance. Beans in the 7-21 day range after roasting typically grind most predictably in manual grinders. Older beans become increasingly dry and may produce more dust and inconsistent particles.
Travel-friendly recommendations: Medium-roast beans from Brazil, Guatemala, or Colombia often provide an excellent balance of grinding ease and flavor complexity while being forgiving if grind consistency varies slightly. These origins typically present fewer challenges for portable grinding equipment.
Adjusting your AeroPress grind settings during travel becomes easier once you understand how different bean characteristics affect your specific grinder. Slightly looser settings for dense light roasts and tighter settings for more brittle dark roasts often produce the best results.
Can Manual Grinders Match Electric Quality? (A Practical Assessment)
Many coffee enthusiasts wonder if their travel setup must compromise quality compared to their home equipment. The answer is both encouraging and nuanced.
High-quality manual grinders can absolutely match or even exceed the grind consistency of electric grinders in the same price range. Premium manual grinders in the $100-150 range often deliver particle consistency comparable to electric burr grinders costing $200-300. This is primarily because manual grinders can dedicate more of their manufacturing cost to burr quality rather than motors and electronics.
Where manual grinders excel:
– Grind consistency at medium to medium-fine settings (ideal for AeroPress)
– Zero retention of grounds between uses (no stale coffee in the next batch)
– Precision adjustment at the critical AeroPress grind range
– Durability and longevity (fewer components to fail)
Where electric grinders maintain advantages:
– Speed and convenience for larger batches
– Easier grinding of very light, dense beans
– More comfortable for those with hand strength limitations
– Typically wider range of effective settings for multiple brew methods
For the specific context of AeroPress brewing while traveling, a quality manual grinder represents no compromise whatsoever in the cup. Many coffee professionals actually prefer to use ultimate guide portable grinders for AeroPress brewing even at home, recognizing their superior performance in this specific application.
Your Complete AeroPress Travel Coffee Routine
Integrating your freshly ground coffee into an efficient travel brewing workflow makes the entire experience more enjoyable. Here’s a streamlined morning routine that incorporates all the elements we’ve discussed:
Evening Prep (2 minutes)
– Fill kettle or water vessel and set near heating source
– Set out AeroPress components and grinder
– Pre-measure beans into grinder if noise is a concern
Morning Routine
1. Heat water (2-3 minutes depending on method)
2. While water heats, grind coffee (60-90 seconds)
3. Assemble AeroPress and add ground coffee (30 seconds)
4. Add water and stir briefly (30 seconds)
5. Steep according to preference (30-90 seconds)
6. Press and enjoy (30 seconds)
Total active time: 4-6 minutes from start to finished cup
Efficiency tips:
– Use the inverted AeroPress method to prevent dripping while waiting for water to heat
– Clean the grinder by adding a few drops of water and grinding to remove residue
– Dry components quickly by pressing a paper towel between AeroPress plunger and chamber
– Create a dedicated “coffee kit” bag that stays packed between uses
This routine works virtually anywhere – from hotel rooms using the in-room kettle to campsites with a portable stove. The entire process, from whole beans to exceptional cup, takes just 5-7 minutes once you’ve established your routine.
Quality manual coffee grinders for espresso also excel at producing the medium-fine grind needed for AeroPress, making them versatile travel companions for various brewing methods.
Grinding your own coffee during travel transforms an ordinary morning into a moment of genuine pleasure. With the right tools and techniques, that perfect cup of AeroPress coffee becomes a reliable constant no matter where your adventures take you.