
Why Grind Size Matters for Your Travel AeroPress Experience
The secret to a perfect AeroPress coffee lies in one crucial element that many travelers overlook: the grind size. When you’re brewing on the go, this detail becomes even more important than it is at home.
Grind size directly impacts how water extracts flavors from your coffee. Too fine, and you’ll get bitter, over-extracted coffee that’s hard to press through. Too coarse, and you’ll end up with sour, under-extracted coffee that tastes weak and watery. With the AeroPress’s unique brewing system—combining pressure, paper filtration, and short brew times—getting the grind right is essential.
While brewing at home gives you controlled conditions, travel throws in variables that make proper grinding even more critical:
– Inconsistent water temperatures in hotel rooms
– Limited access to proper equipment
– Time constraints during your adventures
– Variable water quality in different locations
The AeroPress’s versatility with different brewing methods (standard, inverted, concentrated, or diluted) also means grind size becomes your main control point when other factors are less predictable.
Even Alan Adler, the AeroPress inventor, emphasizes that proper grinding unlocks the full potential of this simple brewing device. The science confirms this—coffee extraction is fundamentally about surface area contact with water, which is directly determined by how finely you grind your beans.
Understanding the precision grind settings for espresso can help you appreciate the similar principles at work in AeroPress brewing, though with slightly different requirements for optimal extraction.
Finding the Perfect AeroPress Grind Size for On-The-Go Brewing
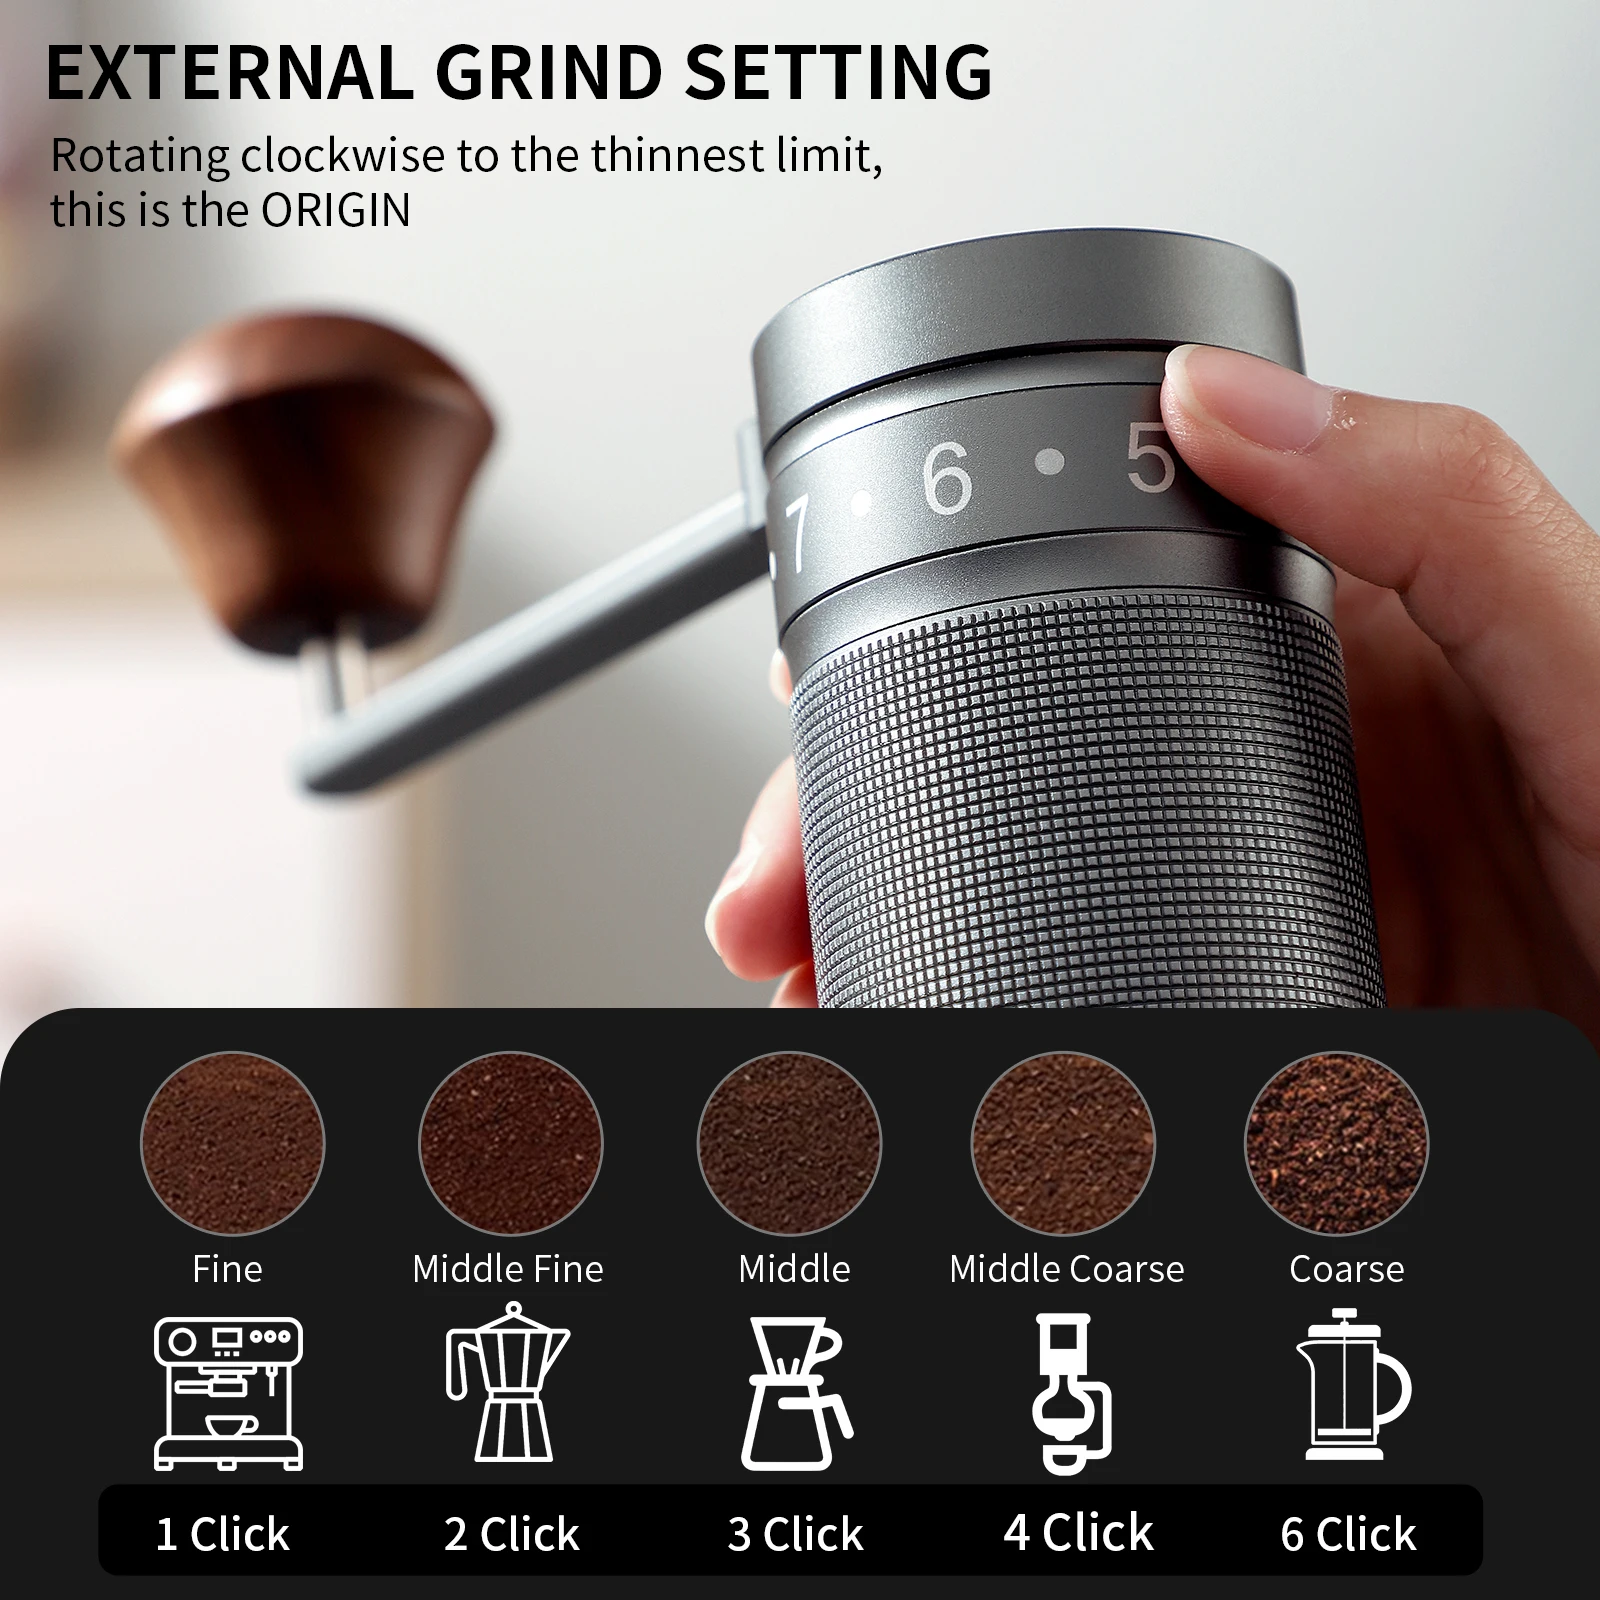
For most travel AeroPress brewing, a medium-fine grind delivers the best balance of flavor, extraction efficiency, and ease of pressing. This optimal grind should resemble fine sand or table salt in texture—not as fine as espresso but definitely finer than typical drip coffee.
When you rub this grind between your fingers, it should feel slightly gritty but not harsh or powdery. Visually, individual particles should be just barely distinguishable to the naked eye. This grind size creates the ideal balance between extraction surface area and water flow rate.
Why is this medium-fine grind so effective for travel brewing? It extracts quickly enough for a flavorful cup in just 1-2 minutes, yet isn’t so fine that it clogs your filter or requires excessive pressure to push through—important considerations when brewing in hotel rooms, campsites, or airport lounges.
Your brewing method affects the ideal grind size slightly:
| Brewing Method | Recommended Grind | Visual Comparison |
|---|---|---|
| Standard AeroPress | Medium-fine | Fine sand |
| Inverted method | Medium | Slightly coarser than fine sand |
| Concentrated/espresso-style | Medium-fine to fine | Finer than table salt |
| Longer steep time | Medium | Coarser than table salt |
The official AeroPress guidance suggests a grind “similar to fine drip coffee,” but many enthusiasts find going slightly finer produces better results, especially when brewing on the go. The finer grind helps compensate for the shorter brew times often needed when traveling.
With practice, you’ll develop an instinct for the correct grind setting for espresso methods versus what works best for your AeroPress. When in doubt, slightly finer is better than too coarse, as you can always adjust by using less pressure or shorter brew time.
Understanding the optimal grind size specifications for your particular brewing style can dramatically improve your travel coffee experience, turning ordinary hotel mornings into specialty coffee moments.
Top Travel Grinders for AeroPress Enthusiasts
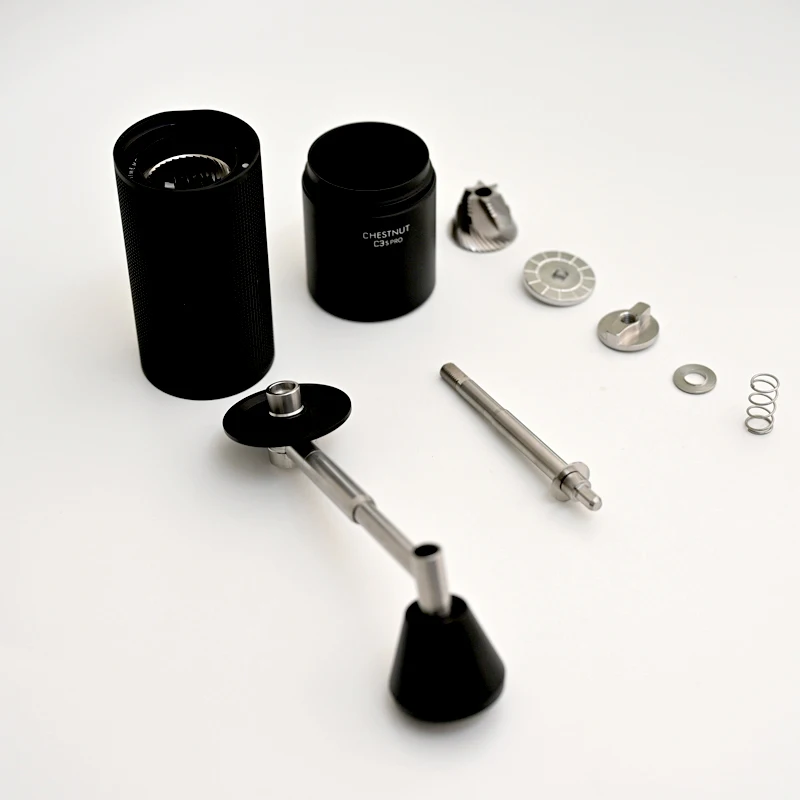
When it comes to grinding coffee on the go, not all portable grinders are created equal. For AeroPress brewing, a quality burr grinder makes all the difference—even when traveling.
Burr grinders crush beans between two textured surfaces (burrs) set to a specific distance apart, creating uniform particle sizes crucial for even extraction. This consistency is particularly important for AeroPress, where extraction happens quickly under pressure. In contrast, blade grinders chop beans randomly, producing inconsistent particles that extract at different rates, leading to mixed flavors.
The ideal travel grinder for AeroPress needs to balance several key factors:
– Small size and light weight for packability
– Durable construction to withstand travel conditions
– Consistent grind output for reliable brewing
– Easy adjustment for different grind settings
– Simple cleaning and maintenance on the go
Several standout models have earned reputations among traveling coffee enthusiasts:
Premium Options:
– High-precision stainless steel burr sets
– Multiple fine adjustment settings (15-40 clicks)
– Aircraft-grade aluminum or stainless steel construction
– Fold-out handles for compact packing
– Some models designed to fit inside the AeroPress chamber for maximum space efficiency
Mid-Range Options:
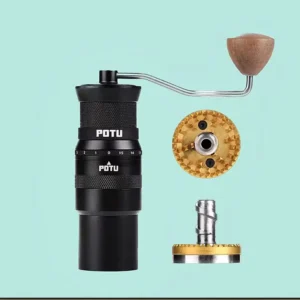
– Ceramic burr designs offering good consistency
– Lightweight materials with reinforced components
– 10-20 grind adjustment settings
– Good balance between performance and portability
Budget-Friendly Options:
– Simplified burr mechanisms
– Fewer adjustment settings but still capable of medium-fine grinds
– More plastic components but still durable enough for occasional travel
Most quality travel grinders provide enough capacity for 1-2 AeroPress brews (15-25g of coffee) per filling, which is perfect for individual brewing. Steel burrs tend to perform better in travel situations due to their durability, though ceramic burrs can offer excellent grind consistency when handled carefully.
For comprehensive information on the best portable grinding options, explore our ultimate guide to portable grinders for AeroPress which details the performance characteristics of various models.
Pre-Ground vs. Fresh-Ground: Making the Right Choice for Your Trip
One of the biggest decisions for coffee-loving travelers is whether to bring whole beans and a grinder or simply use pre-ground coffee. Each approach has distinct advantages depending on your trip circumstances.
Option 1: Bringing a Travel Grinder
– Pros: Fresh flavor, optimal extraction, flexibility to adjust grind for different conditions
– Cons: Extra weight/space (typically 8-12oz/230-340g), additional time required for grinding
Option 2: Pre-grinding Before Your Trip
– Pros: Convenience, no extra equipment needed, can use your high-quality home grinder
– Cons: Flavor degradation (coffee loses 60% of aromatics within 15 minutes after grinding)
Option 3: Buying Pre-ground Locally
– Pros: Maximum convenience, no need to transport coffee
– Cons: Unpredictable grind size, often too coarse for optimal AeroPress brewing
For travelers serious about their coffee, the decision typically depends on trip length. For weekenders, pre-grinding just before departure and storing in an airtight container works reasonably well. For trips longer than 3-4 days, bringing a portable grinder generally delivers noticeably better results.
If you do pre-grind, consider these preservation tips:
– Use small, airtight containers and fill completely to minimize air exposure
– Package in individual serving portions to limit opening/closing the main supply
– Store away from heat, moisture, and direct sunlight
– Consider vacuum-sealed bags for maximum freshness
– Darker roasts generally maintain flavor better when pre-ground than lighter roasts
Your destination matters too—backpacking in remote areas might justify bringing a compact travel coffee grinder despite the weight, while urban destinations may offer freshly ground coffee from local cafés.
For those seeking the ideal balance of portability and quality, exploring dedicated portable coffee grinder options can provide the perfect solution for maintaining fresh flavor without weighing down your luggage.
Adjusting Your Brewing Technique for Non-Ideal Travel Grinds
Even with careful planning, travel often means working with less-than-perfect grinds. The good news is that the AeroPress is remarkably forgiving when you know how to adjust your brewing technique to compensate.
When Your Grind is Too Fine
This common issue with pre-ground “espresso” coffee can lead to clogged filters, excessive resistance, and bitter over-extraction. To compensate:
– Use cooler water (175-185°F/80-85°C instead of boiling)
– Shorten brew time to 45-60 seconds
– Press very slowly and gently to avoid channeling
– Dilute the final brew slightly if bitterness persists
When Your Grind is Too Coarse
Often an issue with hotel coffee or limited grinder adjustment range:
– Increase water temperature to near boiling (200-205°F/93-96°C)
– Extend brewing time to 2-3 minutes
– Use the inverted method to prevent premature dripping
– Stir more vigorously to increase extraction
– Consider using two paper filters stacked together
When Your Grind is Inconsistent
Common with blade grinders or lower-quality manual grinders:
– Use water at medium temperature (190°F/88°C)
– Brew slightly longer than usual (90-120 seconds)
– Stir gently but thoroughly before pressing
– Press with moderate, consistent pressure

This compensation table provides quick guidance based on available grind:
| Grind Type | Water Temperature | Brew Time | Agitation | Notes |
|---|---|---|---|---|
| Too fine | 175-185°F (80-85°C) | 45-60 sec | Minimal | Very slow press |
| Too coarse | 200-205°F (93-96°C) | 2-3 min | Vigorous | Use inverted method |
| Inconsistent | 190°F (88°C) | 90-120 sec | Moderate | Medium pressure |
Remember that other variables can help compensate for grind imperfections. Increasing coffee quantity slightly can help with too-coarse grinds, while reducing dose can mitigate problems with overly fine grounds.
For travelers seeking consistently excellent results regardless of conditions, investing in a precision manual grinder provides the control needed to adapt to varying coffee beans and water conditions while maintaining ideal extraction parameters.
Troubleshooting Common AeroPress Grind Issues While Traveling
Even experienced AeroPress users encounter brewing challenges while traveling. Here’s how to identify and solve common grind-related problems on the go:
Problem: Coffee Tastes Sour and Weak
– Symptoms: Watery body, sharp acidity, quick flow-through
– Likely cause: Grind too coarse or insufficient brew time
– Solution: Use hotter water, steep longer (2+ minutes), or if possible, grind finer. In a pinch, try the “double filter” technique using two paper filters to slow down flow.
Problem: Plunger is Extremely Difficult to Press
– Symptoms: Requires excessive force, sometimes creates vacuum lock
– Likely cause: Grind too fine or too much coffee used
– Solution: Use slightly less coffee, press more slowly, or if available, adjust to slightly coarser grind. In emergencies, stop pressing if resistance becomes dangerous and dilute the concentrated brew you’ve already extracted.
Problem: Coffee Drips Through Filter Before Pressing
– Symptoms: Coffee begins flowing through the filter during steeping
– Likely cause: Grind too coarse for standard method
– Solution: Use the inverted method, or if that’s not possible, place the plunger just above the grounds during steeping to create an air lock.
Problem: Coffee Tastes Bitter and Harsh
– Symptoms: Astringent mouthfeel, unpleasant aftertaste
– Likely cause: Over-extraction from too fine a grind
– Solution: Use cooler water, reduce steep time to 30-45 seconds, or adjust to coarser grind when possible.
Problem: Inconsistent Results Day-to-Day
– Symptoms: Unpredictable flavor profiles despite using the same beans
– Likely cause: Inconsistent grinding technique
– Solution: Count turns or clicks consistently when adjusting your grinder, maintain consistent grinding motion, and ensure beans are evenly distributed in the grinding chamber.
When grinding with limited equipment, achieving consistent grinds for your AeroPress becomes more challenging but even more important. Remember that visual cues can help: your pressed puck should be firm but not rock-hard, and the dripped coffee should be clear without excessive muddiness.
For travelers who prioritize consistency, reliable handheld coffee grinders provide much more predictable results than pre-ground coffee or less specialized equipment.
Essential Travel Brewing Tips for AeroPress Perfection
Mastering your travel AeroPress setup extends beyond just the grind. These practical tips will help you achieve coffee shop quality wherever your adventures take you:
Smart Packing Strategies
– Store paper filters in a small notebook to keep them flat
– Use the AeroPress funnel as a grinding catchment device
– Pre-measure beans into small zip-lock bags or pill containers for daily portions
– Pack a small, dedicated travel towel for cleanup
Water Considerations
– Bottled spring water generally works better than distilled water
– In hard water areas, let tap water sit for 5 minutes to release some chlorine
– Consider packable water filters for camping trips or locations with questionable water quality
– Heated water from hotel kettles is typically fine, though water cups on airplanes should be avoided
Measurement Without Scales
– The AeroPress scoop approximates 14-15g of whole beans
– Learn to “eyeball” water levels using the numbered markers
– Count whole beans (roughly 65-75 beans = 10g depending on size and variety)
– Maintain consistent ratios rather than precise measurements when traveling
Time-Saving Morning Routines
– Set up your dry components the night before
– Prepare your grind while hotel water heats
– Use the “flip and go” method: prepare inverted, then flip onto cup and press immediately for drinking later
– Clean by simply ejecting the puck and quick-rinsing (thorough cleaning can wait until later)
Cleaning Shortcuts
– A quick rinse is sufficient between brews
– Use the plunger to push out excess water from the chamber
– In a pinch, wipe the plunger seal with a napkin instead of rinsing
– Hotel shower spray makes a good makeshift pressure rinse

All-Metal Hand Grinder, Flat Burr Hand Grinder, Manual Espresso Grinder, Precision Manual Grinder
Price range: $716.96 through $717.43 Select options This product has multiple variants. The options may be chosen on the product page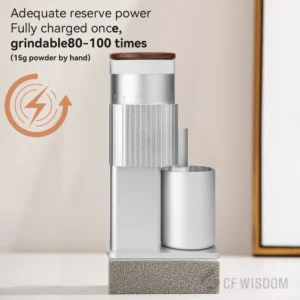
Fine Adjustment Hand Grinder, Precision Manual Grinder, Travel Coffee Grinder
Price range: $185.11 through $494.63 Select options This product has multiple variants. The options may be chosen on the product page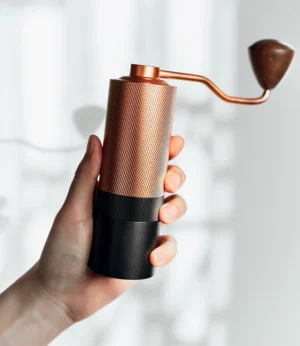

Hand Burr Grinder, Hand Crank Coffee Grinder, Manual Espresso Grinder, Portable Coffee Grinder
Price range: $262.72 through $300.22 Select options This product has multiple variants. The options may be chosen on the product page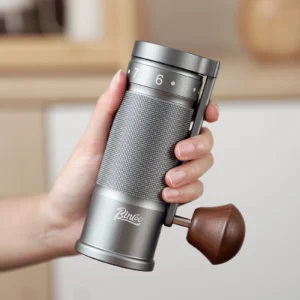
All-Metal Hand Grinder, Compact Coffee Mill, Hand Burr Grinder, Travel Coffee Grinder
$212.33 Select options This product has multiple variants. The options may be chosen on the product page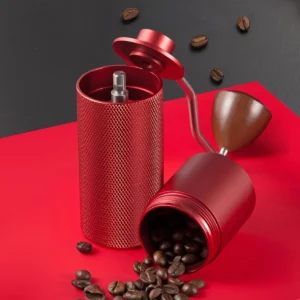
Hand Burr Grinder, Manual Coffee Grinder Stainless Steel, Precision Manual Grinder
Price range: $183.64 through $187.52 Select options This product has multiple variants. The options may be chosen on the product page
Handheld Burr Grinder, Manual Coffee Mill Grinder, Travel Coffee Grinder
$191.45 Select options This product has multiple variants. The options may be chosen on the product page
Remember that part of the joy of travel coffee is adapting to circumstances—embracing the challenge of creating great coffee with limited resources enhances the experience rather than diminishing it.
Advanced Techniques: Elevating Your Travel Coffee Game
Once you’ve mastered the basics of travel brewing with your AeroPress, these advanced techniques will take your coffee to the next level:
Competition-Inspired Travel Recipes
The Quick Immersion:
– Grind: Medium-fine (slightly finer than table salt)
– Water: 175°F (80°C)
– Method: Standard (not inverted)
– Process: Add coffee, pour water to #2 mark, stir 10 times, attach cap, wait 30 seconds, press gently for 30 seconds
– Result: Clean, bright cup with enhanced acidity
The Concentrated Sipper:
– Grind: Fine (similar to espresso but slightly coarser)
– Water: 195°F (90°C)
– Method: Inverted
– Process: Add coffee, pour water to #1 mark, stir vigorously, steep 1:30, flip and press slowly
– Result: Rich, concentrated brew similar to espresso (dilute to taste)
Bean Selection Strategy for Travel
The best travel coffees are often medium-roast beans that work well across various extraction levels. When visiting new places, look for locally roasted beans but avoid extremely light roasts, which require more precise brewing control than travel usually allows.
Advanced Hand-Grinding Technique
For maximum consistency with manual grinders:
– Hold the grinder vertically with one hand stabilizing the top
– Create a smooth, consistent rotation rather than jerky movements
– Count your rotations (typically 40-60 for medium-fine AeroPress grind)
– Listen for the sound of beans fully grinding before completing
Understanding the principles behind perfect espresso grind settings can enhance your precision with AeroPress grinding as well, even though the optimal grind is slightly different.
Is Pre-Ground Coffee Ever a Good Option for Travel AeroPress?
While freshly ground coffee delivers superior flavor, there are legitimate scenarios where quality pre-ground coffee makes sense for AeroPress travel brewing:
For ultra-light backpacking trips where every ounce matters, the weight savings of pre-ground coffee may outweigh the flavor benefits of bringing a grinder. Similarly, for very short trips (1-2 days), the freshness loss is minimal enough that the convenience might justify skipping the grinder.
If you must use pre-ground coffee, look for these characteristics:
– Specialty coffee roasters who offer grinding specifically for AeroPress
– Packaging with one-way valves that release gas but prevent oxygen entry
– Vacuum-sealed options that minimize oxidation
– Coffee that’s ground immediately before packaging
To maximize pre-ground coffee quality:
– Break your supply into daily portions in small airtight containers
– Only open what you’ll use immediately
– Keep sealed portions in cool, dark places
– Consider slightly shorter brew times as pre-ground coffee extracts more quickly
Many specialty roasters now recognize the “AeroPress grind” as a standard option between drip and espresso, making it easier to request the proper consistency if having beans ground to order.
Can You Achieve Cafe-Quality Results with a Travel Setup?
With the right approach, a travel AeroPress setup can indeed produce coffee that rivals or even exceeds what many cafes offer. The key difference isn’t necessarily the equipment but rather the attention to detail—particularly with grinding.
Q: Does expensive equipment make better coffee when traveling?
A: While premium grinders provide more consistency, technique matters more than price. A properly used mid-range manual grinder can outperform an expensive but hastily used automatic one.
Q: How close can travel coffee get to cafe quality?
A: With freshly roasted beans, proper grinding, good water, and careful technique, travel AeroPress coffee can match or exceed the quality of many cafes—particularly those without specialized coffee programs.
Q: What’s the minimum setup for excellent travel coffee?
A: An AeroPress, a quality manual burr grinder, good beans, and filtered water cover the essentials. Everything else is optimization rather than necessity.
The most significant advantage of controlling your own brewing—especially grinding—is consistency. While cafes may have better equipment, they don’t always have baristas who pay close attention to each cup. Your personal travel setup, though minimal, benefits from your focused attention to your own preferences.
There’s also a unique satisfaction in creating exceptional coffee in unusual locations. The contrast between your surroundings—whether a mountain vista or a sterile hotel room—and the cafe-quality coffee in your cup enhances the experience in ways no coffee shop can replicate.