
Why Deep Cleaning Your Hand Coffee Grinder Is Essential for Superior Coffee
Deep cleaning a hand coffee grinder goes far beyond the quick brush-out you might do after each use. It’s a thorough process that involves complete disassembly and careful cleaning of every component. This level of maintenance becomes crucial because coffee beans contain oils that gradually build up inside your grinder. Over time, these oils turn rancid, introducing unwanted bitter or sour notes to your freshly ground coffee.
This buildup doesn’t just affect flavor. As residue accumulates between burr teeth and on grinder surfaces, it directly impacts grind consistency. Even the finest precision grind settings for espresso can’t compensate for dirty equipment. Many coffee enthusiasts invest in premium manual coffee burr grinders but undermine their quality by neglecting proper maintenance.
The benefits of deep cleaning include:
- Significantly improved flavor clarity without rancid oil contamination
- Restored grinding consistency for better extraction
- Extended equipment lifespan, particularly for precision components
- Smoother operation with less resistance during grinding
- Prevention of potential contamination or mold growth
Professional baristas typically maintain strict cleaning schedules, with studies showing coffee oils can begin degrading within just 1-2 weeks after exposure to air. By following proper maintenance protocols, you’ll ensure every cup meets the standard your quality grinder was designed to deliver.
How Often Should You Deep Clean Your Hand Coffee Grinder?
Understanding the appropriate cleaning frequency for manual grinders helps maintain optimal performance without unnecessary work. The ideal schedule varies based on your usage patterns:
- Light use (1-3 times weekly): Deep clean every 2-3 months
- Moderate use (daily): Deep clean monthly
- Heavy use (multiple times daily): Deep clean every 2-3 weeks
Watch for these indicators that your grinder needs attention: visible oil residue on components, inconsistent grind size, increased grinding resistance, or noticeable flavor changes in your coffee. Darker, oilier roasts will necessitate more frequent cleaning than light roasts.
Remember that quick cleaning (brushing out loose grounds) should be done after each use, while deep cleaning involves complete disassembly and thorough maintenance of all components. Environmental factors like humidity can accelerate oil degradation, potentially requiring more frequent cleaning.
Essential Tools and Materials You’ll Need for Deep Cleaning
Before beginning the deep cleaning process, gather all necessary equipment for coffee grinder cleaning. Having everything prepared in advance makes the process more efficient and reduces the risk of losing small components.
Essential Tools:
* Small, soft brushes (artist brushes with 1/4 inch or 6mm tips work well for burr crevices)
* Microfiber clothes (lint-free to prevent residue)
* Cotton swabs for hard-to-reach areas
* Small container to safely store tiny components
* Wooden toothpicks for precision cleaning (never use metal tools that might scratch)
* Dish soap (mild, unscented variety)
* Clean, dry towels
Optional but Helpful:
* Compressed air canister (for drying and removing stubborn particles)
* Specialized grinder cleaning tablets (particularly useful for removing oils)
* Magnifying glass for inspecting burrs
* Camera or phone to document disassembly order
Workspace Requirements:
* Well-lit area with plenty of space
* Clean surface (preferably white to help spot small parts)
* Small bowls to organize different components
* Reference manual for your specific hand burr grinder model
Never use harsh chemicals, abrasive cleaners, or dishwashers, as these can damage precision components and specialty materials used in quality grinders.
Step 1: Preparing Your Grinder for Disassembly
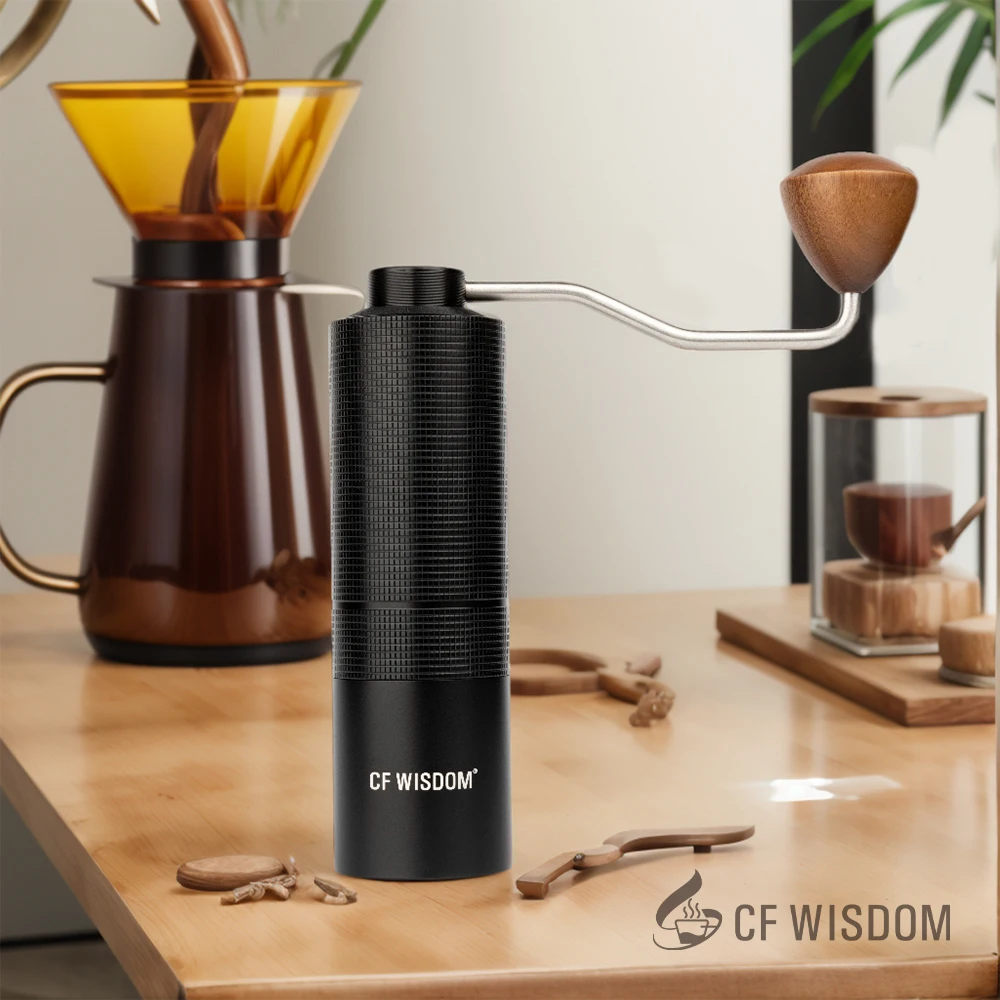
Proper preparation ensures a smooth disassembly and cleaning process, especially for those with limited experience maintaining stainless steel manual coffee grinders.
Empty all beans and grounds from your grinder by turning it upside down and giving it a few gentle taps.
Take “before” photos of your assembled grinder from multiple angles. These will serve as references during reassembly.
Set your grinder to the coarsest setting. This typically creates the most space between components and makes disassembly easier.
Prepare your workspace by laying out a clean towel or mat to prevent small parts from rolling away.
Place a small container nearby to hold tiny components like springs, washers, and screws.
If available, consult your grinder’s user manual for any model-specific disassembly instructions.
Handle all components with care, particularly the burrs which have sharp edges that can cause injury if mishandled.
Taking these preparatory steps dramatically reduces the risk of losing parts or incorrect reassembly, especially important with precision equipment like coffee grinders.
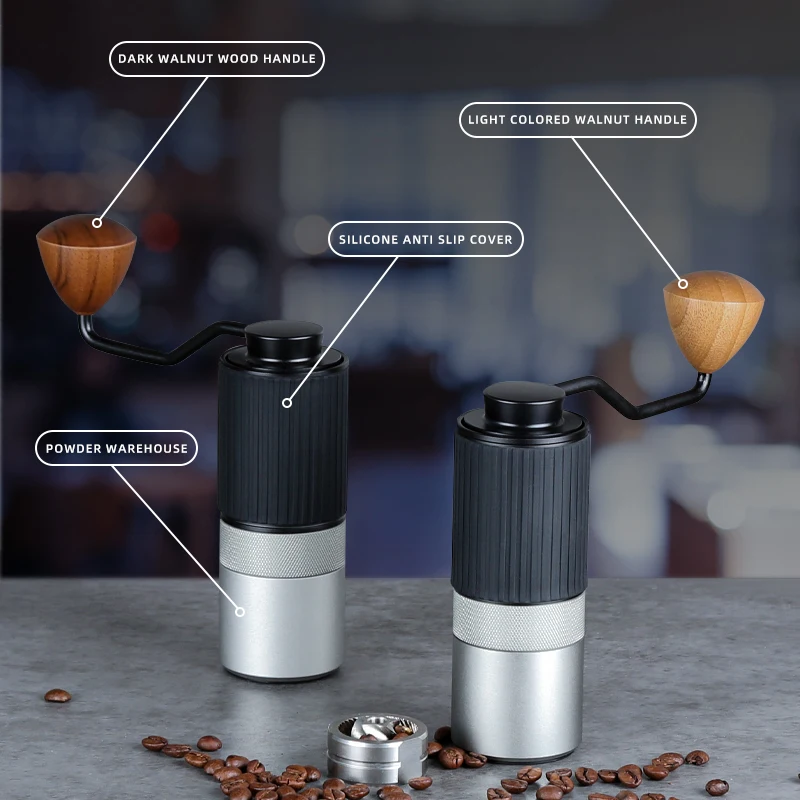
Step 2: Complete Disassembly Guide for Hand Coffee Grinders
This step-by-step guide applies to most espresso coffee hand grinders, though slight variations may exist between models:
Remove the handle by unscrewing the central bolt or nut (usually turns counterclockwise). Some models may have a small cap covering this fastener.
Carefully lift off the top cap or hopper lid if it’s separate from the main bean chamber.
Remove the hopper/bean chamber by unscrewing it from the main body. This typically exposes the upper part of the burr assembly.
Extract the inner burr assembly. In most grinders, this involves:
– Removing any retaining nut or screw at the top of the center shaft
– Carefully pulling the outer burr housing upward
– Extracting the central shaft with the inner burr attachedSeparate the inner burr from the center shaft if possible (some designs allow this, others have fixed burrs).
Remove the grounds catch container from the bottom of the grinder.
If applicable, carefully extract any washers, bearings, or spacers, noting their exact order and orientation.
For grinders with adjustable settings, carefully disassemble the adjustment mechanism, taking note of how the components interact.
Remove any rubber or silicone gaskets, being careful not to stretch or damage them.
Set all components on your clean workspace, organized in the order of disassembly.
Exercise particular care with the burrs and adjustment components, as these precision-engineered parts determine your grinder’s performance.

Step 3: Deep Cleaning the Burr Assembly – The Heart of Your Grinder
The burr assembly requires the most attention during manual burr coffee grinder cleaning as it directly impacts grinding quality. Different materials require specific cleaning approaches:
For Steel Burrs:
1. Use a dry, soft brush to remove all loose coffee particles from between the teeth and surfaces.
2. Dampen a cloth with warm water and mild soap, then gently wipe all surfaces of the burrs.
3. For stubborn oil residue, apply a small amount of diluted vinegar solution (1 part white vinegar to 4 parts water) using a cotton swab.
4. Rinse thoroughly with clean water, ensuring no soap residue remains.
5. Dry immediately and thoroughly to prevent any rust formation.
For Ceramic Burrs:
1. Brush away loose grounds with a soft brush.
2. Clean with warm soapy water, using cotton swabs to reach between the teeth.
3. Rinse thoroughly with clean water.
4. Allow to dry completely (ceramic can be air-dried longer than metal as it won’t rust).
For Both Types:
1. Pay special attention to the central shaft and mounting areas where oils tend to accumulate.
2. Use a wooden toothpick (never metal tools) to remove compacted coffee from tight spaces.
3. Inspect burrs under good light for any remaining residue after cleaning.
Never soak steel burrs or use abrasive materials on either type. The precision edges of burr teeth must be preserved for optimal grinding performance.
Step 4: Cleaning the Grinder Body, Hopper, and Grounds Chamber
Different materials used in stainless steel manual coffee grinders and other models require specific cleaning approaches:
Metal Bodies (Stainless Steel, Aluminum):
– Wipe down with a damp cloth and mild soap
– Pay special attention to internal threading where grounds can accumulate
– Rinse thoroughly and dry immediately to prevent water spots or corrosion
– For stubborn stains on stainless steel, a paste of baking soda and water works effectivelyGlass Components:
– Wash with warm soapy water
– Rinse thoroughly to eliminate soap residue
– Dry with a lint-free cloth to prevent water spotsPlastic or Acrylic Parts:
– Clean with mild soap and warm (not hot) water
– Avoid abrasive cleaners that might scratch surfaces
– Allow to air dry completely before reassemblyThreads and Connection Points:
– Use a small brush to clean threads where components screw together
– Remove all coffee residue from thread grooves to ensure proper sealing
– A cotton swab dipped in alcohol works well for cleaning thread areasHard-to-Reach Areas:
– Use compressed air to blow out grounds trapped in crevices
– A pipe cleaner can reach into narrow channels
– Wooden toothpicks help remove compacted grounds from corners
Thorough cleaning of these components ensures smooth operation and proper assembly when putting the grinder back together.
Step 5: Properly Cleaning Small Parts and Components
The small components in your grinder often affect precision and performance significantly:
Springs: Clean gently with warm soapy water, rinse thoroughly, and dry completely to prevent rust. Never stretch springs during cleaning.
Washers and Spacers: Wipe with a damp cloth or briefly soak in warm soapy water, then dry thoroughly. Check for any coffee grounds stuck to surfaces.
Bearings: Clean the exterior but avoid submerging sealed bearings in water. Instead, wipe with a slightly damp cloth and dry immediately.
Adjustment Mechanisms: Clean threads carefully with a soft brush. Remove all coffee dust without damaging the threading. Apply food-grade mineral oil only if the manufacturer recommends it.
O-rings and Gaskets: Gently wipe clean with a damp cloth. Avoid harsh soaps that can cause deterioration. Check for cracks or signs of wear.
Fasteners and Screws: Clean threads with a small brush or cotton swab. Ensure complete drying to prevent rust.
Filtered water is preferable when rinsing metal components, as minerals in tap water can leave deposits that affect performance or cause corrosion over time. Always allow these small components to dry thoroughly before reassembly to maintain proper espresso grind settings.
Step 6: Drying All Components Thoroughly Before Reassembly
Proper drying is critical when cleaning manual coffee grinders and often overlooked. Residual moisture can cause several serious issues:
First, lay all components on a clean, absorbent towel in a well-ventilated area.
Pat dry components with a lint-free cloth, paying special attention to crevices and threaded areas where water might hide.
For burrs and metal components, consider using compressed air to blow out water from tight spaces. Hold the parts at an angle that allows water to exit freely.
Allow all components to air dry completely for at least 2-3 hours. Steel burrs and other metal components should dry faster to prevent oxidation.
Check threaded areas and crevices for hidden moisture by pressing with a dry paper towel – any dampness will show on the paper.
Never reassemble your grinder until all components are 100% dry – moisture trapped during reassembly can lead to rust, mold development, or stuck components.
Ceramic components generally need longer drying times than metal parts.
The risks of insufficient drying include rust formation on metal parts, mold growth in hidden areas, and premature deterioration of gaskets and seals. Taking extra time during this step prevents potential damage that could compromise your grinder’s performance and longevity.
Step 7: Precise Reassembly of Your Hand Coffee Grinder
Careful reassembly ensures your grinder functions properly after cleaning:
Reference your disassembly photos to confirm the correct order of components.
Begin by reassembling the burr mechanism:
– Reattach the inner burr to the center shaft (if separated)
– Insert the shaft through its bearing or mounting point
– Reinstall any washers or spacers in their exact original positions
– Secure the burr assembly with the appropriate retaining hardwareReassemble the adjustment mechanism, ensuring threads align properly. Never force components together.
When reattaching the outer burr housing, verify that it seats correctly against the inner components. Misalignment here will cause uneven grinding.
Reinstall the bean hopper/chamber, checking that it threads smoothly onto the main body.
Reattach the handle to the center shaft, tightening securely but not overtightening.
Test the adjustment mechanism through its full range of motion to ensure smooth operation.
Check for any gaps or misalignments in the assembled grinder.
Common reassembly problems include cross-threading components (which damages threads), incorrect ordering of washers and spacers (affecting grind consistency), or improper alignment of the burrs (causing metal-on-metal contact).
After reassembly, verify that all moving parts operate smoothly and that the grinder feels solid with no loose components. Proper grinder calibration in the next step will fine-tune performance.
Step 8: Calibrating Your Grinder After Cleaning
After cleaning and reassembly, your grinder requires proper calibration to ensure consistent results:
Start by setting your grinder to its “zero point” – the point where the burrs just begin to touch. Turn the adjustment knob until you hear or feel the burrs making slight contact.
From this zero point, back off slightly (usually 1-2 clicks or a small turn) to establish your finest grind setting.
Test the calibration by grinding a small amount of coffee. The grounds should be very fine but still flow through the burrs without causing them to stall.
For stepped grinders (with distinct click positions), verify that each step produces a noticeable change in grind size.
For stepless grinders, mark or note several key positions for your preferred brewing methods.
Different grinder designs require specific calibration approaches. Stepped grinders have preset increments, while stepless models provide infinite adjustment possibilities for perfectly adjusted espresso grinds.
Some grinders may feel slightly stiff after cleaning as residual coffee oils previously provided lubrication. This stiffness should diminish after grinding a small amount of coffee. If you notice excessive resistance or unusual sounds, disassemble and check for proper component alignment.
Step 9: Testing Your Freshly Cleaned Coffee Grinder
Before returning to regular use, testing your grinder ensures it’s functioning properly:
Use “sacrificial” beans for initial testing – beans you don’t mind discarding – as the first few grinds might contain trace cleaning residue or dislodged coffee particles.
Grind a small amount (about 10g) and discard it, looking for any unusual colors or smells that might indicate remaining cleaning agents.
Examine the ground coffee for consistency. It should have uniform particle size appropriate for your selected grind setting.
Listen for any unusual sounds during grinding. The operation should be smooth with no grinding or scraping noises.
If you notice any irregularities, check your espresso grind size chart to verify the results match expected outcomes for your setting.
Test multiple grind settings to ensure the adjustment mechanism works properly across its entire range.
If any issues arise, check for:
– Improper burr alignment
– Loose components
– Missing washers or spacers
– Adjustment mechanism problems
Minor adjustments might be necessary as the grinder “breaks in” again after cleaning. The absence of coffee oils can initially make the grind slightly different from what you’re accustomed to, but this will normalize after a few uses.
Step 10: Maintaining Cleanliness Between Deep Cleanings
Regular maintenance significantly extends the time between deep cleanings and preserves coffee quality:
- After Each Use:
- Brush out loose grounds from the burrs and grinding chamber
- Wipe external surfaces with a dry cloth
Leave the hopper empty when storing
Weekly Maintenance:
- Remove the grounds container and clean thoroughly
- Brush the burrs more extensively, focusing on visible residue
Wipe the bean hopper with a dry cloth to remove oils
Monthly Practices:
- Check adjustment mechanisms for signs of coffee build-up
- Inspect burrs for any visible residue buildup
Use grinder cleaning tablets if recommended for your model
Storage Recommendations:
- Store in a cool, dry place with the adjustment set to a medium setting
- Leave the hopper empty to prevent oil absorption into components
- Consider a small silica gel packet nearby (not inside) for humid environments
These simple practices keep your portable coffee grinder performing optimally between deep cleanings and extend the intervals needed between full disassembly.


All-Metal Hand Grinder, Flat Burr Hand Grinder, Manual Espresso Grinder, Precision Manual Grinder
Price range: $716.96 through $717.43 Select options This product has multiple variants. The options may be chosen on the product page
Fine Adjustment Hand Grinder, Precision Manual Grinder, Travel Coffee Grinder
Price range: $185.11 through $494.63 Select options This product has multiple variants. The options may be chosen on the product page

Hand Burr Grinder, Hand Crank Coffee Grinder, Manual Espresso Grinder, Portable Coffee Grinder
Price range: $262.72 through $300.22 Select options This product has multiple variants. The options may be chosen on the product page
Manual Burr Mill, Manual Coffee Grinder Stainless Steel, Manual Coffee Mill Grinder, Mechanical Coffee Grinder
Price range: $127.26 through $130.32 Select options This product has multiple variants. The options may be chosen on the product page
All-Metal Hand Grinder, Compact Coffee Mill, Hand Burr Grinder, Travel Coffee Grinder
$212.33 Select options This product has multiple variants. The options may be chosen on the product page
Hand Burr Grinder, Manual Coffee Grinder Stainless Steel, Precision Manual Grinder
Price range: $183.64 through $187.52 Select options This product has multiple variants. The options may be chosen on the product page
What Not to Do: Common Hand Coffee Grinder Cleaning Mistakes
Knowing what to avoid is just as important as knowing proper cleaning techniques when maintaining your manual coffee mill grinder:
Using rice to clean grinders is a widespread but potentially harmful myth. While it can remove coffee residue, rice can also damage burrs and adjustment mechanisms due to its hardness. The starch residue can also create new problems by forming a paste when mixed with water.
Never submerge your entire grinder in water, even models that appear sealed. Water can penetrate bearings and internal mechanisms that aren’t meant to be wet, causing rust and premature failure.
Avoid using dishwashers for any grinder components. The high heat and harsh detergents can warp plastic parts, damage seals, and corrode metal surfaces.
Metal brushes or abrasive cleaners should never be used on burrs. Even small scratches can affect grinding performance and consistency dramatically.
WD-40 and similar household lubricants are extremely dangerous for coffee equipment. These petroleum-based products are not food-safe and can contaminate your coffee with harmful chemicals and off-flavors.
Over-tightening components during reassembly often leads to damaged threads or cracked parts. Always use gentle pressure and stop tightening when components are secure.
Finally, avoid grinding flavored coffees in your quality grinder, as the artificial flavor oils are particularly stubborn and can permanently taint your equipment, affecting all future batches.
How a Clean Grinder Transforms Your Coffee Experience
A properly maintained grinder delivers a noticeably superior coffee experience in several ways:
True coffee flavors emerge once rancid oils and stale grounds are removed from your equipment. The difference is especially noticeable in lighter roasts where subtle fruit notes and floral aromas can shine through without contamination from old coffee residue.
Grinding consistency improves dramatically after deep cleaning, creating uniform particles that extract evenly during brewing. This consistency is crucial for achieving the correct grind settings for espresso and other brewing methods.
Your equipment operates more smoothly and quietly after proper maintenance, making the morning coffee ritual more enjoyable. The reduced friction also minimizes wear on precision components, extending your grinder’s lifespan.
Many coffee enthusiasts report their grinders operate for a decade or more with proper maintenance, making regular cleaning one of the most cost-effective ways to protect your investment in quality equipment.
By incorporating these cleaning practices into your coffee routine, you’ll ensure every cup represents the true potential of your beans. The time invested in maintenance returns dividends in flavor quality, equipment longevity, and the satisfaction of mastering another aspect of the coffee craft.
At Savor Suite, we believe that maintaining your grinder is just as important as selecting quality beans – both are essential steps in the journey toward coffee perfection. With proper care, your hand coffee grinder will continue to be a reliable partner in your daily brewing ritual for years to come.