
The Science Behind Espresso Grind Size: Foundation for Perfect Shots
The journey to exceptional espresso begins with understanding what “dialing in” truly means. This essential process involves finding the perfect grind size for your specific beans, equipment, and desired taste profile. Mastering this skill forms the cornerstone of consistent, delicious espresso drinks.
At its core, espresso extraction is a simple yet precise science. When pressurized water passes through coffee grounds, it dissolves and carries away flavor compounds. The grind size directly controls how quickly this water flows, which determines what ends up in your cup.
This cause-effect relationship between grind size and extraction creates predictable outcomes:
- Too coarse: Water rushes through too quickly (under-extraction), resulting in sour, thin shots with pale, minimal crema. These shots typically finish in under 20 seconds and lack body and sweetness.
- Too fine: Water struggles to pass through (over-extraction), creating bitter, harsh shots with dark, sometimes spotty crema. The machine may even “choke” with extremely fine grinds, producing no flow at all.
The ideal espresso precision grind settings create just enough resistance for pressure to build properly while allowing water to extract the full spectrum of desirable flavors. This perfect balance typically results in 25-30 second extraction times for double shots.
The science of solubility explains why grind size matters so much. Different flavor compounds extract at different rates—acids extract first (sour), followed by sugars (sweet), and finally bitter compounds. With the perfect grind, you’ll capture the pleasant acidity and sweetness while minimizing bitterness.
Visual and Tactile Characteristics of the Perfect Espresso Grind
Recognizing the ideal espresso grind by sight and touch is a valuable skill that develops with experience. The perfect espresso grind has distinct characteristics that set it apart from other brewing methods.
Visually, proper espresso grind resembles fine table salt or powdered sugar—significantly finer than regular sugar but not as fine as flour. The particles should be small enough to create necessary resistance but not so fine that they block water flow completely. When examining closely, the grind should appear relatively uniform without obvious larger chunks.
When conducting a tactile test, rub a small amount between your fingers. The ideal espresso grind feels silky and slightly powdery, with a tendency to form small clumps that break apart with light pressure. These subtle clumping properties indicate the right particle size for proper extraction. If the grounds feel gritty like sand, they’re too coarse; if they feel like powdered flour that doesn’t separate, they’re likely too fine.
Using reference points helps identify the correct texture. While the ultimate espresso grind size chart provides visual comparisons, practical analogies work well too. The perfect grind should leave a light residue on your fingertips when touched—more than coarse grounds would, but not as much as extremely fine powder.
This visual and tactile understanding connects directly with the extraction theory. The particle size determines surface area exposure to water, controlling how quickly flavors dissolve during the brief high-pressure extraction process.
Understanding Manual Grinder Adjustment Mechanisms
Manual espresso grinders use various adjustment systems, each with unique characteristics that affect how you’ll approach dialing in your perfect shot. Understanding your specific grinder’s mechanism is essential for making precise, intentional adjustments.
The two main categories of adjustment systems are:
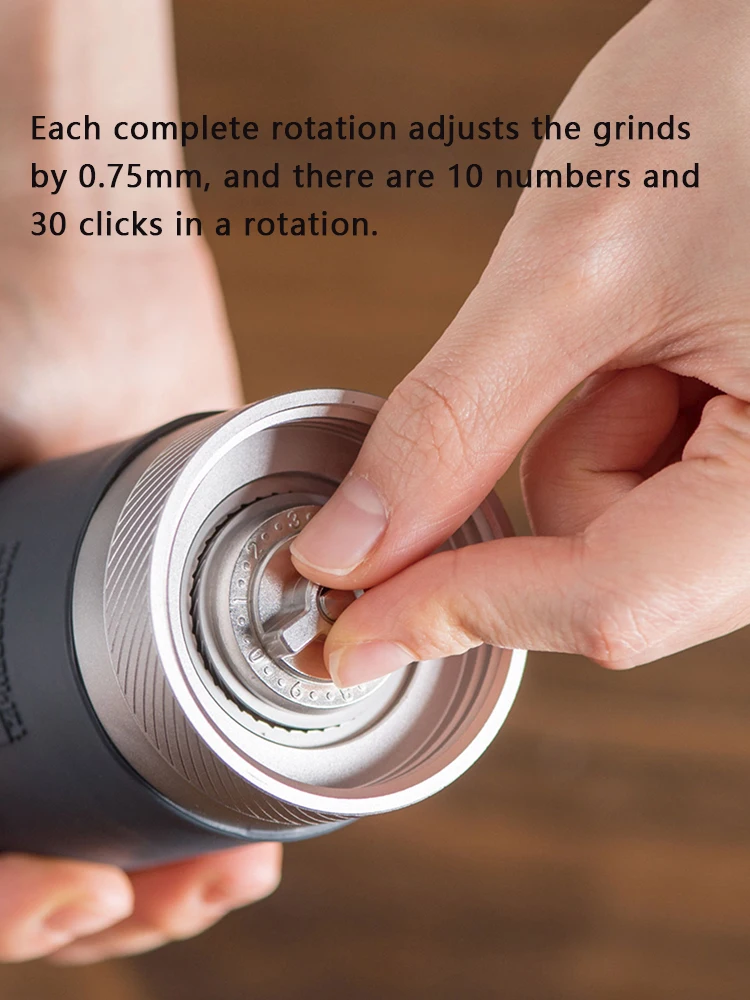
Stepped systems feature distinct adjustment points or “clicks” that provide tactile and audible feedback. These systems offer excellent repeatability—you can easily count clicks to return to previous settings—but may limit fine-tuning if the steps are too far apart.
Stepless systems allow infinite adjustment points between coarse and fine, offering maximum precision for espresso. However, finding exact previous settings can be challenging without careful tracking.
Most manual grinders utilize one of these adjustment configurations:
- External adjustment rings/dials: Located on the outside of the grinder, these provide quick, visible adjustments but may drift if accidentally bumped.
- Internal adjustment nuts: Hidden inside the grinder, these maintain stability once set but require partial disassembly to adjust.
- Click-based systems: Combine stability with repeatability through audible clicks when turning the adjustment ring.
The golden rule when adjusting grind for perfect espresso is to make small, incremental changes. This is particularly important because minor adjustments can dramatically affect extraction. For many quality manual grinders, just 1-2 clicks or a quarter turn can transform an under-extracted shot into a perfectly balanced one.
Always adjust between grinding sessions, never during grinding. This prevents damage to the burrs and ensures consistent particle size. Many experts recommend “zeroing” your grinder occasionally (finding the point where burrs just touch) to maintain calibration, especially after maintaining your manual burr grinder or disassembly.
Remember that different models have different adjustment sensitivities—some might have 30 clicks in their adjustment range, while others have 40+ clicks, making each click represent a different degree of change.
Step 1: Essential Preparation for Dialing In Your Espresso
Before making a single adjustment to your grinder, proper preparation sets the foundation for successful dialing in. Start with freshly roasted beans, ideally 7-21 days after the roast date. This optimal window balances degassing (where beans release CO2 after roasting) with freshness, directly impacting extraction quality and consistency.
Ensure your espresso machine is thoroughly preheated—this typically takes 15-20 minutes, depending on your model. A properly heated machine provides stable temperature throughout extraction, critical for consistent results. While waiting, clean your portafilter thoroughly to remove any old coffee oils that could taint your shots.
Gather these essential tools before beginning:
– Digital scale with 0.1g accuracy (for precise bean and yield measurement)
– Timer (smartphone works fine)
– Proper-fitting tamper for your portafilter
– Small notebook for recording settings and results
For your initial setting on a new precision manual grinder, start slightly finer than medium-fine if your grinder doesn’t have espresso-specific markings. While this might not be perfect immediately, it provides a reasonable starting point.
Consistency in environment matters too—significant changes in humidity and temperature can affect how coffee grounds behave and extract. Try to maintain similar conditions when possible.
Prepare your workflow by deciding on a consistent dose (typically 16-20g for a double shot, with 18g being a common standard). Measuring dose precisely (±0.1g) eliminates one variable from the equation, allowing you to focus specifically on grind adjustment effects.
Step 2: Initial Grind Setting and First Test Shot
With preparation complete, you’re ready to pull your first test shot. Before grinding, always purge a small amount of beans (about 2-3g) through your grinder after making any adjustment. This ensures no old grounds from previous settings contaminate your test shot.
For consistent dosing, weigh your whole beans before grinding rather than weighing the ground coffee. This practice eliminates inconsistency from grounds retained in the grinder. For a standard double shot, measure exactly 18g of beans.
After grinding into your portafilter, proper distribution is crucial for even extraction. Consider these techniques:
– WDT (Weiss Distribution Technique): Gently stir grounds with a thin needle to break clumps
– Light tapping of the portafilter side to settle grounds evenly
– Using a distribution tool to level the bed of coffee
Apply consistent tamping pressure (about 30 pounds of force) with a level tamp. The exact pressure matters less than consistency between shots.
Now pull your test shot while carefully observing:
– When the first drops appear
– How the flow develops
– The total extraction time
– Final yield weight
Your target parameters for this first test shot should be:
– Input: 18g coffee
– Output: 36g espresso (1:2 brew ratio)
– Extraction time: 25-30 seconds (from pump start to finish)
The quality of this first shot will direct your next adjustment. Pay attention to flow rate, color progression, and especially time—these are your primary feedback mechanisms.
Many manual espresso grinders feature precisely engineered burrs that make even small adjustments noticeable in your extraction. Document your initial settings carefully to establish your baseline for refinement.
Step 3: Analyzing Your Shot and Making Precise Adjustments
After pulling your test shot, careful analysis guides your next adjustment. Evaluate your shot based on three key aspects: time, visual cues, and taste.
If your shot extracted too quickly (under 20-25 seconds):
– You’ll notice a rapid flow that may start blonde or transparent
– The shot will likely taste sour, thin, and lacking sweetness
– The crema will be pale and minimal, dissipating quickly
– Adjustment needed: Make your grind finer, typically by 2-3 clicks on a standard manual grinder
If your shot extracted too slowly (over 30-35 seconds):
– The flow may appear dark, syrupy, or come in sporadic drips
– The taste will be noticeably bitter, astringent, or have a burnt quality
– The crema may be excessively dark or have tiger-striping
– Adjustment needed: Make your grind coarser, typically by 1-2 clicks
If your shot extracted within target time but tastes off:
– For sour shots in good time: Try a slightly finer grind (1 click)
– For bitter shots in good time: Try a slightly coarser grind (1 click) or reduce your brew ratio
Understanding the 30-second espresso rule helps establish a framework for these adjustments. The rule exists because extraction chemistry follows a predictable pattern—acids extract first (sour), then sugars (sweet), followed by bitter compounds. Your goal is to find the sweet spot where you maximize sweetness while balancing acidity and minimizing bitterness.
A perfectly extracted shot will display:
– Rich golden-brown crema with tiger-striping
– A syrupy, consistent flow that’s neither too fast nor too slow
– Complex sweetness with pleasant acidity and minimal bitterness
– A lingering, clean aftertaste that’s enjoyable minutes after sipping
Your tasting ability will develop over time, allowing you to detect increasingly subtle differences between shots.
Step 4: The Iterative Process – Refining Your Grind Setting
Dialing in espresso is fundamentally iterative—a cycle of testing, evaluating, and adjusting until you achieve optimal results. Approach this methodically to develop both your skills and coffee understanding.
Follow this systematic process:
- Make a single adjustment based on your previous shot analysis
- Pull another shot with identical parameters (dose, tamping pressure, etc.)
- Evaluate results, noting improvements and remaining issues
- Repeat until satisfied with the extraction
The key to success is changing only one variable at a time. If you adjust both grind size and dose simultaneously, you won’t know which change affected the result. Most fine adjustment hand grinders allow for small, precise changes that make this iterative process more controlled.
Keep detailed records of each attempt, including:
– Grind setting (clicks/marks from zero)
– Dose weight (in grams)
– Yield weight (in grams)
– Extraction time (in seconds)
– Taste notes and observations
– Adjustments made for next attempt
Set realistic expectations about this process. Dialing in a new bean typically requires 3-5 test shots, especially as you’re developing your skills. Even experienced baristas rarely nail the perfect extraction on their first attempt.
You’ll know you’ve reached optimal extraction when:
– The shot flows evenly with honey-like consistency
– Extraction time falls within your target range
– The taste is balanced with noticeable sweetness
– The crema is rich and persistent
– The aftertaste is clean and pleasant

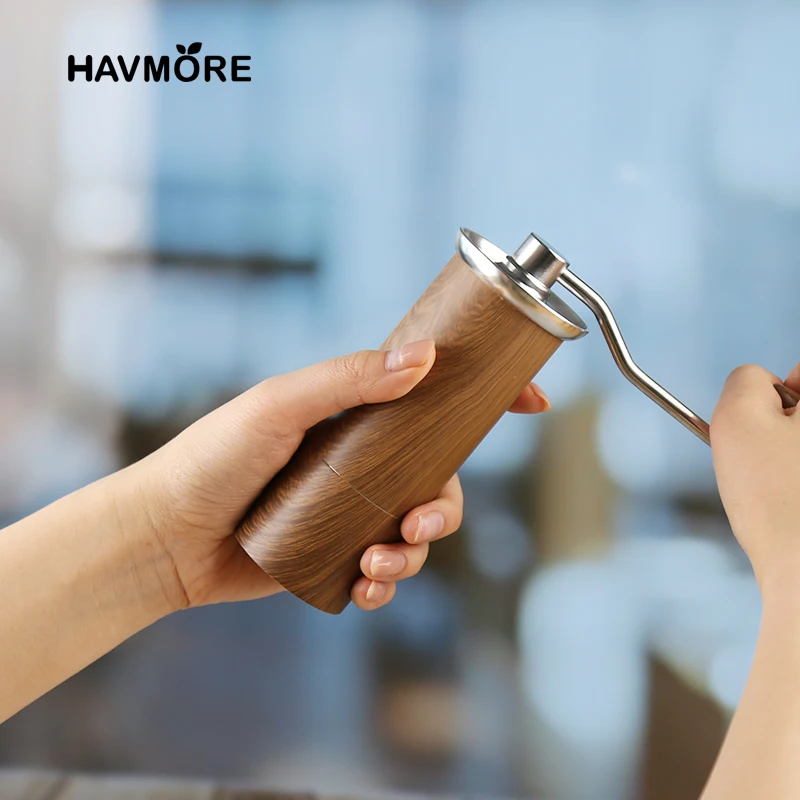
All-Metal Hand Grinder, Flat Burr Hand Grinder, Manual Espresso Grinder, Precision Manual Grinder
Price range: $716.96 through $717.43 Select options This product has multiple variants. The options may be chosen on the product page
Fine Adjustment Hand Grinder, Precision Manual Grinder, Travel Coffee Grinder
Price range: $185.11 through $494.63 Select options This product has multiple variants. The options may be chosen on the product page

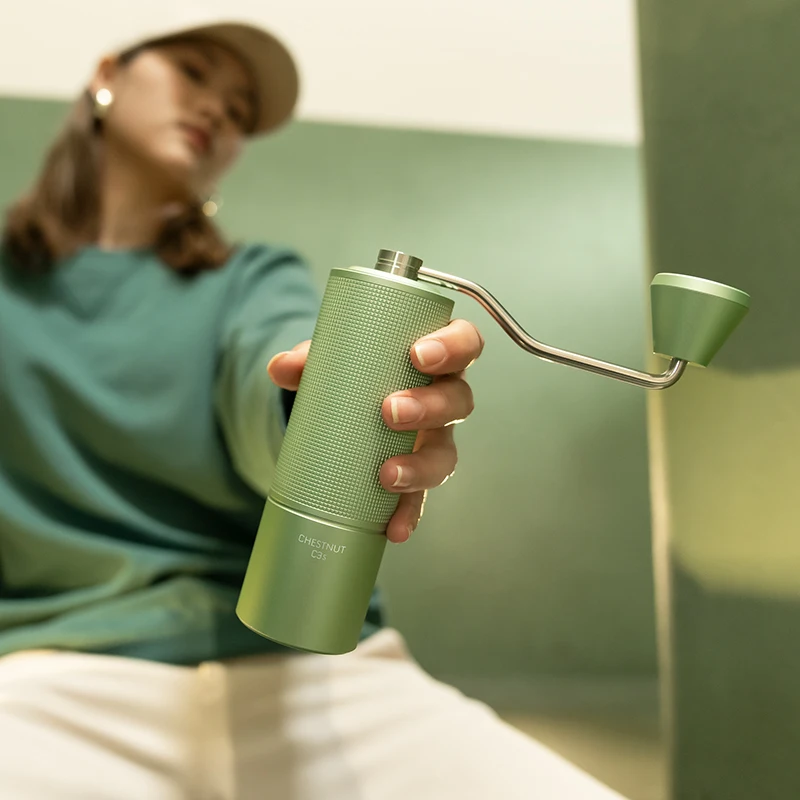
Hand Burr Grinder, Hand Crank Coffee Grinder, Manual Espresso Grinder, Portable Coffee Grinder
Price range: $262.72 through $300.22 Select options This product has multiple variants. The options may be chosen on the product page
Hand Burr Grinder, Manual Coffee Grinder Stainless Steel, Precision Manual Grinder
Price range: $183.64 through $187.52 Select options This product has multiple variants. The options may be chosen on the product page
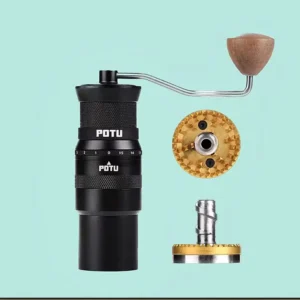
Manual Coffee Grinder Stainless Steel, Manual Espresso Grinder, Travel Coffee Grinder
Price range: $276.22 through $276.39 Select options This product has multiple variants. The options may be chosen on the product page
Hand Crank Coffee Grinder, Manual Coffee Grinder for Espresso, Manual Coffee Grinder Stainless Steel
$349.15 Select options This product has multiple variants. The options may be chosen on the product page
Common Grind-Related Problems and Solutions
Even with careful technique, you’ll encounter extraction issues that require troubleshooting. Understanding common problems and their solutions speeds up your dialing-in process.
Shot gushes too quickly (under 20 seconds)
– Primary cause: Grind too coarse
– Solution: Make grind finer by 2-3 clicks/adjustments
– Additional checks: Ensure proper distribution and tamping pressure
– How to identify: Watery appearance, sour taste, minimal resistance during extraction
Machine chokes/barely drips (over 35 seconds or no flow)
– Primary cause: Grind too fine
– Solution: Make grind coarser by 2-3 clicks/adjustments
– Additional checks: Verify you’re not overdosing the basket
– How to identify: Few or no drops after 10 seconds, extreme bitterness if any liquid extracts
Sour taste despite proper extraction time
– Primary cause: Potential temperature issue or under-developed roast
– Solution: Verify machine temperature is hot enough (195-205°F/90-96°C)
– Alternative approach: Try increasing yield ratio (e.g., from 1:2 to 1:2.5)
– How to identify: Pronounced acidity that overwhelms other flavors
Bitter taste despite proper extraction time
– Primary cause: Possible over-extraction despite normal timing
– Solution: Try slightly coarser grind (1 click) or reduce yield
– Additional checks: Ensure water quality and temperature aren’t issues
– How to identify: Lingering harshness at the back of tongue and dry aftertaste
Uneven extraction/channeling
– Primary cause: Inconsistent distribution of grounds
– Solution: Improve distribution technique (WDT method), ensure level tamping
– How to identify: Visible channels in puck, spurting or uneven flow from portafilter
For comprehensive troubleshooting of espresso grind issues, remember that proper diagnosis requires considering multiple factors. Sometimes what appears to be a grind issue might be related to other variables like coffee freshness or equipment maintenance.
Variables That Affect Grind Settings
While grind size is crucial, several other factors influence the optimal setting for your specific situation. Being aware of these variables helps explain why your perfect setting might change over time.
Bean characteristics significantly impact grind requirements:
– Age/freshness: As beans age, they release gases and become less resistant to water. Older beans typically require a finer grind to maintain proper extraction time. Fresh beans (1-2 weeks off roast) may need a coarser grind to compensate for increased CO2 content.
– Roast level: Darker roasts are more brittle and soluble, generally requiring coarser grinds than light roasts. Light-roasted beans are denser and less porous, often needing finer grinding to achieve proper extraction.
– Origin/density: High-altitude beans (often from Ethiopia, Kenya) tend to be denser and may require finer grinding than lower-grown varieties (like Brazilian or Indonesian beans).
Environmental factors can require day-to-day adjustments:
– Higher humidity causes grounds to absorb moisture and clump more readily, potentially requiring a coarser grind
– Temperature fluctuations can affect both bean brittleness and extraction dynamics
– Seasonal changes may necessitate regular fine-tuning
Changes to dose or brew ratio will also affect your optimal grind. Increasing dose typically requires a slightly coarser grind to maintain flow rate, while decreasing dose often needs a finer grind.
New manual coffee grinders for espresso may produce slightly inconsistent results until the burrs become “seasoned” through regular use. This natural process helps stabilize performance over the first few weeks.
Manual Grinder Maintenance for Consistent Results
Maintaining your manual grinder ensures consistent, high-quality results over time. Even the best grinder will produce inconsistent grounds if not properly cleaned and cared for.
Regular cleaning prevents oil buildup and removes old coffee particles that can affect taste and grind consistency. For espresso grinding, implement this maintenance schedule:
- After each use: Brush visible grounds from burrs and catching chamber
- Weekly: Wipe exterior and sweep out grounds path
- Monthly: Disassemble for deeper cleaning of burrs and adjustment mechanism
- Every 3-6 months: Check burr alignment and calibration
When cleaning, avoid using water on burrs as this can promote rust in some models. Instead, use a dry brush, compressed air, or specialized grinder cleaning tablets that absorb oils without moisture.
Static is a common issue with manual grinders, especially when grinding for espresso. The RDT method (Ross Droplet Technique)—adding a tiny drop of water to beans before grinding—can significantly reduce static cling without affecting grind quality.
Store your grinder in a stable position to prevent accidental adjustment changes. Some grinders benefit from being stored with reduced tension on the adjustment mechanism when not in use for extended periods.
Check for burr wear by examining edge sharpness—dull burrs produce more fines and inconsistent particle size, directly impacting extraction quality. Quality manual grinders typically require burr replacement only after 500-1000 pounds of coffee, but this varies by model and materials.
Frequently Asked Questions About Manual Espresso Grinding
Can I use the same grind setting for different brewing methods?
No, each brewing method requires its own specific grind size. Espresso needs a fine grind, while pour-over requires medium, and French press uses coarse. The difference between espresso grind and drip grind is substantial—attempting to use espresso grind for drip methods results in bitter over-extraction, while using drip grind for espresso creates under-extracted, sour shots.
How do I know when my burrs need replacement?
Look for inconsistent particle size, difficulty achieving fine enough grinds, or visible wear on burr edges. Quality manual grinder burrs typically last many years for home use. If grinding suddenly requires significantly more effort or produces noticeably more fines, consider checking burr condition.
Is there a perfect universal espresso grind setting?
No. The ideal setting varies between grinder models, coffee origins, roast levels, and even environmental conditions. Focus on learning your specific grinder’s adjustment range rather than seeking universal settings.
How much coffee should I waste when dialing in?
Expect to use 3-5 shots (54-90g of coffee) when dialing in a new bean. While this might seem wasteful, consider it an investment in the remaining coffee. Once dialed in, note your settings to minimize waste with future bags of the same coffee.
Why does my grind setting drift over time?
Several factors cause apparent drift: burr seasoning in newer grinders, temperature and humidity changes, and mechanical parts settling. Some manual grinders may also loosen slightly during use, requiring occasional recalibration.
Developing Your Espresso Grinding Skills: Next Steps
As you become comfortable with the basic dialing-in process, continue developing your skills through deliberate practice and experimentation. Keep a coffee journal to track your progress and identify patterns—this simple habit accelerates learning and helps build intuition.
Once you’ve mastered consistent extraction with your favorite beans, explore the world of single-origin espressos. Different regions produce dramatically different flavor profiles that may require unique approaches to grinding and extraction. This exploration will further refine your palate and adjustment techniques.
Remember that consistency comes through repetition and attention to detail. Even experienced baristas constantly fine-tune their approach based on daily conditions and bean characteristics. The pursuit of perfect espresso is ongoing—each shot offers an opportunity to learn and improve.
The skills you develop while mastering manual espresso grinding transfer to other brewing methods as well. The careful observation, methodical adjustments, and attention to extraction variables benefit everything from pour-over to French press brewing.
Ultimately, the reward comes in each well-crafted cup—a perfect espresso represents not just delicious coffee but the satisfaction of mastering a complex skill with immediate, tangible results.