
Understanding Espresso Crema: The Golden Crown of Your Coffee
Espresso crema is the crowning glory of a well-extracted espresso shot. This reddish-brown foam layer that floats atop your espresso isn’t just visually appealing—it’s a scientific marvel that signals proper extraction. True crema forms when hot pressurized water forces through finely ground coffee, emulsifying coffee oils and trapping carbon dioxide gas released during brewing.
The ideal crema presents a thick, persistent layer with distinctive tiger-striped patterns ranging from caramel to hazelnut with subtle reddish tints. When done right, this velvety foam should maintain its integrity for 1-2 minutes before gradually dissipating, leaving behind traces of its presence on the cup’s inner surface.
Crema Defined: The emulsified mixture of coffee oils, CO₂, and suspended solids that forms a persistent foam layer on properly extracted espresso, serving as both an extraction quality indicator and a contributor to the shot’s aroma, flavor complexity, and mouthfeel.
What makes crema so significant is its dual role as both an indicator of extraction quality and a contributor to the overall sensory experience. A properly formed crema locks in volatile aromatic compounds, enhances mouthfeel, and provides a balanced bittersweet introduction to the espresso beneath it.
The quality of your crema directly reflects your grinder settings. Understanding how to master precision grind settings becomes the primary method for controlling and perfecting this golden layer. No other variable in espresso preparation has quite the same impact on crema formation.
The Science Behind Grind Size and Crema Formation
The relationship between grind size and crema formation involves fascinating principles of coffee extraction physics. When you adjust your espresso grinder, you’re actually controlling multiple critical factors simultaneously.
Grind size determines surface area exposure. Finer grounds present more surface area for water contact, allowing for more efficient extraction of oils and compounds. This increased extraction efficiency directly affects how many oils become emulsified into your crema. However, balance is crucial—the relationship isn’t simply “finer equals better.”
The grind setting creates resistance to water flow, which builds pressure during extraction. The ideal espresso requires approximately 9 bars (130 psi) of pressure. This pressure level is perfect for:
- Forcing water through the coffee puck at the optimal rate
- Emulsifying coffee oils effectively
- Creating the right conditions for CO₂ to form tiny bubbles in the crema
- Extracting favorable flavor compounds without excess bitterness
Extraction dynamics rely heavily on the precise balance between grind size, water flow rate, and contact time. A well-calibrated grind allows water to flow through the coffee bed for approximately 25-30 seconds—the sweet spot for proper extraction. During this time, water temperature (ideally 195-205°F or 90-96°C) facilitates the dissolution of flavor compounds and emulsification of oils necessary for crema formation.
Understanding the various coffee grind effects on pressure and flow helps visualize how these elements work together. The complex interplay between these factors explains why finding the perfect grind setting requires careful adjustment rather than following rigid rules.
Consulting a reliable espresso grind size chart can provide a starting point, but true mastery comes from understanding the underlying principles and making informed adjustments based on observation and taste.
Finding the Perfect Grind Size: The “Goldilocks Zone” for Crema
The quest for perfect crema requires finding that elusive “Goldilocks zone” of grind size—not too fine, not too coarse, but just right. This balance point delivers the optimal extraction conditions for beautiful, persistent crema and balanced flavor.
Too Fine (Over-Extraction):
* Extraction takes longer than 30 seconds
* Water struggles to penetrate densely packed grounds
* Dark, thin crema that dissipates quickly
* Bitter, harsh, burnt flavor notes dominate
* Espresso appears very dark with uneven crema
* Extraction may “choke” or barely drip from the portafilter
Too Coarse (Under-Extraction):
* Extraction finishes in less than 20 seconds
* Water rushes through grounds with little resistance
* Pale, thin crema with large bubbles
* Sour, sharp, acidic flavor notes predominate
* Espresso looks watery with minimal crema
* Shot streams quickly from the portafilter
Just Right (Balanced Extraction):
* Extraction completes in 25-30 seconds
* Water flows steadily with proper resistance
* Rich, persistent crema with tiger-striped patterns
* Balanced sweetness with complex flavor notes
* Espresso has amber-reddish tones with golden crema
* Shot flows like warm honey in an even “mouse tail” stream
The texture of an ideal espresso grind resembles fine sugar or table salt—distinctly finer than regular drip coffee but still distinguishable as individual particles. When rubbed between fingers, it should feel slightly gritty but not powdery like flour.
Mastering perfect espresso grind adjustments requires patience and careful observation. The visual cues from your extraction and resulting crema provide immediate feedback on whether you’re approaching the ideal zone or need further adjustment.
Understanding Your Espresso Grinder: Types and Adjustment Mechanisms
Different espresso grinder designs offer varying degrees of precision and consistency, with each featuring unique adjustment mechanisms that impact your ability to dial in the perfect grind for crema.
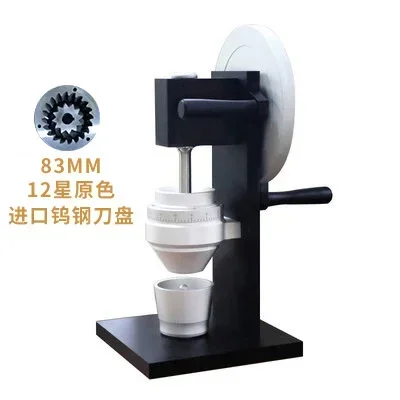
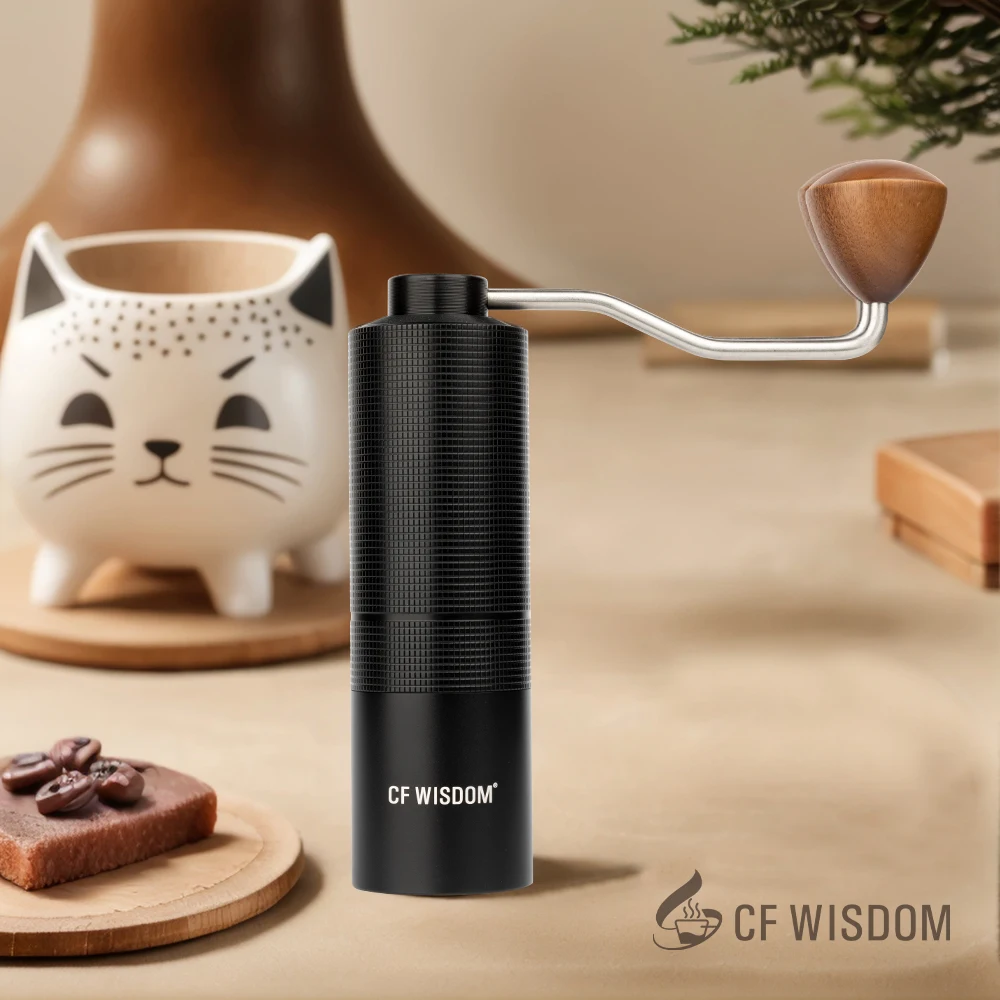
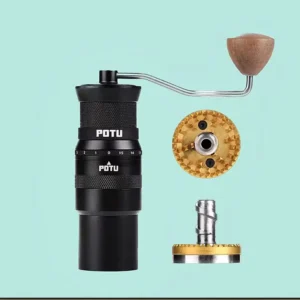
Burr grinders—available in flat or conical configurations—are essential for espresso preparation. Unlike blade grinders that chop beans inconsistently, burr grinders crush beans between two precisely machined surfaces to create uniform particle sizes critical for even extraction and beautiful crema.
| Grinder Type | Adjustment Mechanism | Precision Level | Best For |
|---|---|---|---|
| Entry-level burr | Stepped (click settings) | Moderate | Beginners, casual use |
| Mid-range burr | Stepped micro-adjustments | Good | Enthusiasts, daily use |
| Premium burr | Stepless (infinite settings) | Excellent | Perfectionists, specialty coffee |
| Commercial burr | Stepless with digital control | Outstanding | Professional settings |
The difference between stepped and stepless adjustment systems is crucial for crema perfection:
- Stepped adjustments provide distinct “clicks” between settings, making repeatability easier but limiting fine-tuning options
- Stepless adjustments allow infinite points between settings, enabling precise calibration but requiring more skill to maintain consistency

Most manual espresso grinders use adjustment collars or knobs that rotate to move the burrs closer together (finer) or farther apart (coarser). Understanding your specific grinder’s mechanism is essential—some use clockwise rotation for finer settings, while others work in reverse.
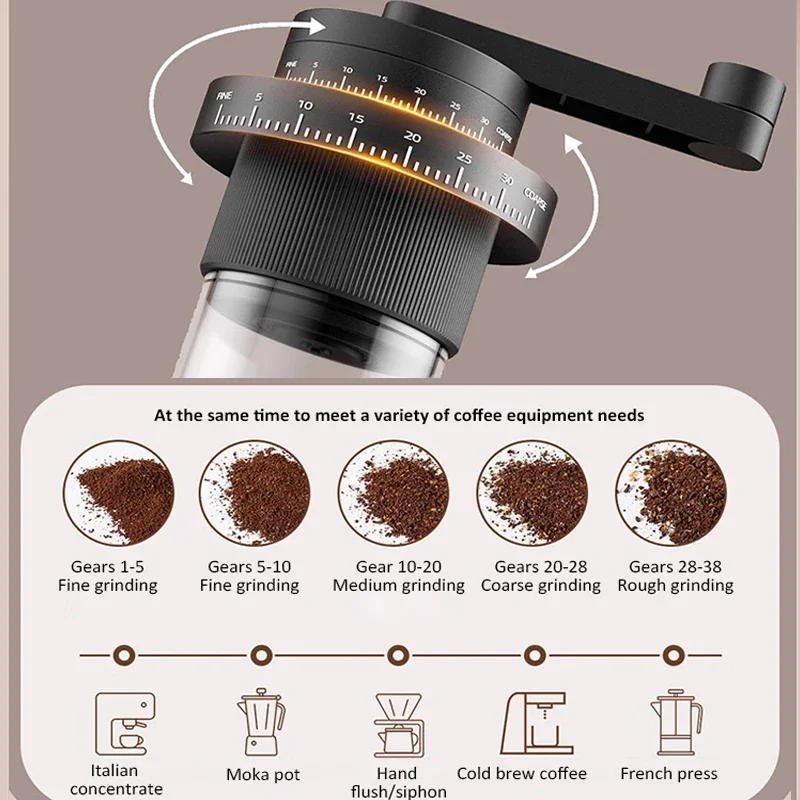
The numbered markings or notches on your grinder serve as reference points rather than universal standards. When a recipe suggests a particular setting, it’s referring to the relative position for that specific grinder model. This means finding your grinder’s espresso range requires experimentation rather than simply matching numbers across different models.
Step-by-Step Guide to Dialing In Your Grinder for Optimal Crema
Achieving perfect crema through precise grinder adjustments requires a methodical approach. Follow these steps to dial in your grinder for optimal results:
Start with freshly roasted beans (5-14 days after roast date). Fresh beans contain the optimal amount of CO₂ for creating rich, persistent crema. Beans that are too fresh or too old will struggle to produce quality crema regardless of grind settings.
Establish a baseline setting by adjusting your grinder to a fine setting—but not the finest possible. For most fine adjustment hand grinders, this means positioning approximately 1/4 to 1/3 from the finest setting.
Follow the complete dialing-in process:
* Measure a consistent dose (typically 18g for a double shot)
* Distribute grounds evenly in the portafilter (using WDT method or finger leveling)
* Tamp with consistent pressure (approximately 30 pounds)
* Extract and time the shot (aim for 25-30 seconds for a 1:2 ratio)
* Assess crema quality (color, persistence, texture)
* Taste the espresso for balanceMake incremental adjustments based on the results:
* If the shot runs too quickly with pale, thin crema: adjust finer
* If the shot runs too slowly with dark, sparse crema: adjust coarser
* Always change only one variable at a timeConfirm optimal settings by pulling another shot with the new adjustment and observing:
* The flow should resemble warm honey or “mouse tails”
* Extraction should complete in 25-30 seconds for a 1:2 ratio (following the 30-second espresso rule)
* Crema should be rich golden-brown with tiger-striping
* Taste should be balanced—neither sour nor bitter
The dialing-in process requires patience. Most professional baristas pull several test shots when calibrating their grinders for new beans. Each adjustment should be small—particularly with stepless grinders where tiny movements can create significant differences in extraction.
Remember that proper distribution and tamping technique are equally important. Even the perfect grind size will fail to produce good crema if the coffee bed has channeling or uneven density.
Fine-Tuning Your Grind: Micro-Adjustments for Different Factors
Once you’ve established a baseline grind setting, fine-tuning for various factors will help maintain optimal crema quality across different conditions.
Bean Variety Adjustments:
* Arabica beans: Generally require slightly finer settings due to their harder, denser structure
* Robusta beans: Often need coarser settings as they produce more crema naturally and can easily over-extract
* Blends: Require finding the balance point that works for the mixed bean characteristics
Roast Level Considerations:
* Light roasts: Need finer settings to compensate for their dense structure and lower solubility
* Medium roasts: Typically work well at standard espresso settings
* Dark roasts: Require coarser settings as they extract more readily and can quickly become bitter
Bean Age Adjustments:
* Very fresh beans (1-4 days): Often need slightly coarser settings to manage excessive CO₂
* Prime age beans (5-14 days): Work well at your standard calibrated settings
* Older beans (15+ days): Typically require progressively finer settings as they continue to degas
Understanding the relationship between espresso grind size and different roast levels enables proactive adjustments rather than reactive troubleshooting. This knowledge is particularly valuable when switching between bean varieties or when your favorite roaster introduces seasonal offerings with different characteristics.
Environmental Factor Adjustments:
* Higher humidity: May require slightly coarser settings as beans absorb moisture
* Lower humidity: Often needs finer settings due to drier beans
* Temperature fluctuations: Warmer environments may require slightly coarser grinds
These micro-adjustments are subtle—often just fractional turns of the adjustment mechanism—but they make significant differences in extraction quality and crema formation. Professional baristas frequently adjust their grinders multiple times throughout the day to account for changing ambient conditions.
Troubleshooting Common Crema Problems Through Grinder Adjustments
When your espresso crema isn’t meeting expectations, the grinder setting is often the culprit. Here’s how to diagnose and solve common crema issues through targeted adjustments:
Problem: No Crema or Very Thin Crema
* Grinder Issue: Most likely too coarse
* Adjustment Solution: Make your grind finer in small increments
* Visual Indicators: Shot extracts too quickly (under 20 seconds), looks watery
* Taste Profile: Sour, sharp, underdeveloped flavors
* Secondary Checks: Verify bean freshness and coffee-to-water ratio
Problem: Dark, Bubbly Crema that Disappears Quickly
* Grinder Issue: Typically too fine
* Adjustment Solution: Make your grind slightly coarser
* Visual Indicators: Shot extracts very slowly, dark color, uneven flow
* Taste Profile: Bitter, astringent, burnt notes
* Secondary Checks: Ensure you’re not tamping too hard
Problem: Uneven or Patchy Crema
* Grinder Issue: Inconsistent grind particle size
* Adjustment Solution: Check for and clean any burr misalignment; consider WDT technique
* Visual Indicators: Blonding in specific areas, uneven extraction
* Taste Profile: Mixed flavors—both sour and bitter simultaneously
* Secondary Checks: Check for channeling in spent puck
Problem: Good-Looking Crema but Poor Taste
* Grinder Issue: Correct fineness but possibly poor distribution
* Adjustment Solution: Maintain grind size but improve distribution technique
* Visual Indicators: Visually appealing but taste disappoints
* Taste Profile: One-dimensional, lacking complexity
* Secondary Checks: Assess water quality and temperature
Precision manual grinders can help address many of these issues by providing consistent particle size distribution. High-quality burrs create fewer “fines” (dust-like particles) and “boulders” (oversized chunks) that disrupt even extraction.
For persistent issues, consult our comprehensive guide to troubleshooting espresso grind issues which covers both grinder-specific problems and other variables that might be affecting your crema quality.
Maintaining Grinder Performance for Consistent Crema Quality
The condition of your grinder directly impacts its ability to produce the consistent grind necessary for quality crema. Regular maintenance ensures optimal performance over time.
Daily Maintenance:
* Brush the grind chamber and chute after each use to remove coffee residue
* Clean the bean hopper of oils when switching beans
* Wipe external surfaces to prevent coffee dust buildup
Weekly Maintenance:
* More thorough cleaning of the grind chamber and exit chute
* Check burr alignment (no wobbling or unusual sounds)
* Verify calibration against your reference point
Monthly Maintenance:
* Deep clean burrs (following manufacturer guidelines)
* Remove and clean any removable parts
* Check and tighten any loose components
| Usage Level | Deep Cleaning Frequency | Burr Inspection | Replacement Consideration |
|---|---|---|---|
| Light (1-3 shots/day) | Every 2-3 months | Every 6 months | Every 2-3 years |
| Moderate (4-8 shots/day) | Monthly | Every 3 months | Every 1-2 years |
| Heavy (9+ shots/day) | Bi-weekly | Monthly | Annually or as needed |
Signs of burr wear that affect crema quality include:
* Increasingly inconsistent particle size
* Difficulty achieving the same extraction results at familiar settings
* Needing to adjust significantly finer than previously required
* More channeling despite proper technique
* Declining crema quality despite following proper procedures
Proper cleaning methods vary by grinder type. Most manual grinders can be disassembled for thorough cleaning, while electric models may have specific cleaning recommendations. Specialized grinder cleaning products remove oils and coffee particles that brushes alone might miss.
Evaluating Results: Reading Your Crema for Ongoing Adjustments
Learning to “read” your crema provides valuable feedback for ongoing grinder adjustments. The visual characteristics of your crema tell a story about your extraction quality and grind settings.
Color Indicators:
* Light blonde/white crema: Typically indicates under-extraction from too coarse a grind
* Medium caramel to hazelnut: The ideal color range for properly extracted espresso
* Dark brown to almost black: Often signals over-extraction from too fine a grind
Texture Assessment:
* Large, quick-popping bubbles: Usually indicates under-extraction
* Fine, persistent microfoam: The ideal texture for properly extracted crema
* Thin, dark film rather than foam: Typically signals over-extraction
Persistence Evaluation:
* Disappears in under 30 seconds: Often too coarse a grind or under-extraction
* Lasts 1-2 minutes before gradually dissipating: Ideal persistence for quality crema
* Forms initially but collapses quickly with dark streaks: Typically too fine a grind
The tiger-striping pattern—those reddish-brown streaks within the golden crema—indicates proper extraction balance and is a visual marker of quality. When these patterns appear consistently, you’ve likely found your optimal grind setting.
Visual assessment should always be paired with taste evaluation. The look of your crema might be perfect, but the ultimate test is flavor. A properly extracted espresso with ideal crema should taste balanced—neither sour (under-extracted) nor bitter (over-extracted)—with sweetness and complexity appropriate to the coffee origin and roast level.
Our collection of espresso coffee hand grinders provides the precision needed for achieving consistent results once you’ve learned to interpret these visual cues.
Beyond Grinding: Complementary Factors That Influence Crema
While grinding is the primary factor in crema formation, several complementary elements work alongside grind settings to influence crema quality:
Bean Freshness:
* Optimal window: 5-14 days after roast date
* Too fresh: Excessive CO₂ creates unstable, bubbly crema that dissipates quickly
* Too old: Insufficient CO₂ results in minimal crema regardless of grind settings
Water Quality:
* Ideal mineral content: 80-150 ppm (moderately hard water)
* Too soft: Extracts too efficiently, potentially over-extracting
* Too hard: Creates scale and can interfere with proper extraction
Machine Pressure:
* Optimal pressure: 9 bars (130 psi)
* Too low: Insufficient pressure fails to properly emulsify oils for crema
* Too high: Excessive pressure can channel through the puck, creating uneven extraction
Basket Quality:
* Precision baskets (VST, IMS): Provide even flow and consistent extraction
* Standard baskets: May have less even hole distribution affecting extraction uniformity
* Basket cleanliness: Residue can restrict flow and create channeling
Tamping Technique:
* Pressure consistency: Approximately 30 pounds
* Level tamp: Prevents channeling that disrupts even extraction
* Distribution before tamping: Eliminates clumps for more uniform water contact

All-Metal Hand Grinder, Flat Burr Hand Grinder, Manual Espresso Grinder, Precision Manual Grinder
Price range: $716.96 through $717.43 Select options This product has multiple variants. The options may be chosen on the product page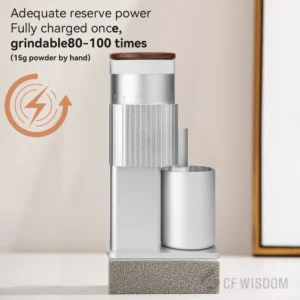
Fine Adjustment Hand Grinder, Precision Manual Grinder, Travel Coffee Grinder
Price range: $185.11 through $494.63 Select options This product has multiple variants. The options may be chosen on the product page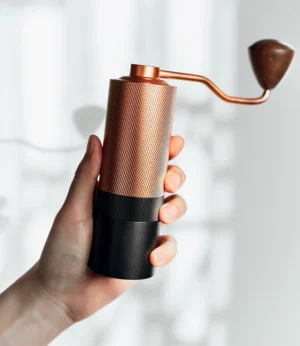

Hand Burr Grinder, Hand Crank Coffee Grinder, Manual Espresso Grinder, Portable Coffee Grinder
Price range: $262.72 through $300.22 Select options This product has multiple variants. The options may be chosen on the product page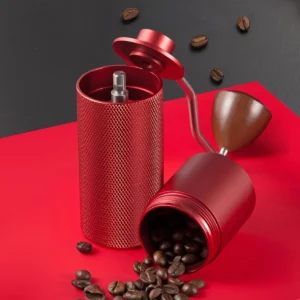
Hand Burr Grinder, Manual Coffee Grinder Stainless Steel, Precision Manual Grinder
Price range: $183.64 through $187.52 Select options This product has multiple variants. The options may be chosen on the product page
Manual Coffee Grinder Stainless Steel, Manual Espresso Grinder, Travel Coffee Grinder
Price range: $276.22 through $276.39 Select options This product has multiple variants. The options may be chosen on the product page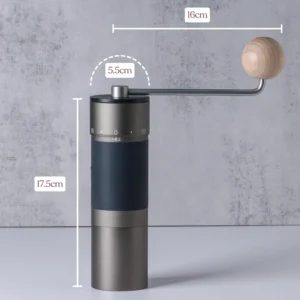
Hand Crank Coffee Grinder, Manual Coffee Grinder for Espresso, Manual Coffee Grinder Stainless Steel
$349.15 Select options This product has multiple variants. The options may be chosen on the product page
Understanding the importance of espresso grind consistency helps you recognize how these factors interact with your grinder settings. When making adjustments, change only one variable at a time to accurately assess its impact on crema quality.
Expert Tips for Crema Perfection: Advanced Grinding Techniques
Once you’ve mastered the basics of grinder adjustment, these advanced techniques can help elevate your crema quality to professional standards:
Single-Dosing Method:
* Measure exact dose before grinding rather than using a bean hopper
* Eliminates compaction variables and ensures consistent dose
* Allows for easy switching between different coffees
* Reduces waste and keeps beans fresher longer
RDT (Ross Droplet Technique):
* Add a small drop of water to beans before grinding (just enough to barely dampen)
* Significantly reduces static electricity that causes grounds to stick to grinder parts
* Results in less retention and more consistent dosing
* Improves distribution evenness in the portafilter
WDT (Weiss Distribution Technique):
* Use fine needles or specialized tool to stir grounds in the portafilter
* Breaks up clumps created during grinding
* Creates homogeneous density throughout the coffee puck
* Dramatically reduces channeling during extraction
Temperature Management:
* Allow grinder to reach operating temperature by grinding a small amount of beans before your actual dose
* Store beans at room temperature rather than refrigerated
* Consider thermal stability when selecting a grinder
* Be aware of ambient temperature changes affecting grind performance
Documentation System:
* Keep a coffee journal noting grind settings, extraction times, and results
* Take photos of particularly successful crema for visual reference
* Record adjustments made for different beans and conditions
* Create a personal reference system for your specific grinder
Many of these techniques can be implemented using simple household items, though specialized tools are available. For instance, a few acupuncture needles in a wine cork can create an effective WDT tool, while a small spray bottle can help manage static in lieu of the more precise RDT method.
When To Consider Upgrading Your Grinder for Better Crema
While technique can compensate for equipment limitations to some extent, there comes a point where your grinder itself may be the factor limiting your crema quality.
Signs your grinder may be limiting your results:
- Inconsistent particle size despite proper maintenance
- Limited adjustment range making fine-tuning impossible
- Excessive fines (dust-like particles) causing over-extraction
- Inability to grind fine enough for proper espresso extraction
- Significant retention issues causing inconsistent dosing
- Excessive static making distribution difficult
- Burrs that heat up quickly, affecting extraction characteristics
Key features that improve adjustment precision:
- Stepless adjustment mechanisms for infinite calibration options
- Higher quality burrs (particularly hardened steel or ceramic)
- More stable burr mounting systems reducing wobble
- Finer thread pitch on adjustment mechanisms
- Better designed grinding chambers with less retention
- More powerful motors that maintain consistent RPM under load
When upgrading, consider your actual needs rather than pursuing the most expensive option. The law of diminishing returns applies strongly to coffee equipment—the difference between an entry-level and mid-range grinder is typically more significant than between mid-range and high-end models.
For most home enthusiasts, a quality hand grinder can deliver results comparable to much more expensive electric models. The manual effort is rewarded with exceptional grind quality and precise adjustment capability without the cost of motorized components.
Key Takeaways: The Grinder Adjustment Mindset for Consistent Success
Mastering espresso grinder adjustments for perfect crema is both a science and an art form. The journey requires patience, observation, and a willingness to experiment methodically.
Remember these fundamental principles:
- Grinder adjustment is an iterative process, not a one-time setting
- Small, incremental changes produce the most valuable feedback
- Visual assessment of crema should always be paired with taste evaluation
- Consistency in technique is just as important as equipment calibration
- Different coffees will require different settings—there is no universal “perfect” setting
- Maintenance directly impacts your ability to achieve consistent results
- Keep detailed notes to build your personal reference system
The most successful home baristas adopt an experimental mindset, treating each adjustment as a learning opportunity rather than a frustration. Trust your senses—particularly taste—above rigid rules or guidelines.
The perfect crema is ultimately about balance: finding that sweet spot where your grinder settings create the ideal resistance for water flow, extracting the optimal compounds from your coffee beans, and emulsifying oils into that gorgeous golden crown that makes espresso so distinctive.
With consistent practice and attention to detail, you’ll develop an intuitive understanding of how your specific grinder responds to different adjustments—allowing you to create cafe-quality crema in your own home, shot after perfect shot.