

Understanding the Importance of Zeroing Your Hand Grinder
For coffee enthusiasts seeking that perfect cup, precision matters at every step of the brewing process. One critical yet often overlooked aspect of manual coffee grinding is “zeroing” your hand grinder. But what exactly does this mean?
What is “zeroing”?
Zeroing is the process of finding the true burr touch point in your hand grinder—the precise position where the grinding surfaces make minimal contact with each other, creating a reference point for all your grind adjustments.
Many coffee lovers don’t realize that the factory settings on their grinders may not represent the “true zero” point. This discrepancy can lead to inconsistent grinding results and make it difficult to replicate your favorite coffee’s taste day after day. When your grinder isn’t properly zeroed, the distance between burrs may vary slightly each time you adjust it, leading to uneven extraction.
The benefits of properly zeroing your grinder extend beyond just consistency. It helps protect your burr life by preventing accidental over-tightening, maximizes your grinder’s performance, and allows for repeatable settings across different brewing methods. Understanding grind consistency in hand burr grinding is fundamental to brewing excellent coffee.
Even small inconsistencies in grind size can dramatically affect extraction—too fine might create bitter, over-extracted coffee, while too coarse might result in sour, under-extracted brews. This is particularly crucial for specialty coffee, where subtle flavor notes depend on precise extraction parameters.
Modern precision manual grinders are designed to deliver exceptional consistency, but they still require proper calibration to perform at their best. By taking the time to zero your grinder correctly, you’re ensuring that every cup reaches its full potential.
Before You Begin: Essential Preparation Steps
Before diving into the zeroing process, proper preparation will ensure accurate results and protect your investment. Follow these important steps:
- Clean your grinder thoroughly
Coffee oils and particles can interfere with finding the true zero point. Cleaning your manual burr coffee grinder removes these residues and provides a clean slate for calibration. Use a small brush to clean between the burr teeth and a dry cloth to wipe down all surfaces.
- Identify your adjustment mechanism
Different manual coffee burr grinders feature varying adjustment systems:
– External ring adjustments (common on Comandante-style grinders)
– Top dial adjustments (found on Timemore C2/C3 and similar models)
– Internal adjustment rings (featured on certain premium models)
– Stepped vs. stepless mechanisms (stepped grinders have distinct “clicks” while stepless allow infinite adjustment)
- Understand your grinder’s construction
Familiarize yourself with how your specific model assembles and disassembles. Most grinders require minimal tools for basic maintenance, but knowing the construction helps prevent damage during zeroing.
- Gather necessary tools
For most hand grinders, you’ll only need:
– Clean, dry cloth
– Small brush for cleaning
– Flashlight (optional, but helpful for visibility)
– Your grinder’s manual (if available)
- Observe safety precautions
Burrs are sharp and precision-engineered components. Avoid forcing adjustments and be gentle when finding the touch point to prevent burr damage.
Visual cues that indicate your grinder needs zeroing include inconsistent particle size (some chunks mixed with fines), difficulty repeating your favorite settings, or a general drift in grind quality over time.
This preparation provides the essential groundwork before proceeding to the actual zeroing technique. Taking these steps seriously protects your investment and ensures accurate calibration.
Step-by-Step Guide to Finding Your Grinder’s True Zero Point
Finding your grinder’s true zero point is the cornerstone of precision grinding. Follow this universal process that works for most hand grinder designs:
Start with a clean, empty grinder
– Ensure all coffee particles are removed from the grinding chamber
– Make sure the burrs are completely clean and dryBegin from a coarse setting
– Turn the adjustment mechanism to its coarsest setting
– This prevents accidental damage from burrs being forced together too quicklyGradually move toward finer settings
– Turn the adjustment dial/ring slowly toward the finer direction
– Move in small increments (half-turns or a few clicks at a time)
– While adjusting, gently rotate the handle to feel for resistanceIdentify the burr touch point
– Listen carefully for a light “chirping” or paper-like scratching sound
– This subtle noise indicates the burrs are just beginning to touch
– The handle will also start to show increased resistance to turning
– Be attentive to changes in sound and feel—the difference can be subtleVerify the zero point with the handle movement test
– When you think you’ve found zero, try slowly turning the handle
– It should move with slight resistance but without feeling forced or stuck
– If the handle won’t move at all, you’ve gone too far—back off slightlyMark your true zero position
– Note or mark this position on your grinder as your reference point
– Some grinders have markings; otherwise, you might create a small mark with a pencil
– For unmarked grinders, count the number of clicks/turns from your zero pointDouble-check with the “back-off” test
– From your potential zero point, back off slightly coarser (1-2 clicks or a small turn)
– The handle should now turn more freely
– Go back to the zero point to confirm the resistance returns
The “chirping” sound that indicates burr contact is subtle—similar to the sound of rubbing fine sandpaper or tissue paper together. This is different from the harsh grinding or metal-on-metal sound that indicates excessive pressure.
Common troubleshooting issues during this process include:
- No clear resistance point: This may indicate uneven burr wear or misalignment. Proper burr alignment significantly affects finding the true zero.
- Too much play in the adjustment: Some grinders have inherent play in their adjustment mechanisms. Make sure to always approach the zero point from the coarser direction.
If you’re still struggling with finding your zero point, many manufacturers provide model-specific guidance. For example, 1Zpresso offers detailed calibration tutorials that can help with their specific models.
Zeroing Techniques for Different Grinder Types
Different hand grinder designs require slightly modified zeroing approaches. Here’s how to adapt the process for common grinder types:
External Ring Adjustment Grinders
- Typical models: Comandante-style grinders
- Zeroing process:
- Hold the grinder body firmly while turning the adjustment ring
- Listen for the first signs of burr contact while slowly turning the ring
- Count the number of clicks from the zero point for repeatable settings
- The zero point is often 4-5 clicks before the burrs lock completely
- These grinders typically have pronounced clicks, making counting easier
Top Dial Adjustment Grinders
- Typical models: Timemore C2/C3 style
- Zeroing process:
- Zero is often found by turning the dial clockwise until slight resistance
- The dial usually has numbered markings to help note your zero position
- Back off 1-2 numbers for very fine espresso, 8-12 for pour-over
- The click mechanism is often subtler than external ring models
- Some top-dial grinders have a locking mechanism to prevent drift
Internal Adjustment Ring Grinders
- Typical models: Various premium hand grinders
- Zeroing process:
- May require partial disassembly to access the adjustment mechanism
- Often have finer adjustment resolution (more clicks per revolution)
- Typically more stable once set, requiring less frequent re-zeroing
- Zero point is often more precise due to more robust construction
Stepped vs. Stepless Adjustment
- Stepped grinders:
- Zero is determined by counting clicks from burr contact
- Each click represents a fixed increment of adjustment
- Easier to repeat settings reliably once zero is established
Limited to the predetermined step sizes
Stepless grinders:
- Zero is determined by feel and sound without definitive clicks
- Offers infinite adjustment possibilities between settings
- Requires more care to mark and return to exact settings
- May use marks or dots on the adjustment mechanism for reference
Flat burr hand grinders typically have different zeroing characteristics than conical burr models. Flat burrs make more even contact at the zero point, often producing a more uniform resistance and sound. The zeroing process feels more definitive with these grinders.
Many hand burr grinder designs have their own quirks when finding the zero point. Premium models often feature better alignment and more precise adjustment mechanisms, making the zeroing process more straightforward and the results more consistent over time.
Post-Zeroing: Calibrating Your Grinder for Various Brewing Methods
Once you’ve successfully zeroed your grinder, you can use this reference point to dial in specific grind settings for different brewing methods. Here’s a general guide for settings based on your newly established zero point:
| Brewing Method | Typical Setting from Zero | Grind Consistency |
|---|---|---|
| Espresso | 1-5 clicks/notches | Fine, like powdered sugar |
| AeroPress | 5-10 clicks/notches | Fine to medium-fine, like table salt |
| Pour-over (V60, Chemex) | 10-15 clicks/notches | Medium, like coarse sand |
| French Press | 15-20 clicks/notches | Coarse, like sea salt |
| Cold Brew | 18-25 clicks/notches | Very coarse, like bread crumbs |
Remember that these are starting points—you’ll need to adjust based on your specific grinder model, coffee beans, and taste preferences. Lighter roasts typically require a slightly finer grind than darker roasts using the same brewing method.
When dialing in for espresso, start at the finer end and adjust coarser if you experience channeling or overly long extraction times. For pour-over methods, if your coffee tastes sour, try going finer; if it tastes bitter, go coarser.
Achieving uniform grinds is much easier when working from a properly zeroed grinder. The zero point gives you a reliable reference that makes it simple to switch between brewing methods and reproduce your favorite settings.
For example, if you discover that your V60 tastes best at 12 clicks from zero, you can confidently return to this setting each time. Similarly, manual grinders designed for espresso require particularly precise calibration from the zero point to achieve the fine adjustments needed for espresso extraction.
Using your grinder’s zero point as a consistent reference allows you to build a personal “grind map” for your favorite coffees and brewing methods, making it easier to reproduce great results day after day.
Maintaining Your Zero Point: Regular Checks and Adjustments
Your grinder’s zero point isn’t permanently fixed—it requires periodic attention to maintain accuracy. Here’s how to preserve your calibration:
When to re-zero your grinder:
– After thorough cleaning and disassembly
– If you notice a decline in grind consistency
– When seasons change (temperature and humidity can affect components)
– After traveling with your grinder
– Approximately every 3-6 months with regular use
Cleaning significantly impacts calibration. When you remove coffee oils and particles from the burrs, the true contact point may shift slightly. This is why re-zeroing after cleaning is essential.
Signs that your zero point may have shifted:
– Your usual settings suddenly produce different results
– Inconsistent particle size in your grounds
– Changes in brewing time despite using the same settings
– Unusual resistance or play in the adjustment mechanism
New burrs require “seasoning” or breaking in. During the first few pounds of coffee, microscopic burr edges wear down, which can slightly alter the zero point. Re-zeroing after breaking in new burrs will provide a more stable reference point.
Various factors affecting grind consistency can influence your zero point over time. For instance, ambient humidity can cause slight swelling or contraction of some grinder components, potentially shifting calibration by a fraction.
For those who frequently brew espresso, maintaining an accurate zero point is particularly crucial. Espresso coffee hand grinders require exceptional precision, as even minor calibration drift can significantly impact extraction quality.
Regular zeroing checks are a simple habit that ensures your grinder continues to perform optimally. By making this part of your routine maintenance, you’ll enjoy more consistent, delicious coffee with every brew.

All-Metal Hand Grinder, Flat Burr Hand Grinder, Manual Espresso Grinder, Precision Manual Grinder
Price range: $716.96 through $717.43 Select options This product has multiple variants. The options may be chosen on the product page
Fine Adjustment Hand Grinder, Precision Manual Grinder, Travel Coffee Grinder
Price range: $185.11 through $494.63 Select options This product has multiple variants. The options may be chosen on the product page

Hand Burr Grinder, Hand Crank Coffee Grinder, Manual Espresso Grinder, Portable Coffee Grinder
Price range: $262.72 through $300.22 Select options This product has multiple variants. The options may be chosen on the product page
Manual Burr Mill, Manual Coffee Grinder Stainless Steel, Manual Coffee Mill Grinder, Mechanical Coffee Grinder
Price range: $127.26 through $130.32 Select options This product has multiple variants. The options may be chosen on the product page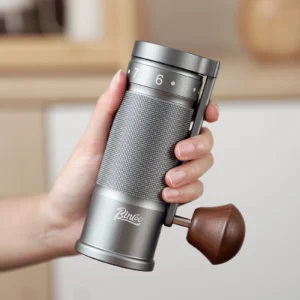
All-Metal Hand Grinder, Compact Coffee Mill, Hand Burr Grinder, Travel Coffee Grinder
$212.33 Select options This product has multiple variants. The options may be chosen on the product page
Hand Burr Grinder, Manual Coffee Grinder Stainless Steel, Precision Manual Grinder
Price range: $183.64 through $187.52 Select options This product has multiple variants. The options may be chosen on the product page
Troubleshooting Common Zeroing Problems
Even with careful attention to technique, you might encounter challenges when zeroing your hand grinder. Here are solutions to common issues:
Problem: Cannot find a clear zero point
Solution: Try the “pendulum method”—go past the zero point until burrs clearly touch, then back off until they just separate. The midpoint between these positions is often your true zero. Clean your burrs thoroughly as residue can mask the subtle feedback.
Problem: Uneven burr contact
Solution: This indicates potential alignment issues. Disassemble your grinder and check for coffee particles trapped in the burr carrier. Ensure the central shaft is straight and the outer burr is seated properly. Some premium grinders have alignment adjustment systems that may need fine-tuning.
Problem: Over-tightened burrs
Solution: If you’ve gone too far and jammed the burrs, don’t force the handle. Slowly back off the adjustment until resistance decreases. Check for any damage to burr edges—minor scratches are typically okay, but deep gouges may require burr replacement.
Problem: Zero point keeps shifting
Solution: This often indicates loose components or wear in the adjustment mechanism. Check that all parts are properly tightened. Some grinders have locking features to prevent drift—make sure these are engaged. Aging grinders may develop play in their adjustment systems, requiring more frequent zeroing.
Problem: Inconsistent grind even after zeroing
Solution: If you’re experiencing inconsistent grinding despite proper zeroing, check for burr wear, shaft wobble, or bean feeding issues. Sometimes the problem lies not with the zero point but with the grinder components themselves.
Problem: Chirping sound occurs across multiple settings
Solution: This usually means a burr is out of alignment or the shaft has slight bending. Sometimes a small piece of foreign material is embedded in a burr. Careful disassembly and inspection are needed.
For problems that persist despite troubleshooting, contact the manufacturer. Quality hand grinders typically have good warranty support, and manufacturers can often provide model-specific guidance for complex alignment issues.
When Should You Re-Zero Your Hand Grinder?
Knowing when to re-zero your grinder is as important as knowing how. Here are the key moments when recalibration is necessary:
After thorough cleaning or disassembly: Any time you take apart your grinder for deep cleaning, the reassembly process may slightly alter the burr position.
When changing between significantly different coffee types: Moving from very light to very dark roasts (or vice versa) may warrant re-zeroing, as these beans require notably different grind settings.
If grind consistency problems develop: When you notice unexpected fines or boulders in your grounds despite using your usual settings.
After travel or shipping: The vibrations and handling during transport can affect alignment. Travel coffee grinders are particularly susceptible to this and should be checked before your vacation brewing.
With seasonal changes: Significant shifts in humidity and temperature can affect the metal and other materials in your grinder, subtly changing the zero point.
After grinding approximately 5-10 pounds of coffee: This is a good general maintenance interval for checking calibration.
Signs that zeroing has drifted include unexpected changes in extraction time, taste inconsistency with the same coffee and brewing method, or visible unevenness in the ground coffee particles.
For daily users, checking your zero point approximately once a month is reasonable. For occasional users, checking before each use might be more practical. The more precisely you need your grind setting (especially for espresso), the more frequently you should verify your zero point.
Advanced Zeroing Tips for Coffee Enthusiasts
For those looking to take their grinding precision to the next level, these advanced techniques can help refine your zeroing process:
Keep a grinder journal: Document your zero point and optimal settings for different coffees and brewing methods. This record becomes invaluable as you gain experience with your grinder.
Use a digital scale for verification: After zeroing, grind a set amount of coffee (e.g., 20g) and weigh the output. Discrepancies can indicate retention issues or incomplete grinding due to improper zeroing.
Visual inspection technique: After zeroing, grind a small amount of coffee onto a dark surface. Use a magnifying glass or macro camera to check for consistency. Look for an even distribution of particle sizes rather than a mix of fine dust and large chunks.
The double-blind taste test: Have someone adjust your grinder to different settings near your presumed zero point, then brew and taste without knowing which is which. This removes psychological bias and helps identify the truly optimal calibration.
Temperature stabilization: For the most precise zeroing, allow your grinder to reach room temperature before calibrating if it’s been stored in a particularly cold or warm environment.
Environmental factors can significantly impact grinding performance. Morning grinding might yield slightly different results than evening sessions due to daily temperature fluctuations. Similarly, different coffee origins often have varying density and hardness, which may require subtle adjustments from your baseline settings.
Mastering perfect espresso requires particularly attentive grind adjustment, as espresso extraction magnifies even minor calibration issues. The most discerning enthusiasts often dedicate time to testing their zero point with actual brewing results rather than relying solely on mechanical feedback.
How Does Proper Zeroing Impact Your Coffee Flavor?
The difference between properly zeroed and poorly calibrated grinders is immediately apparent in your cup. When your grinder is accurately zeroed, you’ll experience:
Enhanced flavor clarity: Individual flavor notes become more distinguishable rather than muddled together. That blueberry note in your Ethiopian coffee or chocolate undertone in your Colombian becomes more pronounced.
Better sweetness and acidity balance: Proper extraction resulting from consistent grind size brings out balanced sweetness while taming harsh acidity. This creates a more harmonious overall flavor profile.
Reduced bitterness: Inconsistent grinding often leads to over-extraction of smaller particles, creating bitterness that masks other flavors. Proper zeroing minimizes this problem.
Improved mouthfeel: The texture of your coffee changes noticeably with grind consistency. A properly zeroed grinder produces a more pleasing, uniform mouthfeel without gritty sediment or silty fines.
Repeatability: Perhaps most importantly, proper zeroing allows you to reproduce your favorite coffee experiences consistently. When you find that perfect setting, you can return to it reliably.
The science behind this relates to extraction mechanics—even particle size means even extraction, while mixed particle sizes extract at different rates. When smaller particles over-extract while larger ones under-extract, the result is simultaneously sour and bitter coffee lacking sweetness.
Many coffee lovers are surprised when proper zeroing reveals new flavor dimensions in familiar coffees they’ve been drinking for years. Fine adjustment hand grinders particularly excel at revealing these subtle flavor differences through precise calibration.
By taking the time to properly zero your grinder, you’re not just performing mechanical maintenance—you’re unlocking your coffee’s full flavor potential.
Can You Zero a Hand Grinder Without Disassembly?
Yes, most hand grinders can be zeroed without full disassembly, though the precision might be slightly lower than with complete disassembly methods. Here’s how to perform a non-disassembly zeroing:
Quick calibration method:
1. Empty the grinder completely of beans
2. Clean the grinding chamber as thoroughly as possible through the normal openings
3. Start from a very coarse setting
4. Slowly adjust finer while gently turning the handle
5. Stop at the first sign of resistance or “chirping” sound
6. Mark or note this position as your reference zero
This approach works well for regular maintenance and quick checks, especially for grinders with external adjustment mechanisms. However, it does have limitations:
Limitations of non-disassembly zeroing:
– Less precise than full disassembly methods for some grinder designs
– May miss detecting small particles trapped between burrs
– Doesn’t allow visual inspection of burr condition and alignment
– Might not be sufficient for fixing alignment issues
When disassembly is necessary:
– If you notice uneven grinding despite calibration
– After significant grinder use (approximately every 30-50 pounds of coffee)
– When changing burrs or other components
– If the grinder has been dropped or damaged
Some grinder models feature design elements that make non-disassembly zeroing more effective. Grinders with better burr alignment features typically maintain their calibration longer and can be more accurately zeroed without disassembly.
For on-the-go situations, a quick verification method is to grind a small amount of coffee and check the consistency visually. If it appears even, your previous zeroing is likely still accurate.
How Does Burr Type Affect the Zeroing Process?
Different burr designs require slightly different approaches to zeroing. Understanding these distinctions helps achieve optimal calibration:
Conical vs. Flat Burrs:
Conical Burrs:
– Zero point often feels less definitive—more of a gradual increase in resistance
– Make a softer “chirping” sound when touching
– Often more forgiving if slightly over-tightened
– May need to go slightly past initial contact for true zero reference
Flat Burrs:
– More obvious and sudden resistance at the zero point
– Produce a more distinct sound when touching
– Less forgiving when over-tightened—greater risk of damage
– Often provide more precise zeroing due to the parallel contact surfaces
Material Considerations:
Steel Burrs:
– Harder material produces more distinct feedback when touching
– Less affected by temperature changes
– More durable zero point that stays consistent longer
– Often associated with a more metallic sound at zero point
Ceramic Burr Coffee Grinders:
– Softer sound when reaching zero point
– May be more susceptible to damage if over-tightened
– Can be affected by temperature variations more than steel
– Often require more gentle handling during zeroing
Burr Seasoning Effects:
New burrs undergo a “seasoning” process as the microscopic edges wear down during initial use. This typically affects zeroing in the following ways:
– New burrs may have a slightly different zero point than after they’re seasoned
– The zero point typically stabilizes after grinding 1-2 pounds of coffee
– Re-zeroing after this initial break-in period provides a more stable reference
– Seasoned burrs often produce a less scratchy sound at the touch point
The geometry of burr teeth also influences zeroing characteristics. Burrs with more aggressive cutting angles tend to have a more pronounced feedback at zero, while burrs with finer, more numerous teeth might have a subtler transition point.
Understanding these differences helps you adapt your zeroing technique to your specific grinder design, resulting in more accurate calibration and better coffee.